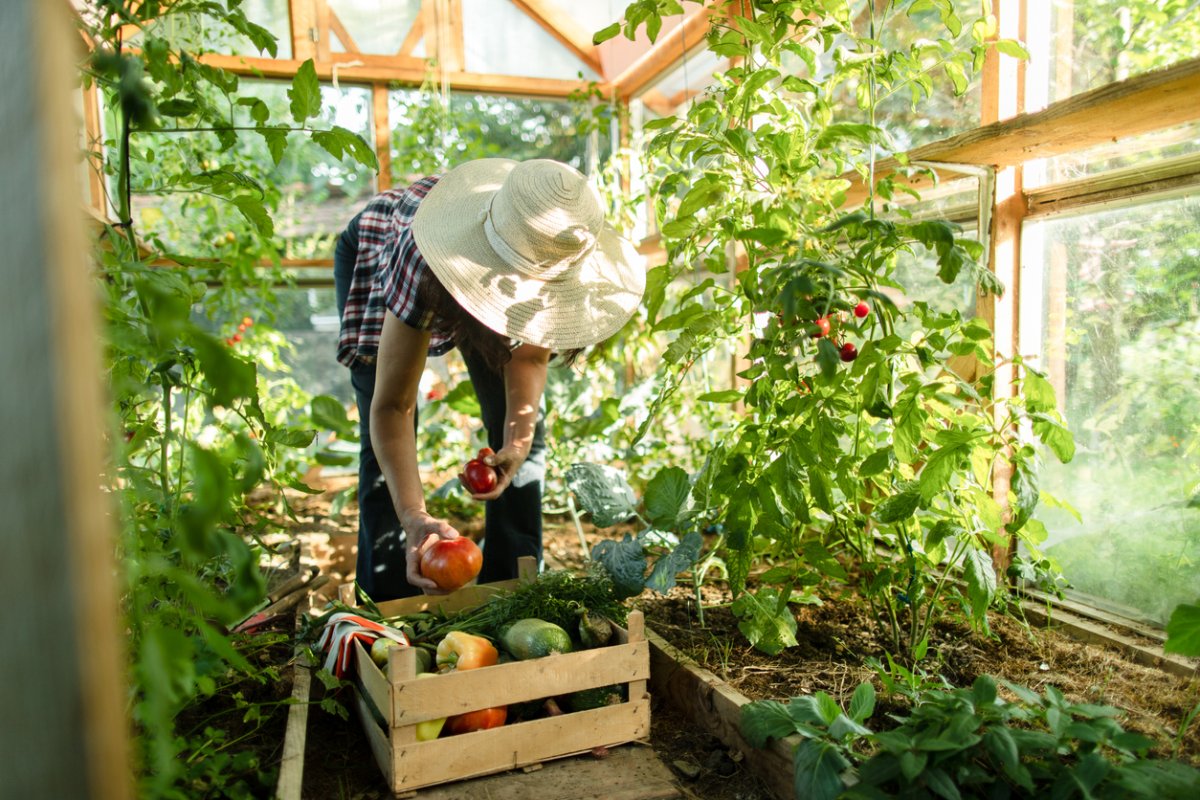
Organic gardening has a reputation for being wholesome, sustainable, and surprisingly good at emptying a shopping cart. Premium soil, specialty fertilizer, designer planters, and shelves of botanical pest products can make a few homegrown tomatoes feel like luxury automobiles.
Fortunately, plants are unimpressed by price tags. They need suitable soil, sufficient light, consistent moisture, nutrients, and protection from serious pests. By recycling household materials, planting strategically, and buying only what solves a real problem, you can grow an organic garden on a budget without treating your backyard like a miniature agricultural investment fund.
What Does Budget Organic Gardening Actually Mean?
For most home gardeners, growing organically means building healthy soil and managing weeds, insects, and diseases without routinely relying on synthetic fertilizers or pesticides. Commercial farms must follow specific federal requirements before selling certified organic produce, but a backyard garden does not need certification.
That does not mean every homemade or “natural” treatment is automatically safe. Vinegar can damage desirable plants, concentrated soap can burn foliage, and some organic pesticides can harm pollinators. Start with prevention and physical controls. If a product becomes necessary, verify that it is labeled for the plant and pest, follow every direction, and look for recognized organic-use language when that matters to you.
1. Grow Crops That Earn Their Space
The cheapest organic garden begins before anything is purchased. Make a list of what your household regularly eats, then prioritize crops that are productive, expensive at the store, or best when freshly harvested.
Leaf lettuce, kale, herbs, cherry tomatoes, snap beans, peppers, and summer squash can provide repeated harvests. A packet of cut-and-come-again lettuce may produce weeks of salads. Basil can be pinched repeatedly and turned into enough pesto to frighten an innocent bowl of pasta.
Match plants to your conditions
Sun-loving fruiting crops generally need at least six to eight hours of direct sunlight. If your garden receives less, focus on leafy greens, parsley, cilantro, or other crops that tolerate partial shade. Choosing plants suited to the site prevents wasted seeds, fertilizer, and optimism.
Use succession planting to keep small beds productive. After harvesting spring radishes, sow beans. Replace finished peas with cucumbers, or follow early lettuce with fall spinach. More harvests from the same ground mean better value without buying additional real estate.
2. Test the Soil Before Trying to Fix It
A soil test is one of the few garden expenses that can prevent several other expenses. Cooperative Extension and university laboratories commonly offer affordable tests that report soil pH, nutrient levels, and amendment recommendations.
Without a test, gardeners often add lime, phosphorus, or fertilizer simply because a bag promises “bigger blooms.” If the soil already contains enough, that money accomplishes little and may create nutrient imbalances or runoff. Most vegetables perform well in slightly acidic soil, but the ideal range varies, so follow crop-specific and regional guidance.
Take samples from several locations within the bed, combine them as instructed, and avoid sampling immediately after fertilizing. The resulting report turns garden spending from guesswork into a short, targeted shopping list.
3. Turn Household Scraps Into Compost
Finished compost improves soil structure, contributes nutrients, supports soil organisms, and helps soil manage water. Bagged compost is useful, but making it at home converts materials you already have into a valuable amendment.
Combine carbon-rich “browns,” such as dry leaves, untreated shredded cardboard, and small twigs, with nitrogen-rich “greens,” including fruit and vegetable scraps, coffee grounds, and untreated grass clippings. Keep the pile about as damp as a wrung-out sponge and provide air by turning it periodically.
Build a nearly free compost bin
A heap can work without a container where local rules allow it. For a tidier arrangement, use salvaged untreated pallets, wire fencing, or a lidded trash can with ventilation holes. Secure the lid if raccoons regard your neighborhood as an all-night buffet.
Avoid adding meat, dairy products, fats, pet waste, diseased plants, glossy paper, or vegetation treated with persistent herbicides. Use only mature compost around food crops. Unfinished material can temporarily tie up nitrogen, smell unpleasant, or carry pathogens.
4. Stretch Every Seed Packet
Seeds generally cost less than transplants, especially for beans, peas, cucumbers, squash, radishes, carrots, and other crops that can be sown directly. Share packets with neighbors, attend seed swaps, or divide purchases with friends. Few households need 200 zucchini plants unless they are planning an unusually aggressive neighborhood outreach program.
Store leftover seed in a cool, dry, dark place. Label it with the variety and year, then test older seed by placing a small sample between damp paper towels. If most seeds germinate, the packet is still useful. If germination is weak, sow more thickly.
Save seed from the right plants
Open-pollinated varieties are the most dependable choice for seed saving because their offspring tend to resemble the parent plants. Hybrid seeds may produce unpredictable results. Beans, peas, peppers, and tomatoes are approachable crops for beginners, although cross-pollination and seedborne disease still require attention.
Save seed only from healthy, vigorous plants. Dry it thoroughly when the crop requires dry storage, label it clearly, and research the correct collection method for each species.
5. Repurpose Containers and Supports Safely
Seed trays, pots, plant labels, trellises, and watering tools do not need to arrive in coordinated colors. Yogurt cups, nursery pots, and food-grade buckets can become containers after they are cleaned and fitted with adequate drainage holes. Plastic blinds can be cut into plant labels, while chopsticks and sturdy branches make useful markers or lightweight supports.
Sanitize previously used pots before starting seedlings, particularly if disease occurred in them. Do not grow food in containers that held paint, oil, industrial chemicals, pesticides, or other unknown substances. A free container stops being a bargain when its history sounds like the opening scene of a laboratory thriller.
For trellises, reuse sound lumber, wire panels, bamboo, or branches. Inspect salvaged wood carefully and avoid materials treated with chemicals that are unsuitable near edible crops.
6. Collect Free Organic Mulch
Mulch reduces evaporation, suppresses many weeds, moderates soil temperature, and protects the surface from compaction. Instead of buying decorative bark, use shredded leaves, weed-free straw, untreated grass clippings, or partially finished leaf mold.
Dry leaves are especially valuable because many neighborhoods practically deliver them by the curb each fall. Shred them with a mower so they are less likely to mat or blow away. Confirm that collected material is clean and free from trash, invasive weeds, and herbicide contamination.
Apply mulch after the soil has warmed and seedlings are established. Keep it slightly away from stems and tree trunks. Add grass clippings only in thin, dry layers; a thick wet pile can become slimy, block air, and produce a fragrance best described as “regrettable.”
7. Water the Roots, Not the Water Bill
Deep, appropriately timed watering encourages stronger root systems and wastes less water than frequent surface sprinkling. Water early in the morning and direct moisture to the soil with a watering wand, soaker hose, or drip line. Check the soil before irrigating rather than following the calendar blindly.
Group plants with similar moisture needs together. Repair leaking connections, mulch bare soil, and remove weeds that compete for water. In containers, leave enough headspace to water thoroughly and place saucers only where standing water will not create root or mosquito problems.
Use collected rainwater carefully
A screened, covered rain barrel can reduce demand for municipal water, particularly for ornamental beds. Roof runoff, however, may contain pathogens, metals, or residue from roofing materials. Local recommendations differ, so consult your Extension service before using collected water on edible crops.
When permitted, apply it to the soil rather than directly onto edible plant parts, keep the barrel covered, maintain the system, and wash harvested produce with potable water. Never treat barrel water as drinking water.
8. Feed the Soil Only When It Is Hungry
More fertilizer does not automatically produce more food. Excess nitrogen can create lush foliage with disappointing fruit, while unnecessary phosphorus can accumulate in soil. Use the soil-test recommendation as your starting point.
Compost may supply part of the garden’s needs, but heavy-feeding vegetables can require additional nutrients. Compare fertilizer products by how much nutrient they provide rather than by bag size. If you want to follow organic practices closely, choose a product clearly labeled for organic gardening or carrying appropriate third-party verification.
Avoid improvising concentrated fertilizer recipes from random kitchen ingredients. Banana peels do not instantly become plant-available potassium, and burying food beside roots can invite animals. Compost materials first or use a researched amendment at the recommended rate.
9. Stop Weeds While They Are Tiny
Young weeds can often be removed with a quick scrape of a hoe. Wait until they are knee-high and carrying seeds, and the job becomes a weekend event with sequels.
Inspect beds briefly several times a week. Pull weeds after rain when the soil is soft, hoe during dry weather so severed plants wither, and avoid deep cultivation that damages vegetable roots or brings buried weed seeds to the surface. Do not compost weeds holding mature seeds unless your composting system becomes hot enough to destroy them reliably.
Mulching after seedlings are established prevents new weeds and reduces future labor. Skip homemade salt-and-vinegar mixtures in productive beds: they can injure crops and soil organisms without solving the underlying weed problem.
10. Practice Integrated Pest Management
The least expensive spray is the one you never need. Integrated pest management begins with choosing resistant varieties, rotating related crop families when space allows, improving air circulation, and checking plants regularly.
Identify the culprit before taking action. A hole in a leaf does not prove the insect currently sitting nearby committed the crime. Some insects are pollinators, predators, or harmless visitors. Crush clusters of pest eggs, handpick larger pests, prune localized damage, and remove badly diseased material.
Use barriers and beneficial insects
Reusable insect netting or floating row cover can block flea beetles, cabbage moths, and other pests before damage begins. Seal the edges and install the cover before the pest arrives. Remove covers from flowering cucumbers, melons, and squash when pollinators need access, unless you plan to hand-pollinate.
Grow small-flowered herbs and flowers such as dill, cilantro, sweet alyssum, and native species to provide nectar and pollen for beneficial insects. A diverse garden will not eliminate every pest, but it can support lady beetles, lacewings, hover flies, and parasitoid wasps.
If intervention is still needed, select the narrowest effective product and follow its label. Even organic insecticides can harm bees or beneficial predators when applied carelessly.
A Shoestring Garden in Practice: Lessons From a Realistic Season
Consider a representative first-year garden built around one 4-by-8-foot bed and several recycled containers. The gardener sets a modest budget, spends the first portion on a soil test, and learns that the ground needs compost but not lime. That one result prevents the purchase of two unnecessary products before a seed ever touches soil.
The remaining budget goes toward six seed packets, two disease-resistant tomato transplants, a roll of reusable insect netting, and a small amount of approved fertilizer. Lettuce, radishes, beans, basil, cucumbers, and chard are selected because they either mature quickly or continue producing after the first harvest. Free leaves become mulch, clean nursery pots are reused, and a discarded wire panel becomes a cucumber trellis.
The first mistake: saving money in the wrong place
The initial lettuce seedlings are started in dense garden soil placed inside yogurt cups. Germination occurs, but several seedlings collapse because the medium remains too wet and poorly aerated. The lesson is immediate: repurposing containers is sensible, but using clean, well-drained seed-starting medium is worth the expense. Frugality works best when it removes decoration and wastenot the conditions plants require to survive.
The second lesson: prevention has excellent returns
In early spring, insect netting protects young greens from flea beetles. The material costs more than a bottle of homemade spray, but it remains useful for future seasons and requires no repeated mixing. When cucumber flowers appear, the cover is removed so bees can reach them.
Aphids later gather on a few chard leaves. Instead of spraying the entire bed, the gardener rinses them away with water and checks the plants every morning. Hover fly larvae and lady beetles appear soon afterward. The aphid population falls without an insecticide bill or collateral damage to helpful insects.
The third lesson: free materials still need inspection
Several bags of curbside leaves look like a mulch jackpot, but one contains plastic, seed heads, and clippings from an unknown lawn. That bag is rejected. The clean leaves are shredded and applied around established plants. Watering becomes less frequent, weeds are easier to pull, and soil no longer splashes onto tomato foliage during storms.
By midsummer, the garden supplies salads, herbs, beans, chard, cucumbers, and a steady trickle of tomatoes. It does not replace the grocery store, and no honest budget should pretend otherwise. Yet the reusable netting, trellis, containers, leftover seeds, and improving soil carry value into the following year. That is where a shoestring organic garden gains momentum: each season produces food while quietly reducing the cost of the next one.
Conclusion
Growing organic food inexpensively is less about inventing miracle sprays and more about avoiding unnecessary purchases. Test before amending, compost clean materials, sow crops that suit the site, reuse safe supplies, mulch bare soil, conserve water, and prevent pest problems before reaching for a product.
Start small enough to observe closely. A carefully managed bed can outperform an ambitious plot that consumes money, water, and every available Saturday. Let the garden expand only after the first space is productive. Your walletand probably your lower backwill appreciate the restraint.