If you have ever dropped an image into Google Docs and thought, “Great, now please face the other direction without making this weird,” you are not alone. Flipping or mirroring an image in Google Docs sounds like it should be a one-click job. In reality, Google Docs makes you take a tiny scenic route. The good news is that the route is easy once you know where the signs are.
This guide walks through exactly how to flip or mirror an image in Google Docs on both Windows and Mac. It also explains the difference between flipping and rotating, shows the easiest workaround, and covers common mistakes that make people think Google Docs is personally messing with them. Spoiler: it usually is not. It is just hiding the useful option in the Drawing tool.
If your goal is to reverse a selfie, create a mirrored logo mockup, flip an arrow so it points the other way, or prep a design for transfer paper, this article will help you get it done without opening five tabs and questioning your life choices.
What It Means to Flip or Mirror an Image in Google Docs
Before jumping into the steps, it helps to know what you actually want the image to do. A lot of people say “rotate” when they really mean “mirror,” and those are not the same thing.
Flip horizontally
A horizontal flip mirrors the image from left to right. Think of it like the image is looking into a mirror. If a person in the photo is facing left, a horizontal flip makes them face right. This is the most common option when someone wants to create a mirror image in Google Docs.
Flip vertically
A vertical flip turns the image upside down from top to bottom. This can be helpful for design experiments, reflections, diagrams, or the occasional chaotic classroom worksheet.
Rotate
Rotation changes the angle of the image. A 90-degree or 180-degree turn is not the same as a mirror effect. If your text or logo looks backward in your head, rotation will not fix it. You need a flip, not a spin.
Can You Flip an Image Directly in Google Docs?
Here is the honest answer: not in the simple way most people expect. Google Docs lets you rotate an image directly in the document, but for a true mirror effect, the easiest built-in method is to use the Drawing feature inside Docs. Once the image is in the Drawing editor, you can flip it horizontally or vertically and then place it back into the document.
That sounds slightly annoying, but it only takes a minute. On Windows and Mac, the process is basically the same because Google Docs runs in your browser. The only real difference is how you open the shortcut menu on Mac if you are using a trackpad or a Control-click.
How to Flip or Mirror an Image in Google Docs on Windows
This is the easiest built-in method for desktop users. It works well if you want to mirror a picture, flip a graphic, or reverse a design without leaving Google Docs.
Step 1: Open your Google Doc
Go to your document and place your cursor roughly where you want the flipped image to appear. You can insert the flipped image later anywhere you want, so do not stress about perfect placement yet.
Step 2: Open the Drawing tool
In the top menu, click Insert, then choose Drawing, and then click New. This opens a drawing canvas inside Google Docs. No artistic ability required. Stick figures may rest.
Step 3: Add your image
Inside the Drawing window, click the image icon and upload the picture you want to flip. You can usually insert an image from your computer, Google Drive, Photos, or a web source depending on what you are using.
Step 4: Select the image
Click the image once so it is highlighted. If it is not selected, the flip options will not affect it. Google Docs enjoys this tiny test of patience.
Step 5: Flip the image
Now right-click the image and look for Rotate. From there, choose either:
- Flip horizontally for a mirror image
- Flip vertically for an upside-down reflection
Some users also see the option under the top toolbar through Actions and then Rotate. Either path gets you to the same place.
Step 6: Save and close
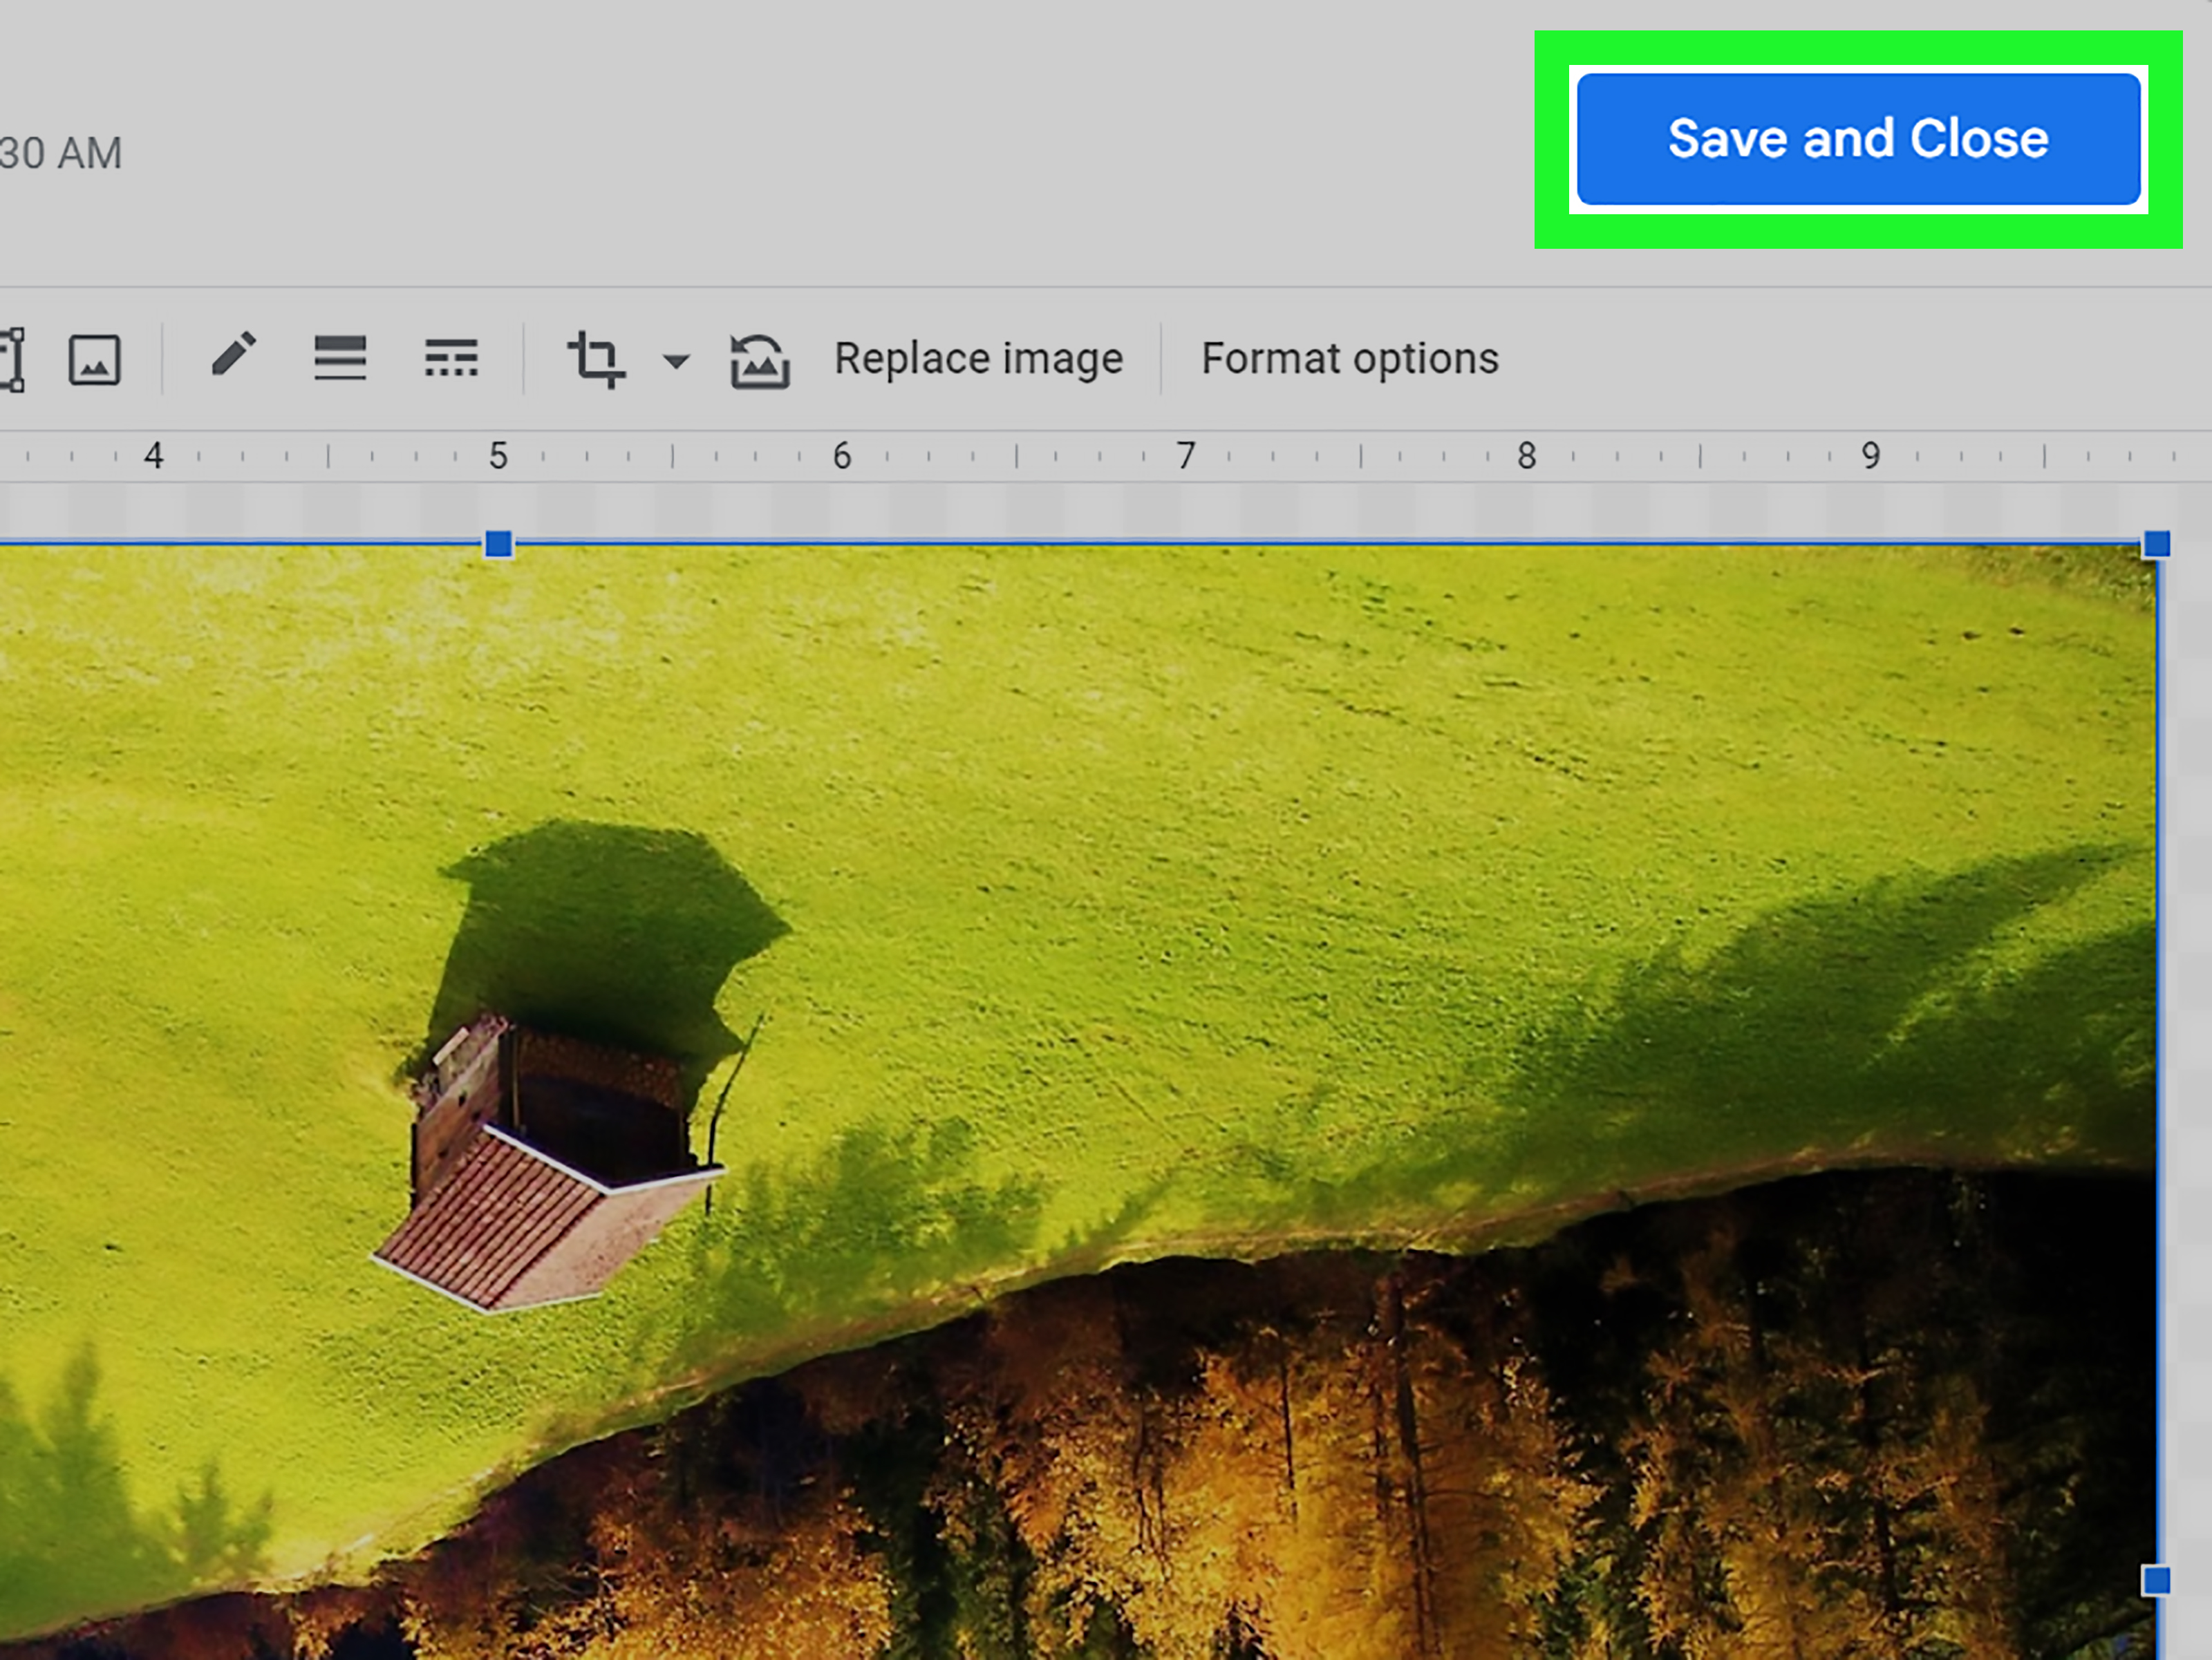
Once the image looks right, click Save and Close. Google Docs inserts the flipped image into your document as a drawing object.
Step 7: Resize and position the image
Click the inserted image to resize it, move it, or wrap text around it. If you need a cleaner layout, choose text wrapping options such as Wrap text, Break text, or In front of text.
How to Flip or Mirror an Image in Google Docs on Mac
If you are on a Mac, the steps are almost identical. Google Docs does not have a separate Mac version with a dramatic personality shift. It behaves the same in Safari, Chrome, or another browser, with one small twist: the shortcut menu may open differently.
Use the same Drawing method
- Open your Google Doc.
- Click Insert > Drawing > New.
- Upload your image.
- Select the image.
- Open the shortcut menu.
- Choose Rotate and then Flip horizontally or Flip vertically.
- Click Save and Close.
How to right-click on Mac in Google Docs
If you are using a mouse, right-click as usual. If you are using a Mac trackpad, you may need to do a two-finger click or use Control + click to open the shortcut menu. Once that menu appears, the rest of the process is the same as on Windows.
So yes, the article title includes Windows and Mac for a reason, but the beautiful truth is this: the method is nearly identical on both. The software drama is minimal for once.
The Fastest Alternative: Use Google Drawings or Google Slides
If you work with images often, you may want a slightly more flexible method. Instead of flipping the image directly in a one-off Drawing inside Docs, you can edit it in Google Drawings or even Google Slides, then insert it back into your document.
Why this method is useful
Using a separate Google Drawings file can be more convenient when:
- You want to reuse the flipped image in multiple documents
- You need more room to work
- You plan to add text boxes, shapes, arrows, or layered elements
- You want the drawing to stay linked so you can update it later
How to do it
Create the image in Google Drawings or Google Slides, flip it there, and then insert it into Docs. If you use Google Drawings from Drive, you can insert it through Insert > Drawing > From Drive. That can be handy for teachers, marketers, and anyone who edits graphics more than once every leap year.
When You Should Flip an Image Instead of Rotate It
Choosing the right adjustment matters more than you might think. Here are a few common examples.
Product photos
If a product is facing the wrong direction in your document layout, a horizontal flip can make the page look more balanced. It is especially helpful in side-by-side comparisons or promotional mockups.
Arrows and icons
Sometimes an arrow points away from the text it is supposed to highlight. One quick flip fixes the problem and saves you from redrawing it like an exhausted graphic designer at 11:47 p.m.
Selfies and portraits
A mirrored selfie may feel familiar because it matches what you saw in your front camera preview. Flipping it can change how text on shirts, signs, or backgrounds appears.
Transfer paper and crafts
If you are printing for iron-on transfers or certain craft projects, a mirrored design may be exactly what you need before printing. That is one of the most practical reasons to flip an image in Google Docs.
Common Problems and How to Fix Them
I do not see a flip option
If you are looking at an image directly in the document, that is the problem. Standard image options in Google Docs focus on size, placement, and rotation. Put the image into the Drawing tool first, then look for the flip command there.
Right-click is not working on Mac
Try a two-finger click on the trackpad or hold the Control key while clicking. You may also want to check your Mac’s secondary click settings if the shortcut menu refuses to appear.
The flipped image looks blurry
This usually happens when the original image is low resolution or when it gets resized too aggressively after insertion. Start with a higher-quality image whenever possible, and avoid stretching it far beyond its original size.
My text wrapping changed after I inserted the image
That is normal. Once the flipped image is added back into Docs, click it and adjust the layout options. In many cases, Wrap text gives the cleanest result.
I only want to rotate the image a little
Then do not use the flip method at all. Click the image in Docs and use the rotation handle or the image options panel to rotate it to a precise angle.
Best Tips for Cleaner Results
- Use a high-resolution image before flipping it
- Decide first whether you need a mirror effect or just a rotation
- Use Google Drawings if you plan to edit the image again later
- Check text and logos carefully after flipping, since readable content can become backward
- Preview the document before printing, especially for transfer or craft projects
Is Flipping an Image in Google Docs Worth the Extra Step?
Absolutely. While the built-in process is not as direct as people would like, it is still simple once you know the path. The trick is remembering that the magic happens in Drawing, not on the image itself in the main document.
For casual users, the built-in method is enough. For people who work with visual layouts more often, Google Drawings or Google Slides may feel smoother. Either way, you do not need expensive software just to make a picture stop facing the wrong way like a stubborn cat avoiding eye contact.
Final Thoughts
If you want to flip or mirror an image in Google Docs on Windows or Mac, the simplest approach is to open the Drawing tool, insert the image there, use the Flip horizontally or Flip vertically command, and then save it back into the document. It is not the most obvious workflow, but it works reliably and only takes a minute.
The biggest takeaway is this: rotation and mirroring are different. If you need the image to face the opposite direction, use a flip. If you only need to tilt or turn it, use the standard rotation controls. Once you know that difference, Google Docs becomes a lot less confusing and a lot more useful.
So the next time your graphic is facing the wrong way, your arrow is being unhelpful, or your transfer-paper design needs to be reversed, you will know exactly where to click. No panic. No mystery. Just a quick detour through the Drawing tool and back to business.
Real-World Experiences With Flipping Images in Google Docs
People usually discover the need to flip an image in Google Docs at the exact moment they are already in the middle of something else. A student is finishing a project and realizes the arrow in a timeline points the wrong way. A teacher is making a worksheet and wants a shape to face the opposite direction. A small business owner is building a flyer and notices a product photo looks awkward because it is facing away from the headline instead of toward it. Nobody wakes up excited to learn image flipping. It is a pure “well, now I need this” feature.
One of the most common experiences is the logo problem. Someone drops a logo or icon into Docs, tries to right-click it, sees rotation options, and assumes the flip command has to be nearby. Then it is not. This is where frustration usually enters the room wearing clown shoes. Once users learn that the image must go into the Drawing tool first, the confusion tends to disappear fast. After that, the process feels easy. Before that, it feels like Google hid the remote on purpose.
Mac users often have a second layer of confusion because the issue may not be Google Docs at all. Sometimes the problem is simply that the shortcut menu is not opening the way they expect. A two-finger click or Control-click solves it, and suddenly the missing menu appears like it was there the whole time, quietly judging everyone.
Another real-world use case comes from people creating mirrored text or reverse layouts for printing. Crafters and DIY sellers often need graphics flipped before using transfer paper. In that situation, Google Docs can absolutely get the job done, but it helps to preview everything carefully before printing. A design that looks perfect on-screen can still surprise you on paper, especially when text, shapes, and image placement all interact.
There is also the presentation and classroom angle. Many users do not need Photoshop-level editing. They just need a picture to face left instead of right. For that, Google Docs is fine. The Drawing workaround is not glamorous, but it is practical, free, and built into a tool people already use every day. That combination matters more than elegance for most users.
In the end, the experience of flipping an image in Google Docs is a lot like assembling flat-pack furniture. The first time feels oddly complicated for something so basic. The second time takes two minutes. The third time, you start acting like a seasoned expert and telling other people, “Oh, yeah, just use Insert, Drawing, New.” That is when you know the skill has officially entered your brain rent-free.