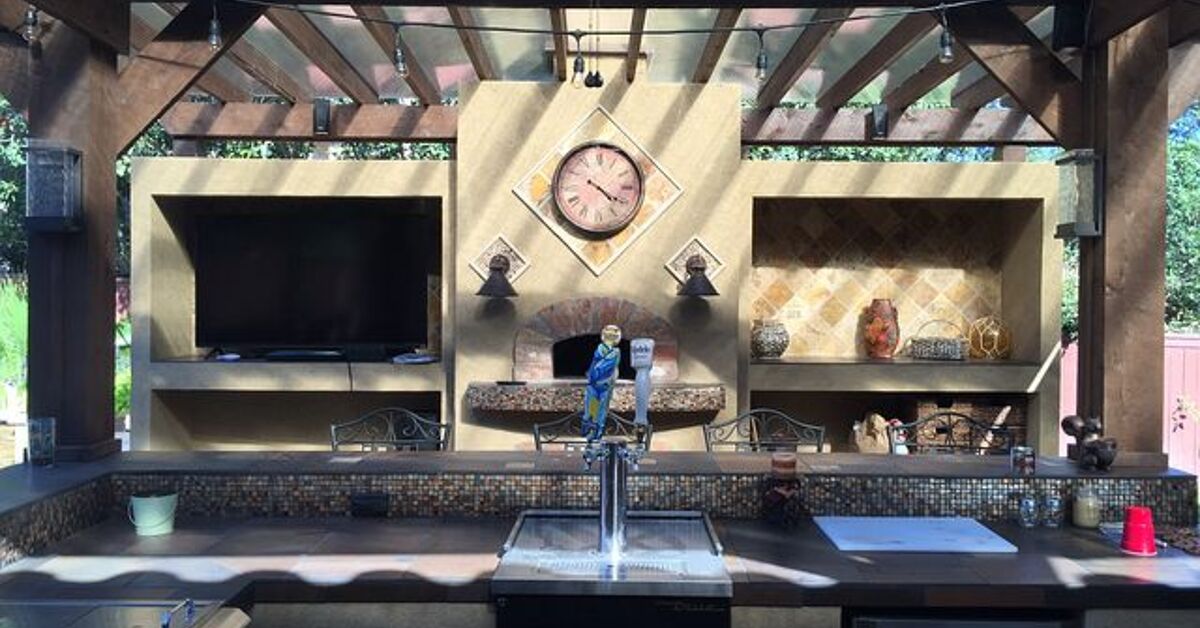
If 2021 taught us anything, it’s that the backyard is not just a yardit’s a dining room, hangout zone, weekend therapy office, and occasionally a very smoky place to overcook corn. The good news? You do not need a luxury build with a four-figure pizza oven to create a great outdoor kitchen. A smart, budget-friendly DIY setup can look amazing, work hard, and still leave room in your wallet for burgers, string lights, and maybe a celebratory patio plant.
This guide rounds up 22 practical, budget-friendly DIY outdoor kitchen ideas inspired by real planning advice, layout best practices, and proven DIY build approaches. The focus is simple: maximize function, keep costs under control, and build something you’ll actually use.
Before You Start: How to Keep an Outdoor Kitchen Budget-Friendly
A budget outdoor kitchen succeeds when you treat it like a phased project, not a one-weekend reality show. Start with the essentials (grill + prep surface + storage), then add upgrades later. That approach is especially smart because outdoor kitchen costs can vary wildly depending on materials, appliances, utilities, and labor.
Budget-first planning rules that save money (and headaches)
- Build near the house to reduce utility runs and extra paving costs.
- Use an existing patio if possible instead of pouring a new slab.
- Start movable or modular and upgrade in stages.
- Choose weather-resistant materials so you’re not rebuilding next season.
- DIY the structure, hire pros for gas/electrical/plumbing where required by code.
Also, don’t skip safety planning. Outdoor cooking areas need proper clearance, airflow/ventilation, and code-compliant electrical and utility work. Budget-friendly is great; budget-friendly and non-flammable is even better.
22 Budget-Friendly DIY Outdoor Kitchen Ideas
1) The Rolling Grill Cart Kitchen
Start with a portable grill and a sturdy rolling utility cart. This is the MVP of low-cost outdoor kitchens because it gives you mobility, prep space, and storage without permanent construction. Add hooks for tools, baskets on lower shelves, and a magnetic towel bar for bonus “I know what I’m doing” energy.
2) A Simple Straight-Line Grill + Counter Setup
A straight layout is usually the cheapest full-looking configuration. Put the grill in the middle (or end), then flank it with countertop space. It’s easy to build, easy to clean, and easy to expand later if you decide your backyard deserves a sink and a mini fridge.
3) DIY Cinder Block Grill Station
Cinder blocks are budget classics for a reason: affordable, durable, and beginner-friendly. Build a basic base for a grill surround or prep station, then finish it with stucco, paint, or stone veneer if you want a more polished look.
4) Pallet-and-Paver Outdoor Prep Bar
Reclaimed pallets + pavers = instant budget charm. Use pallets for the base/frame (only clean, safe, structurally sound pallets), and top with pavers or a sealed slab for a rustic prep bar. It won’t fool a luxury architect, but it will absolutely impress your neighbors during taco night.
5) The Concrete Countertop Build
Poured concrete remains one of the most popular ways to get a high-end look on a lower budget. It’s durable, weather-friendly when sealed, and fits modern, rustic, and industrial styles. If you’re new to concrete work, practice on a smaller prep slab before committing to a long counter run.
6) A Grill Nook on an Existing Patio
If you already have a patio, use it. This is one of the easiest ways to save money because you avoid new flooring or foundation costs. Add a grill, a freestanding counter, and storage cabinets, and you’ve got a compact outdoor kitchen without major structural work.
7) The “2021 Favorite” Black-and-Wood Budget Look
Matte black accents paired with stained wood or faux-wood finishes were everywhere around 2021and honestly, the combo still looks great. Use black hardware, black planters, and a dark grill to create a cohesive look even if your actual setup is small and inexpensive.
8) Repurposed Workbench Kitchen Station
An old workbench can become a perfect outdoor kitchen base. Sand it, seal it for weather resistance, add a backsplash panel, and install shelves below for bins, pans, and charcoal/propane accessories. It’s practical, sturdy, and has a “weekend project” vibe people love.
9) DIY Brick Veneer Facade for a Built-In Look
Want the look of masonry without masonry-level pricing? Build the frame and finish with brick veneer. This gives you a traditional outdoor kitchen look and upgrades curb appeal without the full cost of custom brick construction.
10) Stock Cabinets Converted for Outdoor Use (Covered Areas Only)
If your kitchen is under a covered patio, some homeowners use stock cabinets as a budget starter solution. The key is protection: exterior-grade paint, sealed edges, proper clearance from heat, and realistic expectations. For fully exposed setups, choose more weather-tolerant materials.
11) DIY Outdoor Kitchen With Open Shelving
Closed cabinets look sleek, but open shelves are cheaper and easier to build. Use galvanized bins, labeled baskets, and weather-resistant containers to keep things organized. Bonus: the “open shelf” look forces you to declutter, which is basically free interior design.
12) Budget L-Shaped Layout Using Two Separate Units
Instead of building one large L-shape, place two budget-friendly units perpendicular to each other: a grill station and a prep/bar station. You get better workflow, more counter space, and a more “real kitchen” feel without one big custom build.
13) The Mini Galley Outdoor Kitchen
If you have space, two narrow counters facing each other can create a highly efficient cooking zone. One side can handle grilling/prep; the other can handle serving and drinks. This layout feels surprisingly premium and helps keep guests out of your hot zone.
14) Add a Budget Overhang Bar for Seating
A small counter overhang can turn a plain prep station into a social hub. Add two stools and suddenly you’ve got an outdoor kitchen and a hangout bar. This is a low-cost upgrade that dramatically increases how often people actually gather there.
15) DIY Sink Station (Cold Water Only)
A full plumbing setup can get expensive fast, but a simple sink station can still be worth it. In some builds, a cold-water sink is enough for rinsing produce, washing hands, and quick cleanup. If plumbing isn’t realistic yet, set up a temporary hand-washing station and leave room to upgrade later.
16) Use Gravel + Pavers for a Low-Cost Kitchen Footprint
For yards without a patio, a gravel-and-paver zone is often cheaper than a full concrete slab. It can define the kitchen area, reduce mud, and make the space feel intentional. Just make sure the surface is level and stable enough for carts, counters, and appliances.
17) The Portable “Kitchen on Wheels” Setup
A movable kitchen is ideal for small yards or multipurpose spaces. Use a grill cart, prep cart, and foldable serving table so you can rearrange everything after the party. This is one of the best budget-friendly options because it keeps your upfront costs low and your flexibility high.
18) DIY Pergola Frame Over the Kitchen Zone
Shade adds comfort and style, and a simple pergola frame can be built more affordably than a full roof. It also visually “anchors” your kitchen so the setup looks finished. Just make sure smoke can escape and you maintain safe grill placement and clearance.
19) Add Weather-Friendly Task Lighting on a Budget
Outdoor kitchens need task lighting, not just vibes. String lights are fun, but add focused lighting near the grill and prep area so you can actually see what you’re slicing after sunset. LED options and solar accents can stretch your budget.
20) A DIY Pizza Corner Without a Full Pizza Oven
Love pizza but not “custom masonry oven” pricing? Create a pizza prep corner with a steel table, stone board, topping bins, and a pizza peel station beside the grill. It delivers the experience without the expensive centerpiece.
21) Build in Storage for Safety and Sanity
Budget kitchens often fail because there’s nowhere to put anything. Add hooks, drawers, bins, shelves, or access doors for tools, fuel accessories, gloves, and cleaning supplies. Organized storage improves safety, protects gear, and makes the kitchen feel bigger than it is.
22) Phase Your Dream Kitchen (Start Small, Finish Smart)
This is the most budget-friendly “idea” of all: build in phases. Phase 1: grill + counter + storage. Phase 2: seating + lighting. Phase 3: sink/fridge/cover. Spreading the project out reduces financial stress and gives you time to learn what you actually need instead of buying every gadget on day one.
Budget DIY Outdoor Kitchen Mistakes to Avoid
Skipping layout planning
Even a small setup benefits from a scale sketch. Measure your grill, doors, walking paths, and seating clearance before buying materials. A little planning prevents the classic DIY mistake: building a beautiful counter that blocks the grill lid.
Using indoor-only materials outside
Outdoor kitchens live in sun, rain, grease, and temperature swings. Choose materials and finishes that can handle weather, heat, and cleanup. If you’re improvising with budget pieces, protect and seal them properly.
Underestimating safety requirements
Grills need clearance from combustibles, and gas/electric/plumbing work often requires code-compliant installation. If your project includes utilities, permits, or built-in gas appliances, bring in licensed professionals where needed.
Forgetting food safety in the design
A budget kitchen still needs a food-safe workflow: clean prep surface, hand-washing option, cooler/fridge strategy, and a thermometer. Summer entertaining is a lot more fun when your guests leave with leftovers instead of food poisoning.
Experience-Based Lessons From Budget DIY Outdoor Kitchens (Extended Section)
One of the most common experiences people have with a budget DIY outdoor kitchen is this: they start out thinking they need a “full outdoor kitchen,” but what they really need is a high-function outdoor cooking station. That mindset shift saves a lot of money. Homeowners often begin with a giant wish listgrill, sink, fridge, drawers, pizza oven, bar seating, pergola, lighting, speakers, and maybe a dramatic backsplash for effect. Then they build the first version, use it for a few weekends, and realize that 80% of the joy comes from three things: a reliable grill, enough prep space, and easy cleanup.
Another common experience: mobility beats permanence in the beginning. People who choose rolling carts and freestanding components often discover they love being able to reconfigure the space for birthdays, game nights, or yard work. That flexibility matters more than expected, especially in smaller yards. A setup that looks modest in photos can feel incredibly practical in real life when it moves, stores easily, and adapts to the season.
Budget builders also learn quickly that “cheap” and “low-maintenance” are not the same thing. A bargain material may look great on install day, but if it absorbs water, rusts, warps, or cracks, it becomes expensive later. The better experience usually comes from choosing fewer pieces that are weather-resistant and durable, then upgrading the appearance over time with paint, trim, lighting, or decor. In other words: buy less, but buy smarter.
There’s also a funny pattern with storage. At first, people assume they can just “run inside” for tools, plates, seasoning, and tongs. After about two cookouts, that plan usually collapses. The best budget outdoor kitchens are the ones that include simple storage from the starthooks, shelves, bins, or a cart drawer. It doesn’t need to be fancy. It just needs to stop the “Where did I put the spatula?” sprint.
Many DIYers also report that lighting becomes the surprise hero. They build for daytime use and then end up entertaining in the evening, when the grill zone turns into a shadowy mystery corner. Adding task lighting (not just decorative string lights) dramatically improves both safety and enjoyment. This is one of the highest-impact, lowest-cost upgrades you can make after the initial build.
Finally, the best experience comes from phasing the project and letting real use guide upgrades. The first version teaches you where people gather, where clutter piles up, where smoke drifts, and what features you actually use. That real-world feedback is more valuable than any sketch. So if your 2021-inspired budget outdoor kitchen starts as a grill cart and a prep counter, that’s not a compromiseit’s a smart foundation. Build it, use it, refine it, and let your backyard earn its upgrades.
Conclusion
The best budget-friendly DIY outdoor kitchens aren’t the ones with the biggest price tagsthey’re the ones that make cooking outside easier, safer, and more fun. Start with a solid layout, choose weather-smart materials, prioritize prep space and storage, and expand over time. Whether you build a rolling grill station or a brick-look L-shape, you can create a backyard setup that feels custom without a custom-level budget.