Getting lost in Minecraft is practically a rite of passage. One minute you are chopping trees near your cozy starter base, and the next you are standing in a swamp, arguing with a frog, wondering whether your house was north, south, or emotionally unavailable. That is where maps come in. A Minecraft map helps you record explored terrain, track your position with the right version, plan builds, and create those glorious map walls that make your base look like it has a serious cartography department.
In this guide, you will learn how to make a map in Minecraft, how to expand a map using a cartography table or crafting table, how Java Edition and Bedrock Edition handle maps differently, and how to use maps more intelligently in survival worlds. Whether you are charting a village, planning a mega-base, or trying not to lose your horse again, this guide will help you turn blank paper into a reliable exploration tool.
What Is a Map in Minecraft?
A map in Minecraft is an item that records the terrain around the area where it is activated. When you hold and use a blank map, it becomes a filled map centered on a fixed region of the world. As you walk around, the map updates and reveals nearby terrain such as forests, rivers, oceans, mountains, villages, and player-made structures.
Maps are especially useful because Minecraft worlds are enormous. Coordinates are helpful, but maps give you visual context. They show where rivers bend, where your base sits compared with nearby biomes, and where you accidentally built a dirt tower because you thought it would “only be temporary.” Spoiler: it is never temporary.
Materials Needed to Make a Map
Before you can make a map, you need a few basic materials. The exact recipe depends on whether you are playing Java Edition or Bedrock Edition, but most players will need paper and, for locator-style maps, a compass.
Basic Materials
- Paper: Crafted from sugar cane.
- Compass: Crafted from iron ingots and redstone dust.
- Crafting table: Needed for the classic map recipe.
- Cartography table: Very useful for expanding, copying, locking, and managing maps.
To make paper, collect sugar cane, which usually grows near water. Place three sugar cane in a horizontal row on a crafting table to create three pieces of paper. Since maps and map expansion use paper, it is smart to start a small sugar cane farm near your base. Nothing says “I am a responsible explorer” like organized agriculture.
To make a compass, place one redstone dust in the center of the crafting grid and surround it with four iron ingots above, below, left, and right. The compass is important because it allows a map to show position markers in many versions and situations, depending on the edition.
How to Make a Map in Minecraft
The classic way to make a map is through a crafting table. However, the recipe differs slightly between Minecraft Java Edition and Minecraft Bedrock Edition, so check your version before blaming the crafting grid for having “bad vibes.”
How to Make a Map in Java Edition
In Minecraft Java Edition, a standard empty map is made with eight pieces of paper and one compass. Open the crafting table, place the compass in the center slot, and surround it with paper in all eight remaining slots. The result is an empty map.
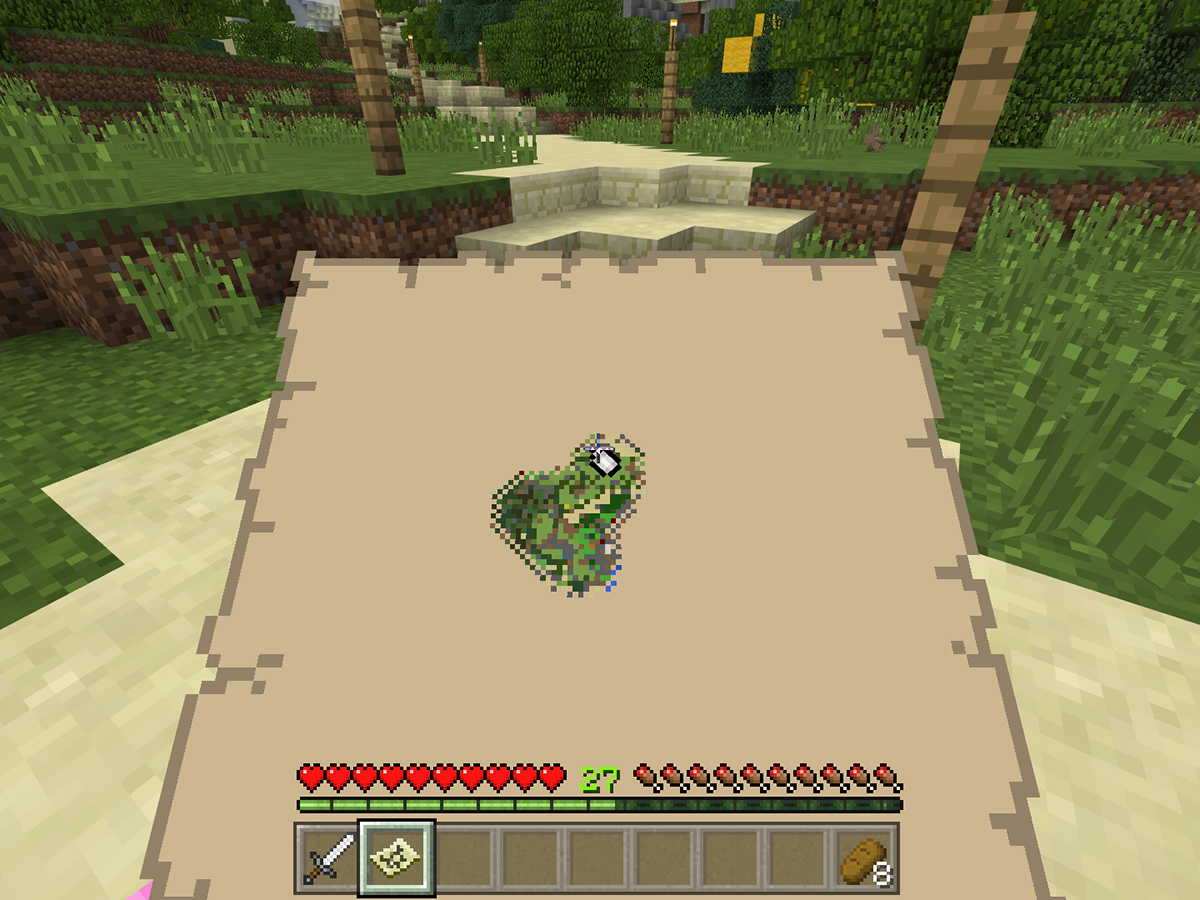
Once the empty map is in your inventory, equip it and use it. The map will activate and begin recording the region around you. From that moment on, the map is tied to that area. If you walk beyond the map’s edge, your player marker may move toward the border or disappear depending on the map type and distance, but the map itself will not magically follow you forever. Minecraft maps are loyal to land, not to your chaotic travel plans.
How to Make a Map in Bedrock Edition
In Bedrock Edition, map behavior is a little different. You can craft a basic empty map using paper, and you can create an empty locator map with paper and a compass. A locator map shows player position markers, making it more useful for navigation, multiplayer, and finding your way home after a very questionable cave trip.
Bedrock players can also use a cartography table to create maps efficiently. For example, placing paper into a cartography table can create an empty map, while combining paper with a compass can create an empty locator map. This makes the cartography table more than a fancy desk for villagers with excellent posture.
How to Use a Map for the First Time
After crafting an empty map, place it in your hotbar, select it, and use it. The blank map will become a filled map. At first, only the nearby area may be visible. As you walk around while holding the map, more terrain appears.
For best results, activate your map in the area you actually want to record. If you activate it at your base, it will map the region around your base. If you activate it three thousand blocks away while chasing a suspiciously cute desert temple, it will map that region instead. The map does not ask questions; it simply documents your decisions.
How to Expand a Map in Minecraft
Expanding a map means zooming it out so it covers a larger area. This is one of the most important map skills in Minecraft because a default map only covers a small region. Expanded maps are better for long-distance navigation, base planning, biome hunting, and creating huge map walls.
There are two main ways to expand a map: using a cartography table or using a crafting table. The cartography table is usually the better option because it is cheaper and simpler.
Method 1: Expand a Map with a Cartography Table
To expand a map using a cartography table, place your filled map in the first slot and one piece of paper in the second slot. The output will be a zoomed-out version of the map. Take the expanded map and use it again to continue filling in the larger area.
You can repeat this process multiple times until the map reaches its maximum zoom level. Each expansion increases the area shown on the map, but it also makes details smaller. At maximum size, the map covers a very large area, which is great for world planning but not ideal if you are trying to admire the exact shape of your chicken pen.
Method 2: Expand a Map with a Crafting Table
You can also expand a map using a crafting table. Place the map in the center slot and surround it with eight pieces of paper. This creates a zoomed-out map. The downside is that this method uses more paper than the cartography table, so it is less efficient.
If you are early in survival mode and sugar cane is limited, use the cartography table. Saving paper may not sound glamorous, but neither does wandering through three biomes because you forgot to bring enough supplies.
Minecraft Map Zoom Levels Explained
Minecraft maps have several zoom levels. A fresh map starts at the smallest scale, showing the most detail but the least land. Each time you expand it, the map shows more territory with less detail. The largest map can cover a huge square area, making it excellent for regional navigation.
Here is the simple way to think about it: a small map is like a neighborhood sketch, while a fully expanded map is like a road atlas. One helps you find your barn. The other helps you understand why your “quick walk” became a three-day expedition involving a ruined portal, a jungle, and emotional damage.
How to Make a Cartography Table
A cartography table is one of the best blocks for map work. To craft one, place two pieces of paper in the top row of a crafting table and four wood planks beneath them in a two-by-two shape. Any wood plank type works, so feel free to use oak, spruce, birch, mangrove, cherry, or whatever lumber your current biome is willing to provide.
Cartography tables can also appear in villages, usually associated with cartographer villagers. If an unemployed villager claims a cartography table as a job site block, it can become a cartographer. That villager may eventually offer map-related trades, including explorer maps, which can lead you to rare structures such as woodland mansions or ocean monuments.
What Else Can You Do with a Cartography Table?
Expanding maps is only one use for the cartography table. It can also copy maps, lock maps, and in some editions help create different map types. If you plan to explore seriously, this block deserves a permanent place in your base.
Copying a Map
To copy a map, place a filled map and an empty map into the cartography table. The output creates a duplicate. This is useful in multiplayer because multiple players can carry the same map. It is also useful if you want one copy for travel and another copy for a map wall.
Copied maps stay linked to the same mapped area. If one copy updates while exploring, the matching copy can reflect the same map data. This makes cloning maps a great habit before heading into dangerous territory. If your friend falls into lava while carrying the only map, everyone gets to enjoy the ancient survival tradition known as “guessing.”
Locking a Map
You can lock a map by combining it with a glass pane in a cartography table. A locked map no longer updates, even if the terrain changes. This is helpful if you want to preserve a snapshot of a build, city, kingdom, or pixel art project.
Locked maps are especially fun for decoration. You can capture a finished castle, lock the map, and display it like official royal paperwork. Very fancy. Very unnecessary. Very Minecraft.
How to Fill Out an Expanded Map
After expanding a map, you need to explore the larger area to fill in the blank spaces. Hold the map while walking through the region it covers. Terrain appears as you move, but unexplored sections remain blank until you visit them.
A good strategy is to travel in a grid pattern. Start near one corner of the map and move in long straight lines, gradually covering the area row by row. Bring food, a bed, tools, and maybe a boat, because Minecraft terrain loves throwing oceans, ravines, mountains, and “surprise, this is powdered snow” situations at explorers.
How to Make a Map Wall
A map wall is one of the most satisfying uses for maps in Minecraft. To make one, place item frames on a wall and insert filled maps into them. Adjacent maps can connect visually, creating a large overhead view of your world.
For the cleanest map wall, use maps of the same zoom level. Create and fill one map, then travel beyond its border before activating the next map. If you activate several maps too close together, they may cover the same region, creating duplicates instead of a proper grid. Minecraft map walls reward planning, which is unfortunate news for players whose base layout is “chests everywhere and vibes.”
Common Mistakes When Making and Expanding Maps
Activating the Map in the Wrong Place
A map records the region where it is first used. If you activate it far from your base, it will not show your base unless the base falls inside that map’s area. Always activate a new map in or near the region you want to chart.
Expanding Before Understanding the Area
Expanding a map too early can make small landmarks harder to see. If you are mapping a detailed town or base, keep a smaller version. If you are mapping a region, expand it. The best map size depends on the job.
Forgetting Edition Differences
Java and Bedrock map recipes and locator behavior can differ. If a recipe does not work, check whether you are using the correct edition instructions. The crafting grid is innocent until proven guilty.
Not Bringing Enough Supplies
Filling a large map can take time. Bring food, tools, torches, a shield, a bed, and extra paper if you plan to create more maps. A map tells you where you are; it does not protect you from skeletons with Olympic-level aim.
Best Uses for Maps in Minecraft
Maps are useful for more than basic navigation. Builders use maps to plan cities, roads, farms, and mega-bases. Explorers use them to track biomes, villages, temples, and ocean areas. Multiplayer groups use shared maps to coordinate travel and mark community zones. Creative players even use maps as artwork by building pixel designs on the ground and displaying the result in item frames.
If you enjoy long-term survival worlds, maps are one of the best tools for making your world feel organized. A wall of maps turns random exploration into visible progress. You can see where you have been, where you still need to go, and where your friend built a suspiciously large dirt cube without asking permission.
Practical Example: Mapping Your Starter Base
Suppose you spawn near a plains village with a river, forest, and mountain nearby. First, gather sugar cane from the riverbank and mine enough iron and redstone to make a compass. Craft your map and activate it near your base. Walk around the village, forest edge, river, and mountain until the map fills in.
Next, craft a cartography table and expand the map once. Now it shows a larger area around your base. Fill in the new blank sections by exploring in loops. If you want a regional overview, expand it again. If you want a detailed base map, keep the original smaller version and copy it for display.
Finally, place item frames on a wall inside your base and display the map. You now have a useful reference and a decorative feature. Congratulations: your starter shack has evolved into a command center, even if the roof is still made of whatever blocks were in your inventory.
Extra Experience: Lessons from Actually Using Maps in Minecraft
The first real lesson about Minecraft maps is that they are most useful when you plan ahead. Many players craft a map only after they are already lost, which is a little like buying an umbrella after becoming completely soaked. A better habit is to make a map early, activate it near your base, and keep it updated as your world expands. Even a simple starter map can save you from wandering in circles while pretending the sunset is “helpful lighting.”
Another useful experience is to keep different maps for different purposes. A small-scale map is excellent for your home area because it shows more detail. You can recognize your farm, village paths, rivers, and nearby builds more clearly. A fully expanded map is better for travel because it covers a much larger region. Think of it as the difference between a house floor plan and a state map. Both are useful, but you would not use a floor plan to find a desert biome.
When making a map wall, patience matters. It is tempting to craft a pile of maps at your base, expand them all, and hope they connect neatly. That often leads to overlapping maps or confusing duplicates. The better method is to activate each new map in the correct neighboring region. Travel beyond the edge of your current map, then activate the next one. This helps create a clean grid. It takes more effort, but the final wall looks much better and makes you feel like the official surveyor of a tiny block kingdom.
In survival mode, always prepare before filling large maps. Bring a bed so you can skip nights, a boat for rivers and oceans, food for long trips, and basic armor in case the local skeleton population has opinions about your travel plans. If you are mapping snowy mountains, leather boots can help with powdered snow. If you are mapping oceans, doors or water-breathing supplies may help, depending on your goals. The map is the mission, but staying alive is a nice bonus.
One underrated trick is copying important maps before dangerous journeys. Keep one copy safe at home and carry the other while exploring. If you fall into lava, get ambushed, or make a bold decision involving an elytra and poor judgment, your original map is not gone forever. This is especially helpful in multiplayer servers, where one player can keep a master copy while others explore.
Locked maps are also more useful than many players realize. If you finish a build and want to preserve its appearance, lock the map before making major changes nearby. This lets you create a historical snapshot. You can display old versions of your base, seasonal builds, or before-and-after progress. In long-running worlds, that can become a fun visual timeline.
Finally, maps make Minecraft feel more personal. Coordinates tell you numbers, but maps tell you stories. They show the river where you built your first bridge, the forest you cleared for a farm, the mountain you swore you would turn into a castle, and the giant unexplored blank spot that is absolutely not calling your name. Once you learn how to make and expand maps properly, exploration becomes less random and more rewarding. You are not just walking around anymore; you are charting your own world, one paper square at a time.
Conclusion
Learning how to make and expand a map in Minecraft is one of those simple skills that makes the entire game feel smoother. With paper, a compass, and a cartography table, you can record terrain, zoom out for bigger views, copy maps for safety, lock maps for decoration, and build impressive map walls. The process is easy once you understand the difference between Java and Bedrock recipes and know when to use the cartography table instead of spending extra paper at a crafting table.
Maps will not stop creepers, cook food, or explain why your storage room has seventeen unlabeled chests. But they will help you explore smarter, plan better, and turn your Minecraft world into something you can actually understand at a glance. And in a game where “just over that hill” can become a two-hour adventure, that is a beautiful thing.
Note: This article is written for web publishing in standard American English and is based on current Minecraft map, paper, compass, and cartography table mechanics.