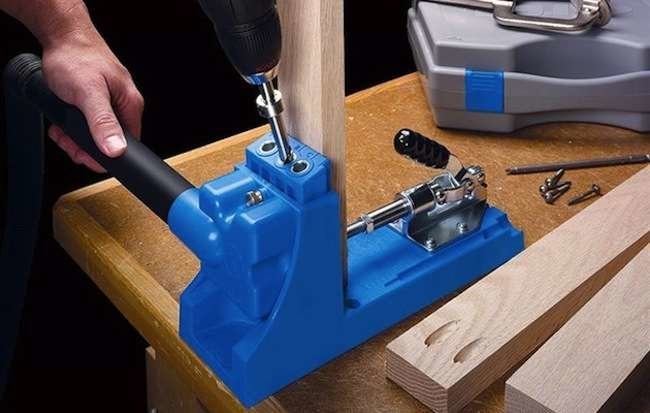
A cordless drill/driver is one of those tools that looks simple until you realize it can quietly take over half your home improvement life. It drills holes, drives screws, assembles furniture, scrubs tile, mixes paint, polishes metal, and saves your wrists from becoming unpaid interns. If there is one tool that deserves a permanent parking spot on your workbench, it is this battery-powered overachiever.
Many homeowners buy a cordless drill/driver for one project, such as hanging curtain rods or assembling a bookcase, and then leave it in a drawer like a forgotten gym membership. Big mistake. With the right bits, attachments, and a little common sense, your drill/driver can become a compact problem-solver for dozens of household tasks.
Why a Cordless Drill/Driver Is So Useful
A cordless drill/driver combines two everyday functions: drilling holes and driving fasteners. The drill mode spins bits fast enough to bore into wood, drywall, plastic, and sometimes masonry when paired with the correct bit and tool type. The driver function lets you sink screws with more control than a basic drill, thanks to torque settings and a clutch that helps prevent stripped screw heads, cracked materials, and the dreaded “oops, that screw is now part of the earth’s core” moment.
Modern cordless models are also portable, rechargeable, and comfortable enough for weekend DIY projects. A 12-volt drill/driver is often enough for light household tasks, while an 18-volt or 20-volt class tool is better for heavier work, larger bits, and frequent use. Add a basic accessory kit, and this humble tool starts acting like a tiny workshop in your hand.
Before You Start: A Few Smart Safety Habits
Wear safety glasses whenever drilling, sanding, brushing, or polishing. Flying dust, wood chips, and metal particles have terrible aim and no manners. Use hearing protection for loud jobs, a dust mask when creating fine dust, and gloves only when they are appropriate and will not get caught in rotating attachments. Keep loose sleeves, jewelry, and long hair away from the chuck. Clamp small workpieces instead of holding them by hand. Finally, match the bit or attachment to the material and let the tool do the work without forcing it.
1. Drill Clean Pilot Holes
The most classic cordless drill use is still one of the most important: drilling pilot holes. A pilot hole is a smaller guide hole that helps a screw enter straight, reduces splitting in wood, and makes driving fasteners easier. This is especially helpful when working near the end of a board, installing cabinet hardware, building shelves, or attaching trim.
For wood screws, choose a drill bit slightly smaller than the screw’s shank. If you are working with hardwood, pilot holes are not optional; they are the polite handshake before the screw moves in. For drywall anchors, use the size recommended on the anchor package. For masonry, use a masonry bit and confirm your drill is suitable for the material. Standard drill/drivers can handle many light-duty tasks, but concrete and brick often require a hammer drill for best results.
Pro Tip
Wrap a small piece of painter’s tape around the bit to mark the desired drilling depth. This simple trick helps prevent drilling too deep, especially when installing wall anchors, shelf brackets, or cabinet pulls.
2. Drive Screws Without Stripping Them
A cordless drill/driver is made for fastening. Whether you are assembling flat-pack furniture, installing hinges, securing drawer slides, or building a simple planter box, it can drive screws faster and more evenly than a manual screwdriver. The secret is using the clutch correctly.
The clutch is the numbered ring near the chuck. Lower numbers apply less torque, while higher numbers apply more turning force. Start low when driving small screws into soft material, then increase as needed. This helps avoid stripped screw heads, snapped screws, and crushed surfaces. For drilling, switch to the drill icon or full drill mode, depending on your model.
Use the correct driver bit, too. Phillips, square, Torx, and hex bits are not interchangeable just because they all look confident. A properly fitted bit grips better, reduces wobble, and makes the job cleaner.
Best Projects for Screw Driving
Use your drill/driver for hanging curtain rods, installing closet organizers, tightening cabinet hardware, mounting TV brackets into studs, attaching door hinges, replacing outlet covers, building raised garden beds, and assembling storage racks. Once you get comfortable, you may begin looking around the house for things that “need screws.” This is normal. Mostly.
3. Assemble Furniture Faster
If you have ever assembled furniture with the tiny hex key included in the box, you know the feeling: one chair, 37 bolts, and a wrist that files a complaint. A cordless drill/driver with a hex bit can speed up furniture assembly dramatically.
The trick is control. Use a low clutch setting and slow trigger speed. Furniture hardware often threads into particleboard, MDF, or preinstalled metal inserts, and too much torque can strip the hole or damage the hardware. Start screws by hand to avoid cross-threading, then finish with the drill/driver. For final tightening, you may still want a hand tool so you can feel the resistance.
This use is especially handy for bed frames, desks, bookshelves, outdoor furniture, storage cabinets, and kids’ play equipment. Keep a small bit set nearby with Phillips, hex, square, and Torx bits. The next time a box of furniture arrives with “easy assembly” printed on the side, your drill/driver can help make that statement slightly less fictional.
4. Install Shelves, Hooks, and Wall Anchors
Few tools are better for everyday home organization than a cordless drill/driver. It helps you install floating shelves, garage hooks, pegboards, towel bars, spice racks, closet rods, and picture-hanging hardware. Instead of guessing, measure carefully, mark your holes, drill pilot holes, and drive screws with controlled torque.
For heavy loads, always locate studs or use anchors rated for the weight. A shelf holding three decorative candles is one thing; a shelf holding cookbooks, plants, and your emotional support cast-iron skillet is another. Use a stud finder, level, tape measure, and the correct fasteners for the wall type.
Drywall, Wood, and Masonry Considerations
Drywall needs anchors when you are not fastening into studs. Wood usually benefits from pilot holes. Brick, block, and concrete require masonry bits and compatible anchors. When drilling masonry, keep the tool steady and avoid overheating the bit. If the job becomes slow and smoky, that is not “ambience.” Stop and reassess the bit, speed, and tool choice.
5. Use a Hole Saw for Larger Openings
A hole saw attachment turns your cordless drill/driver into a clean circle-making machine. It is useful for cutting openings in wood, drywall, plastic, and thin panels. Common projects include installing door hardware, running wires through a desk, adding pipe openings in cabinets, creating drainage holes in planters, or cutting access holes for low-voltage cables.
Choose a hole saw sized for the job and material. Clamp the workpiece when possible, keep the drill square to the surface, and let the teeth cut steadily. Do not force the tool, especially with larger hole saws, because they can grab suddenly. For neat results, drill partway from one side until the pilot bit breaks through, then finish from the opposite side to reduce tear-out.
When to Go Slow
Large bits and hole saws need slower speed and more torque. Fast spinning can overheat the bit, scorch wood, melt plastic, or make the drill harder to control. If your drill/driver has a two-speed gearbox, use the low-speed setting for demanding cuts.
6. Scrub Tile, Grout, and Outdoor Surfaces
With a drill brush attachment, your cordless drill/driver becomes a power scrubber. This is one of the most satisfying drill uses because the results are visible quickly. Attach a nylon brush and tackle bathroom tile, grout lines, shower doors, tubs, sinks, patio furniture, trash cans, planters, and even wheel rims.
Use soft brushes on delicate surfaces and stiffer brushes on tougher grime. Always test in a hidden spot first, because aggressive scrubbing can scratch finishes. Pair the brush with a suitable cleaner for the surface. The drill provides rotation; the cleaner does the chemistry. Together, they are the buddy-cop duo your bathroom never asked for but definitely needed.
Avoid using drill brushes on fragile grout, peeling paint, soft stone, or high-gloss finishes unless the brush is specifically safe for that surface. Keep water away from the battery and motor housing, and never submerge the tool.
7. Sand Small Projects and Tight Spots
A cordless drill/driver can handle light sanding when fitted with sanding drums, flap wheels, or small disc sanding attachments. It will not replace a random orbital sander for tabletops or large boards, but it is excellent for curved edges, chair legs, small repairs, inside corners, dowels, crafts, and awkward spots where a full-size sander feels like trying to park a bus in a pantry.
Use lower speed and gentle pressure. Sanding attachments can remove material quickly, and too much force may gouge the surface. Move continuously to avoid creating dips. Start with a coarser grit for shaping and switch to finer grits for smoothing.
Best Sanding Jobs for a Drill/Driver
Try it on wooden handles, small furniture repairs, rounded edges, craft pieces, rust spots, painted metal touch-ups, and detailed areas on railings. Wear eye protection and a dust mask, and work in a ventilated area. Fine dust has a talent for appearing in places you did not know existed.
8. Mix Paint, Stain, Grout, or Thinset
A mixing paddle attachment can save time when stirring paint, stain, drywall compound, grout, or small batches of thinset. This is especially useful when material has separated in the can or bucket. Instead of stirring forever with a stick and wondering why your arm is now a noodle, attach a mixer and let the drill/driver do the work.
Use the low-speed setting and keep the paddle fully submerged before pulling the trigger. Start slowly to avoid splashing. Move the paddle around the container to blend from the bottom and sides. For thick materials, confirm your drill/driver has enough torque and do not overload it. Heavy mixing can stress smaller drills, drain batteries quickly, and overheat motors.
After mixing, clean the paddle immediately. Dried grout or paint on a mixing attachment is basically a sculpture titled “Regret.”
9. Polish, Buff, and Clean Metal Hardware
Polishing pads, buffing wheels, and wire brush attachments expand your cordless drill/driver’s usefulness for restoration and maintenance. You can polish tarnished metal hardware, clean rust from small parts, shine faucet components, refresh tools, remove paint from hinges, and buff automotive or bicycle parts.
For delicate finishes, use soft pads and mild polish. For rust removal, a wire brush can help, but it should be used carefully. Wire bristles can fly off, so safety glasses are non-negotiable. Keep the tool moving and avoid pressing too hard. Let the attachment skim the surface instead of digging into it.
Smart Polishing Examples
Use a soft buffing pad to brighten brass knobs, restore a dull metal mailbox flag, clean garden tool blades, or polish chrome fixtures. For rusty screws, brackets, and hinges, use a wire wheel lightly before applying a protective finish. Small improvements like these can make old hardware look cared for instead of abandoned by civilization.
How to Choose the Right Drill/Driver Attachments
The attachment matters as much as the tool. Keep a basic kit that includes twist drill bits, brad-point bits for wood, masonry bits, driver bits, nut drivers, countersink bits, a hole saw kit, sanding drums, a nylon brush set, and a small mixing paddle. You do not need every accessory on day one. Start with the tasks you do most often, then add attachments as projects demand them.
Pay attention to chuck size. Many household drill/drivers use a 3/8-inch or 1/2-inch chuck. Make sure the accessory shank fits securely. Tighten the chuck firmly, remove the battery when changing attachments if your model recommends it, and inspect bits for damage before use.
Use Speed and Torque the Right Way
High speed is generally better for drilling small holes. Low speed is better for driving screws, using large bits, mixing, and hole saw work. Lower clutch settings protect delicate materials, while higher settings provide more force. When in doubt, start slow and increase gradually. A patient drill user fixes fewer mistakes.
Common Cordless Drill/Driver Mistakes to Avoid
One common mistake is using the wrong bit. A dull bit makes the drill work harder and creates sloppy holes. Another mistake is ignoring pilot holes, especially in hardwood or near board ends. Skipping pilot holes may save 12 seconds now and cost 20 minutes later when the wood splits.
Overdriving screws is another classic problem. If screw heads sink too deep or strip, lower the clutch setting. Also avoid using a drill/driver as a hammer, pry bar, or step stool. It may be tough, but it is not auditioning for a circus act.
Battery care matters, too. Keep batteries charged, store them in a dry place, and avoid extreme heat. If you are doing a longer project, a second battery is worth having. Nothing slows momentum like a dead battery halfway through building a shelf, especially when the shelf parts are spread across the floor like a wooden crime scene.
Real-World Experience: What It Is Like to Rely on a Cordless Drill/Driver
The first thing most people notice after using a cordless drill/driver regularly is how many “small” jobs become easy enough to stop postponing. A loose cabinet pull no longer waits six months for attention. A wobbly chair gets tightened before it becomes a dramatic dining-room event. A set of shelves goes from “someday” to “done before lunch.” The tool removes friction, and in home improvement, friction is often the reason projects never start.
One practical experience many DIYers share is learning to trust the clutch. At first, it is tempting to crank the drill to maximum torque and let it roar. That works until a screw strips, a hinge shifts, or a screw disappears below the surface like it has joined a witness protection program. After a few projects, you learn to start low, test on scrap material, and increase the setting only when needed. That small habit makes the work cleaner and gives you more confidence.
Another lesson is that accessories determine how useful the drill becomes. A drill/driver with only one Phillips bit is helpful, but limited. Add a compact bit case, a countersink bit, a few drill brushes, and a hole saw or two, and suddenly the same tool handles repairs, cleaning, organizing, and weekend building projects. The upgrade is not always a bigger drill; sometimes it is simply the right five-dollar bit.
For furniture assembly, the drill/driver can feel like a miracle, but restraint matters. Use it to run bolts most of the way in, then finish by hand. This prevents overtightening and keeps fragile manufactured wood from crumbling around fasteners. On outdoor projects, the drill saves time driving deck screws, attaching brackets, and predrilling holes in treated lumber. A spare battery is especially helpful outside, where walking back to the charger every 20 minutes quickly becomes cardio you did not request.
Cleaning attachments are another surprisingly useful discovery. A nylon brush on a drill can revive grout, outdoor chairs, and textured surfaces faster than hand scrubbing. The experience is oddly satisfying, almost like pressure washing for people who live in apartments. Still, test first. A stiff brush can damage soft surfaces, and too much speed can sling cleaner around like a tiny cleaning-product tornado.
The biggest experience-based takeaway is simple: keep the drill accessible. If it is buried under holiday decorations, you will not use it. Store it with a charged battery, basic bits, a pencil, and a small tape measure. That little setup turns a cordless drill/driver from “a tool I own” into “a tool I actually use.” Once it becomes part of your normal household routine, you may wonder how you ever lived with only a screwdriver and optimism.
Conclusion
A cordless drill/driver is more than a tool for making holes. It is a fastener driver, furniture assembler, wall organizer, cleaner, sander, mixer, polisher, and general household problem-solver. With the right settings and attachments, it can make DIY projects faster, safer, and cleaner while saving your hands from unnecessary strain.
The key is to use it thoughtfully. Match the bit to the task, choose the correct speed, adjust the clutch, wear eye protection, and do not force the tool. Whether you are hanging shelves, scrubbing grout, polishing hardware, or building a backyard project, your cordless drill/driver is ready to earn its keep. Give it a charged battery and a good bit, and it might become the most useful tool you own.