Paint has escaped the wall. It is now roaming freely through kitchens, bathrooms, laundry rooms, and thrift-store aisles, looking for outdated surfaces to transform. That faded laminate cabinet, beige appliance, or questionable vinyl floor may not need to be ripped out after all.
The catch is that ordinary wall paint cannot handle every assignment. Slick tile, flexible fabric, metal appliances, and high-traffic floors each require a coating designed for their specific material and working conditions. Successful painting projects depend less on artistic talent and more on choosing the right primer, paint, preparation method, and curing time.
Below are seven surprising things you can paint, the best paint for each surface, and the practical steps that help the finish remain attractive after the excitement of makeover day has passed.
Before Painting an “Unpaintable” Surface
Identify the Material
Start by determining exactly what you are painting. Laminate is not solid wood, porcelain is not ordinary ceramic, and vinyl flooring is not the same as luxury vinyl plank. A paint that bonds beautifully to bare metal may peel from plastic before you have finished congratulating yourself.
Consider Heat, Water, and Wear
Next, think about how the surface is used. A decorative backsplash experiences different conditions from a shower floor. A refrigerator door needs a washable coating, while a fireplace screen requires heat-resistant paint. Products should always be approved for the surface and exposure described on their labels.
Respect the Difference Between Dry and Cured
Paint can feel dry while still being soft underneath. Full curing may take days or even weeks, depending on the coating, temperature, humidity, and number of coats. Avoid scrubbing, stacking objects, replacing heavy hardware, or exposing freshly painted surfaces to water until the manufacturer’s recommended curing period has passed.
Research basis:
1. Laminate Furniture and Cabinets
Laminate furniture often looks like wood from across the room, but its factory-smooth surface has little interest in holding ordinary paint. Fortunately, laminate bookshelves, cabinets, desks, and nightstands can be updated when the glossy finish is properly prepared.
What Paint Should You Use?
Use a high-adhesion bonding primer followed by an acrylic urethane cabinet paint, waterborne alkyd enamel, or another durable trim-and-cabinet coating. These products level more smoothly and resist blocking, scratches, and routine cleaning better than standard flat wall paint.
How to Paint Laminate
Remove hardware, clean away wax and grease, and lightly scuff the surface with fine sandpaper until the shine becomes uniformly dull. Do not sand aggressively because laminate is only a thin decorative layer. Remove every trace of dust, apply the bonding primer, and finish with two thin coats of enamel.
For cabinets, label every door and hinge before disassembly. Otherwise, reinstallation becomes a puzzle in which all the pieces look suspiciously identical. Allow the doors to cure on a flat, protected surface before reinstalling them.
Research basis:
2. Ceramic Tile and Tile Floors
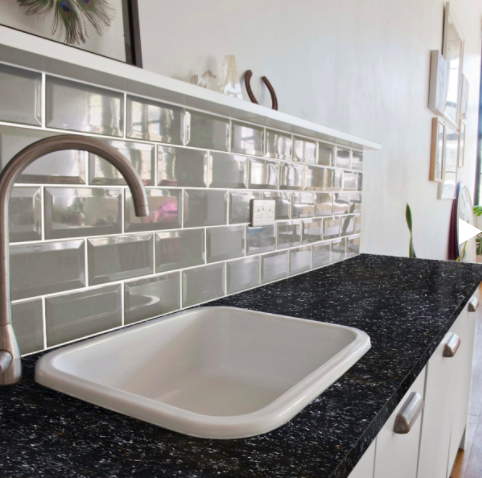
Replacing dated tile can involve demolition dust, damaged drywall, expensive materials, and a weekend that mysteriously consumes three weekends. Painting sound tile is a faster alternative for backsplashes, accent areas, and some floors.
What Paint Should You Use?
Use a coating specifically labeled for tile, such as a two-part epoxy, alkyd urethane enamel, or complete tile-floor refinishing system. Floor tile requires a product rated for foot traffic. Ordinary latex wall paint is not designed to survive abrasion, standing water, or repeated cleaning.
Where Painted Tile Works Best
Painted tile is most dependable on dry backsplashes, fireplace surrounds away from direct flame, laundry-room floors, and lower-traffic bathroom floors. Constantly wet shower walls and shower pans are riskier unless the chosen refinishing system explicitly permits that application.
Preparation Makes or Breaks the Finish
Remove grease, soap residue, mildew, and mineral deposits. Repair cracks or missing grout, dull glossy tile with the recommended abrasive, and apply the specified primer. Use a small brush around grout lines and a smooth roller over broad areas. Wait for the full cure before allowing water, furniture, bath mats, or enthusiastic children onto the surface.
Research basis:
3. Laminate Countertops
Yes, the laminate countertop that has been pretending to be speckled granite since 1997 can be painted. The result will not turn laminate into stone, but it can provide an attractive interim makeover while postponing a major renovation.
What Paint Should You Use?
A coordinated countertop refinishing kit is the most straightforward choice. These systems typically include a bonding base coat and a protective topcoat engineered to work together. Some create solid colors, while others use decorative chips, veining paint, or metallic effects to imitate stone.
How to Get a Durable Result
Degrease the entire counter, paying close attention to the area around the stove and sink. Repair chips, lightly sand when the product requires it, remove dust, and apply thin, even coats. Maintain a wet edge to reduce lap marks, and follow the exact recoat window listed by the manufacturer.
Painted counters should be treated with reasonable kindness. Use cutting boards and trivets, wipe spills promptly, and avoid placing hot cookware directly on the finish. Do not assume a decorative coating is approved for direct food contact; prepare food on a board or other suitable surface.
Research basis:
4. Appliance Exteriors
A functioning refrigerator does not deserve early retirement simply because its color belongs to another decade. Refrigerator doors, dishwasher panels, washing machines, dryers, and other suitable appliance exteriors can often be refinished.
What Paint Should You Use?
Use appliance epoxy or appliance enamel formulated to create a hard, washable finish on metal. For surfaces exposed to elevated temperatures, choose a high-heat coating specifically rated for the expected temperature and application.
What Not to Paint
Do not coat burners, heating elements, oven interiors, cooking surfaces, door seals, ventilation openings, electrical connections, identification labels, or areas that directly contact food. High-heat paint is not automatically food-safe, and many products specifically exclude cooking surfaces.
Application Tips
Unplug the appliance, remove detachable handles when practical, and mask controls and openings carefully. Degrease the exterior, remove rust, and sand according to the coating instructions. Several light spray coats usually produce a smoother result than one heroic coat that immediately begins to sag.
Spray in a ventilated location approved for the product, keep the can moving, and overlap each pass slightly. Reinstall handles only after the coating has hardened sufficiently to resist impressions and scratches.
Research basis:
5. Upholstery, Curtains, and Other Fabric
Painting fabric sounds like a craft project invented during a caffeine emergency, but it can work on lampshades, curtains, canvas accessories, decorative pillows, and selected upholstered furniture.
What Paint Should You Use?
Choose flexible fabric paint, upholstery spray paint, or acrylic paint combined with a textile medium according to the product directions. These options are designed to move with the fibers instead of drying into the texture of a potato chip.
Choose the Right Fabric
Smooth, tightly woven, light-colored fabrics are generally easier to recolor than velvet, leather, heavily textured upholstery, or dark patterned material. A color change within the same general depth is usually more predictable than attempting to turn a black chair bright white.
Test Before Committing
Vacuum the fabric, remove stains, and test the paint in a hidden area. Check the color, texture, transfer resistance, and flexibility after it dries. Apply multiple light layers rather than saturating the material. Brushing the fibers gently between coats can help prevent stiffness.
Fabric painting is best for decorative or lightly used pieces. A formal accent chair may be an excellent candidate; the family sofa used by children, dogs, and a bowl of popcorn every evening is a more ambitious experiment.
Research basis:
6. Vinyl Flooring
Older sheet vinyl can remain firmly attached long after its pattern has stopped being charming. When replacement is not yet practical, a carefully applied floor coating may provide a temporary cosmetic upgrade.
What Paint Should You Use?
Use a bonding primer and porch-and-floor enamel or a complete floor coating system that explicitly lists your type of vinyl as a compatible surface. Manufacturer approval matters because vinyl formulations, factory finishes, and flexibility vary considerably.
When Painting Vinyl Makes Sense
This approach is better suited to laundry rooms, powder rooms, craft rooms, and other moderate-traffic spaces than busy entryways. Avoid painting loose, cushioned, cracked, or moisture-damaged flooring. Painting luxury vinyl plank may void its warranty, so check the flooring manufacturer’s documentation first.
How to Improve Adhesion
Clean the floor thoroughly and remove polish, wax, grease, and residue. Repair loose edges before painting. Degloss the surface only as directed, apply the compatible primer, and build coverage with thin coats. Decorative stencils can disguise seams and create a convincing tile pattern without requiring artistic genius or a geometry degree.
Keep rugs and furniture off the floor until the finish has cured. Add felt pads beneath furniture legs, avoid abrasive cleaners, and expect occasional touch-ups in high-wear areas.
Research basis:
7. Metal Light Fixtures, Hardware, and Fireplace Screens
Replacing every brass light fixture and fireplace screen can become expensive surprisingly quickly. Many metal accents can instead be refinished for a coordinated modern look.
What Paint Should You Use?
For ordinary metal fixtures, use a metal bonding primer followed by spray enamel formulated for metal. Bare aluminum, stainless steel, and certain hard surfaces may benefit from a self-etching or specialized bonding primer. Fireplace screens, radiator covers, and other heat-exposed metal require high-heat paint rated for the intended temperature.
Prepare and Paint Safely
Turn off electrical power before removing a light fixture. Take the fixture apart when possible and protect wires, sockets, screw threads, grounding points, labels, and electrical contacts from paint. Clean away grease and oxidation, remove loose rust, and lightly scuff glossy finishes.
Apply several thin coats from multiple angles. Do not paint lightbulbs, heating elements, gas components, active firebox interiors, or surfaces exposed directly to flame. High-heat coatings may tolerate temperature, but that does not make every hot object an appropriate painting project.
Do You Really Want to Paint the Hardware?
Decorative knobs and low-touch accents are good candidates. Hinges, latches, and moving parts are less reliable because friction can quickly wear through the finish. Sometimes the most professional painting technique is knowing when to put down the spray can and buy a new hinge.
Research basis:
Common Reasons Specialty Paint Projects Fail
The Surface Was Not Completely Clean
Cooking grease, silicone residue, furniture polish, soap film, and invisible hand oils interfere with adhesion. Cleaning should happen before sanding so contaminants are not ground farther into the surface.
The Wrong Primer Was Used
General-purpose primer is not always sufficient for glossy tile, laminate, plastic, or metal. A compatible bonding primer acts as the handshake between a difficult surface and its finish coat.
The Coats Were Too Thick
Heavy coats trap solvents, create drips, and extend curing time. Thin coats may feel slower during application, but they generally produce a smoother and stronger result.
The Surface Returned to Service Too Soon
A countertop may feel dry but still dent beneath a coffee maker. A floor may accept socks but not a heavy table. Follow the full cure time rather than testing the finish repeatedly with a fingernail, which is a surprisingly effective way to create permanent fingernail marks.
A Realistic DIY Experience: What These Projects Teach You
The following composite experience reflects the practical lessons that commonly emerge during specialty-paint projects. The first lesson usually arrives before the paint can is even opened: preparation takes longer than painting. A laminate cabinet door may need only a few minutes of actual rolling, but removing hardware, degreasing corners, sanding edges, vacuuming dust, and arranging a safe drying area can occupy most of the afternoon.
It is tempting to shorten this stage, especially when the cleaned surface already looks respectable. That temptation tends to disappear after seeing paint peel from a greasy corner in one satisfying strip. The experience makes one rule unforgettable: paint cannot form a durable bond with dirt, wax, or soap residue, regardless of what the cheerful label promises.
Another common discovery is that the cheapest brush or roller can make expensive paint look inexpensive. A shedding roller leaves tiny fibers in countertop coatings, while a rough brush can carve visible tracks into cabinet enamel. Testing the applicator on a sample board reveals problems before they become permanent features of the kitchen.
Color also behaves differently on unusual surfaces. A shade that looks calm on a paper sample may appear brighter across an entire appliance or darker on textured fabric. Painting a hidden section or separate sample is not excessive caution. It is far easier to reconsider a six-inch test patch than a full refrigerator that suddenly resembles a giant blueberry.
Fabric projects teach patience in a different way. The first coat can look uneven and alarming because the fibers absorb paint at different rates. Adding more paint immediately may saturate the material and create stiffness. Allowing light coats to dry, brushing the fibers, and evaluating the result in normal room lighting usually produces a softer and more consistent finish.
Floor and countertop projects deliver the most important lesson: curing time is part of the project, not an optional period after it. Planning where to prepare meals, walk, or store furniture prevents frustration. A newly coated counter should not be rushed back into service simply because the kitchen feels inconvenient without it.
The most satisfying moment is often not the final coat but the first week of normal use, when the painted surface remains intact. That is when careful cleaning, compatible primer, thin application, and patient curing prove their value. A successful makeover rarely looks dramatic while it is happening. It looks like a sequence of slightly boring steps performed correctly.
Specialty painting also changes the way homeowners evaluate old belongings. An ugly surface is not automatically a useless surface. A sturdy laminate dresser, sound tile floor, or reliable appliance may still have years of service left. Paint cannot repair structural damage, but it can separate a genuine replacement problem from a simple color problemand color problems are much more fun to solve.
Conclusion
Many household surfaces once considered impossible to paint can be transformed with modern bonding primers and specialty coatings. Laminate, tile, countertops, appliances, fabric, vinyl floors, and metal fixtures all require different products, but the basic formula remains consistent: identify the material, clean it thoroughly, prepare it correctly, apply compatible paint in thin coats, and allow it to cure completely.
Paint is not a miracle repair for broken, unsafe, or moisture-damaged materials. Used thoughtfully, however, it is one of the most affordable ways to extend the life of functional surfaces and give a room an entirely different personality.