Google Docs is famous for being simple, clean, and pleasantly un-dramatic. Then you try to place one picture on top of another, and suddenly it behaves like a cat sitting exactly where you need to type. The good news: you absolutely can overlay pictures in Google Docs. The better news: you do not need a graphic design degree, a third-party add-on, or a suspicious browser extension named something like “Super Image Wizard 9000.”
Whether you are making a school handout, a business proposal, a photo label, a newsletter, a digital worksheet, a cover page, or a quick visual mockup, Google Docs gives you a few practical ways to layer images. The trick is knowing which method fits your goal. If you want a picture over text, the built-in image layout options work well. If you want one picture over another picture, the Google Docs Drawing tool is usually the most reliable choice. If you want a subtle background image, you may need to use transparency, image positioning, or a watermark-style layout.
This guide explains how to overlay pictures in Google Docs step by step, including the easiest methods, common problems, formatting tips, and real-world lessons that make your final document look polished instead of “I fought the toolbar and the toolbar won.”
What Does It Mean to Overlay Pictures in Google Docs?
To overlay pictures means to place one visual element on top of another. In Google Docs, that might mean placing a logo over a photo, putting a transparent label on a screenshot, adding a signature image over a document graphic, or stacking decorative elements on a cover page. It can also mean placing an image in front of or behind text.
Google Docs is primarily a word processor, not a full design platform like Photoshop, Canva, or Illustrator. That matters because image layering in Docs is useful but not unlimited. You can create clean overlays, but complex editing tasks such as masking, advanced blending, deep background removal, or precise pixel-level work are better handled in a design app before inserting the finished image into Docs.
Still, for everyday documents, Google Docs can do more than many users realize. You can move images freely, resize them, adjust transparency, use text wrapping, and create layered image compositions inside the Drawing tool.
Before You Start: Make Sure Your Document Is in Pages Format
If you click an image and cannot find the wrapping or positioning options, your document may be in Pageless format. Google Docs has two layout modes: Pages and Pageless. Pageless is great for wide tables and flexible writing, but some image positioning features are limited there. For overlays, Pages format is usually the safer option.
How to switch to Pages format
- Open your document in Google Docs.
- Click File.
- Select Page setup.
- Choose Pages.
- Click OK.
You can also look under the Format menu for a quick option to switch between Pages and Pageless format. Once the document is in Pages format, image wrapping, position controls, and front-or-behind-text options are much easier to use.
Method 1: Overlay a Picture Using “In Front of Text”
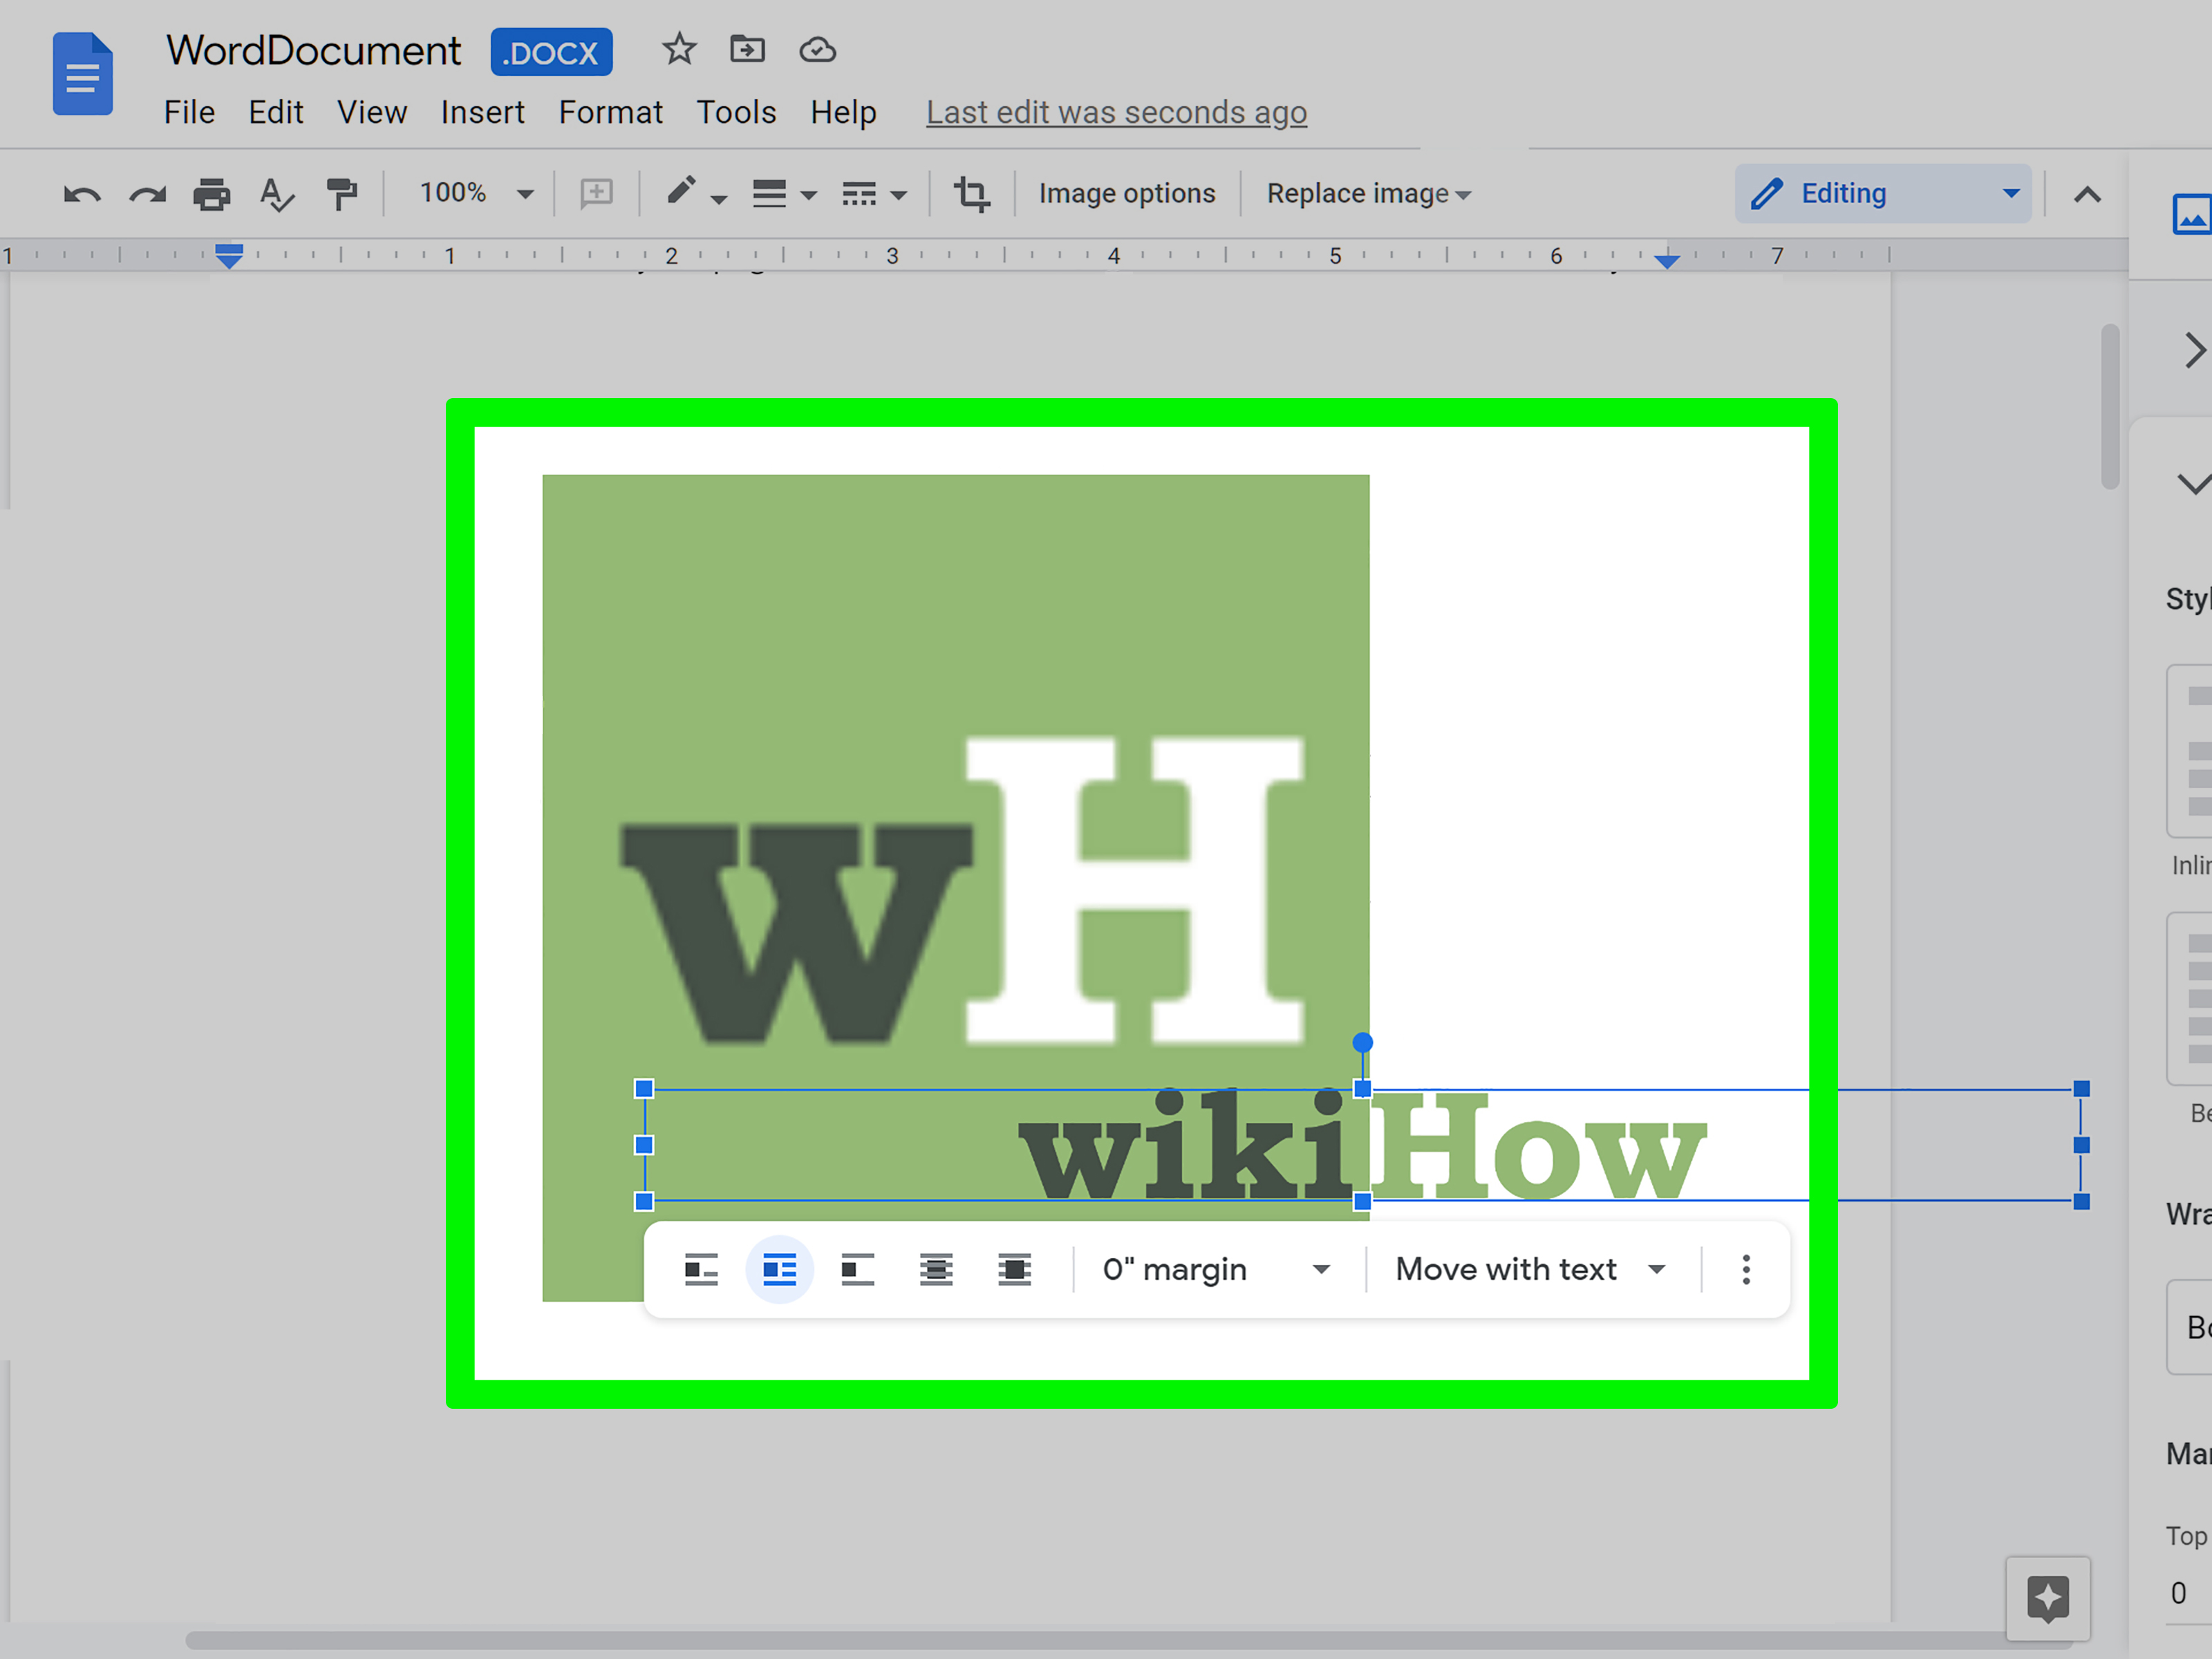
The fastest way to make an image float over content in Google Docs is to use the In front of text option. This works well when you want to place a small image, icon, badge, arrow, logo, or signature on top of a section of your document.
Steps to place a picture in front of text
- Open your Google Docs document.
- Go to Insert > Image.
- Choose where your image comes from: upload from your computer, Google Drive, Photos, a URL, or web search.
- Click the image after it appears in the document.
- Use the small image toolbar that appears below the image.
- Select In front of text.
- Drag the image to the exact spot where you want it to appear.
- Resize it using the corner handles.
This option makes the picture behave like a floating object. It can sit over paragraphs, headings, tables, or other document elements. For example, you could place a “Draft” stamp image over a proposal, add a small checkmark over a screenshot, or position a logo over a header area.
When this method works best
Use this method when the overlay does not need to be grouped permanently with another picture. It is excellent for quick visual placement, especially when you are working on a document that will be exported to PDF or printed.
The main downside is that floating images can shift if you heavily edit the surrounding content. If you delete several paragraphs above the image, the layout may need a quick adjustment. Think of it as placing a sticker on a page: simple, flexible, and occasionally in need of a tiny nudge.
Method 2: Put One Picture Behind Text
Sometimes the overlay you want is not a picture on top of content, but a picture behind it. This is useful for background graphics, soft visual textures, certificate designs, branded letterheads, and photo-based title pages.
Steps to place an image behind text
- Insert your image into Google Docs.
- Click the image.
- Choose Behind text from the image layout options.
- Drag the image into position.
- Open Image options if needed.
- Adjust Transparency, Brightness, or Contrast so the text remains readable.
The most important rule here is readability. A beautiful image behind your text is great until your reader needs a magnifying glass, heroic patience, and maybe a snack break to decode the sentence. If the picture is busy, increase transparency or use a light-colored overlay shape in the Drawing tool before adding text.
Best uses for behind-text images
This method is ideal for subtle backgrounds, branded templates, invitations, one-page flyers, worksheets, and title pages. It is not ideal for long reports unless the background is very faint. A high-contrast photo behind five pages of text can quickly go from “creative” to “visual obstacle course.”
Method 3: Overlay Pictures with the Google Docs Drawing Tool
If your goal is to place one picture directly on top of another picture, use the Drawing tool. This is the most dependable method because it lets you build a mini design canvas inside your document. You can add multiple images, arrange them, add shapes, insert text boxes, and then save the entire composition as one object in your Google Doc.
Steps to overlay pictures inside Drawing
- Place your cursor where you want the final image composition to appear.
- Click Insert > Drawing > New.
- In the Drawing window, click the Image icon.
- Upload or select your first image. This will usually be your background image.
- Click the Image icon again and add your second image.
- Drag the second image on top of the first one.
- Resize and position the overlay image using the corner handles.
- Use order controls such as bring forward or send backward if the wrong image appears on top.
- Add text boxes, arrows, shapes, or lines if needed.
- Click Save and Close.
Your layered design now appears in the Google Doc as a single Drawing object. If you need to revise it later, click the object and choose Edit. This reopens the Drawing window so you can move images, change text, or adjust the layout.
Example: Create a labeled screenshot
Suppose you are writing a tutorial and want to show where users should click inside a screenshot. Insert the screenshot as the base image in Drawing. Then add a small arrow image, a circle shape, or a numbered label on top of the screenshot. Save and close. Now your document has a clean instructional graphic that is much easier to understand than a lonely screenshot with a paragraph saying, “Look somewhere in the upper-right area, but not too far right, you’ll know it when you see it.”
Method 4: Overlay Text on a Picture
Overlaying text on an image is one of the most common reasons people search for this topic. Google Docs gives you two good options: use In front of text for simple document layering, or use the Drawing tool for a more stable design.
Using the Drawing tool for text over an image
- Click Insert > Drawing > New.
- Insert your image.
- Click the Text box icon.
- Draw a text box over the image.
- Type your text.
- Adjust the font, size, color, and alignment.
- Click Save and Close.
This is the better method for banners, labels, invitations, quote images, class worksheets, and cover graphics. Because the image and text are saved together as one Drawing object, they are less likely to drift apart when you edit the document later.
Design tip for readable text overlays
If your text disappears into the photo, add a semi-transparent shape behind the words. For example, place a rectangle over part of the image, set its fill color, reduce the opacity if available, and place your text box above it. This creates contrast without covering the whole image. It is the document-design equivalent of turning on the lights instead of asking readers to squint politely.
Method 5: Use Transparency for a Softer Overlay
Transparency is one of the most useful image settings in Google Docs. It helps you create watermark effects, subtle backgrounds, or layered visuals where both images remain visible.
How to adjust image transparency
- Click the image you want to adjust.
- Select Image options.
- Open the Adjustments section.
- Move the Transparency slider until the image looks right.
- Fine-tune brightness and contrast if needed.
For a background image behind text, transparency often needs to be fairly high. For a logo overlay, moderate transparency can make the design look more professional. For an image-on-image collage, transparency can help create a blended effect, although Docs is not designed for advanced image compositing.
How to Keep Overlaid Pictures from Moving Around
One of the biggest frustrations with image overlays in Google Docs is movement. You finally place the image perfectly, type one extra sentence above it, and suddenly your layout has taken a small vacation. To reduce this problem, use the right positioning settings.
Use “Fix position on page” when available
After selecting an image, choose a layout option such as Wrap text or Break text, then look for positioning choices. Fix position on page helps keep an image anchored to a specific spot on the page rather than moving with nearby text.
Use Drawing for grouped overlays
If several pictures need to stay together, build them in Insert > Drawing > New. This is the closest thing to grouping images in Google Docs. Once saved, the layered visuals behave as a single object in the document.
Export to PDF before sharing final designs
If your layout is final and you do not want collaborators accidentally moving images, export the document as a PDF. This preserves the visual layout and prevents the classic “someone dragged the logo into the paragraph” emergency.
Common Problems and How to Fix Them
The image layout options are missing
Your document is probably in Pageless format. Switch to Pages format by going to File > Page setup > Pages. After that, click the image again and check the image toolbar.
I cannot select an image behind text
Images placed behind text can be tricky to grab. Try right-clicking near the image and looking for an option to select the image. If that does not work, use the undo command if you just placed it, or temporarily move nearby text so you can access the image more easily.
My overlay looks blurry
Start with a larger, sharper image. Stretching a small image makes it blurry. For logos, use a high-resolution PNG when possible. If you are working with screenshots, capture them at full size and avoid resizing them too aggressively.
The top image covers important content
Reduce the size, increase transparency, or move the overlay to a less important area. For text-heavy documents, place decorative overlays in margins, headers, footers, or title sections rather than in the middle of paragraphs.
The images will not stay aligned
Use the Drawing tool. Place both images inside the same Drawing canvas, arrange them, and save them as one object. This makes the overlay much more stable.
Best Practices for Clean Image Overlays
The best overlays look intentional. They support the document instead of wrestling with it. Before adding layered images, decide what the overlay is supposed to do. Is it explaining something? Branding the page? Creating visual interest? Highlighting a detail? If the overlay does not help the reader, it may just be decoration wearing a tiny hat.
Use consistent spacing. If you place a logo in the upper-right corner of one page, keep it in the same position on similar pages. Use contrast wisely. Dark text needs a light background; light text needs a dark background. Avoid placing important text over complicated photos unless you add a shape or transparency effect behind it.
Keep file size in mind, too. Multiple large images can make a Google Doc slower to load, especially for collaborators with weaker internet connections. Compress images before uploading if the document becomes heavy. For professional documents, always preview the exported PDF before publishing or sending it to clients.
When Google Docs Is Not Enough
Google Docs is excellent for lightweight image overlays, but it is not always the final stop. If you need advanced layer control, image masking, background removal, filters, shadows, or precise object alignment, create the graphic in a dedicated design tool first. Then export it as a PNG or JPEG and insert the finished image into Google Docs.
This workflow is often faster than fighting with Docs for complex designs. Use Docs for writing, layout, collaboration, and simple visuals. Use a design tool for advanced image editing. In other words, do not ask a toaster to make soup. It may try, but everyone will be uncomfortable.
Experience Notes: What Actually Works Best When Overlaying Pictures in Google Docs
In real document workflows, the best method depends less on what is technically possible and more on how the document will be used. A quick internal note, a classroom worksheet, and a polished client proposal all have different needs. The fastest option is not always the most stable option, and the prettiest option is not always the easiest to edit later.
For simple one-page documents, using In front of text is usually enough. It is quick, flexible, and easy to explain to someone else. If you are adding a small icon over a paragraph, placing a signature image near a name, or dropping a badge onto a cover page, this method saves time. The main habit that helps is zooming in before you position the image. At 100% zoom, tiny alignment issues are easy to miss. At 150% or 200%, you can place the object more accurately and avoid the “why is this three pixels too low?” moment later.
For anything that needs to stay locked together, the Drawing tool is the better choice. This is especially true for tutorials, worksheets, labels, annotated screenshots, and visual examples. When images and text boxes are placed separately in the main document, they can shift as the document changes. When they are placed together inside Drawing, they behave more like a single graphic. That one difference can save a lot of layout repair time.
Another practical lesson is to prepare images before inserting them. Cropping, resizing, and renaming files ahead of time makes the overlay process smoother. If the background photo is too dark, brighten it before uploading. If a logo has a white box around it, use a transparent PNG instead. If the screenshot includes unnecessary browser tabs, crop them out first. Google Docs can handle basic adjustments, but clean source images make everything easier.
Readability is the rule that beats all other rules. A stylish overlay is not successful if people cannot read the document. When adding text over a photo, use a solid or semi-transparent shape behind the text. When placing a background image behind paragraphs, make it very light. When adding a logo over a page, keep it away from the main reading path unless it is meant to function as a watermark.
Collaboration also changes the strategy. If several people will edit the document, avoid delicate floating layouts unless the design is already final. Someone may add a sentence, paste a table, or change a heading size, and the overlay may move. In shared documents, use Drawing objects or export the final version as a PDF before distribution. This keeps the design from being accidentally rearranged by a well-meaning teammate who only wanted to “fix one typo.” Famous last words.
Finally, always test the final output. A layout can look good inside Google Docs but slightly different after download, print, or PDF export. Before publishing, use File > Download > PDF Document and inspect the result. Check image placement, text contrast, page breaks, and margins. If everything looks clean in the PDF, your overlay is ready for the world.
Conclusion
Learning how to overlay pictures in Google Docs gives you more control over the way your documents look and communicate. For quick layering, use In front of text or Behind text. For picture-on-picture designs, use Insert > Drawing > New. For subtle backgrounds, adjust transparency and contrast. For stable layouts, keep your document in Pages format and group layered elements inside the Drawing tool whenever possible.
Google Docs may not be a professional graphic design suite, but it is surprisingly capable when you know where the image tools live. With the right method, you can create clean overlays for reports, guides, flyers, worksheets, proposals, and web-ready documents without leaving your browser or summoning the ancient spirits of desktop publishing.