Want to know how to make a crystal ball that looks mysterious, glows beautifully, and does not require you to become a medieval glassblower? Excellent. You are in the right enchanted corner of the internet.
A real crystal ball is usually made from polished quartz, glass, or another clear mineral or synthetic material. Making one from raw stone at home would require lapidary equipment, grinding wheels, polishing compounds, patience, safety gear, and the emotional strength to spend days making a sphere that still somehow looks like a potato. For most DIY lovers, the smarter route is to create a convincing decorative crystal ball using a glass globe, acrylic ornament, snow globe blank, or clear plastic sphere.
This guide shows you how to make a DIY crystal ball for Halloween decor, fantasy room styling, party centerpieces, theater props, photography, or just because your bookshelf needs a little “fortune teller with excellent taste” energy. We will cover the best materials, a simple glowing version, a swirling galaxy version, a fancy base, safety tips, troubleshooting, and styling ideas.
What Kind of Crystal Ball Are We Making?
Before you start, decide what “crystal ball” means for your project. A crystal ball can be clear and elegant, smoky and spooky, colorful and magical, or glowing like it knows who ate the last cookie. Your design choice affects your supplies.
Option 1: Glowing Crystal Ball
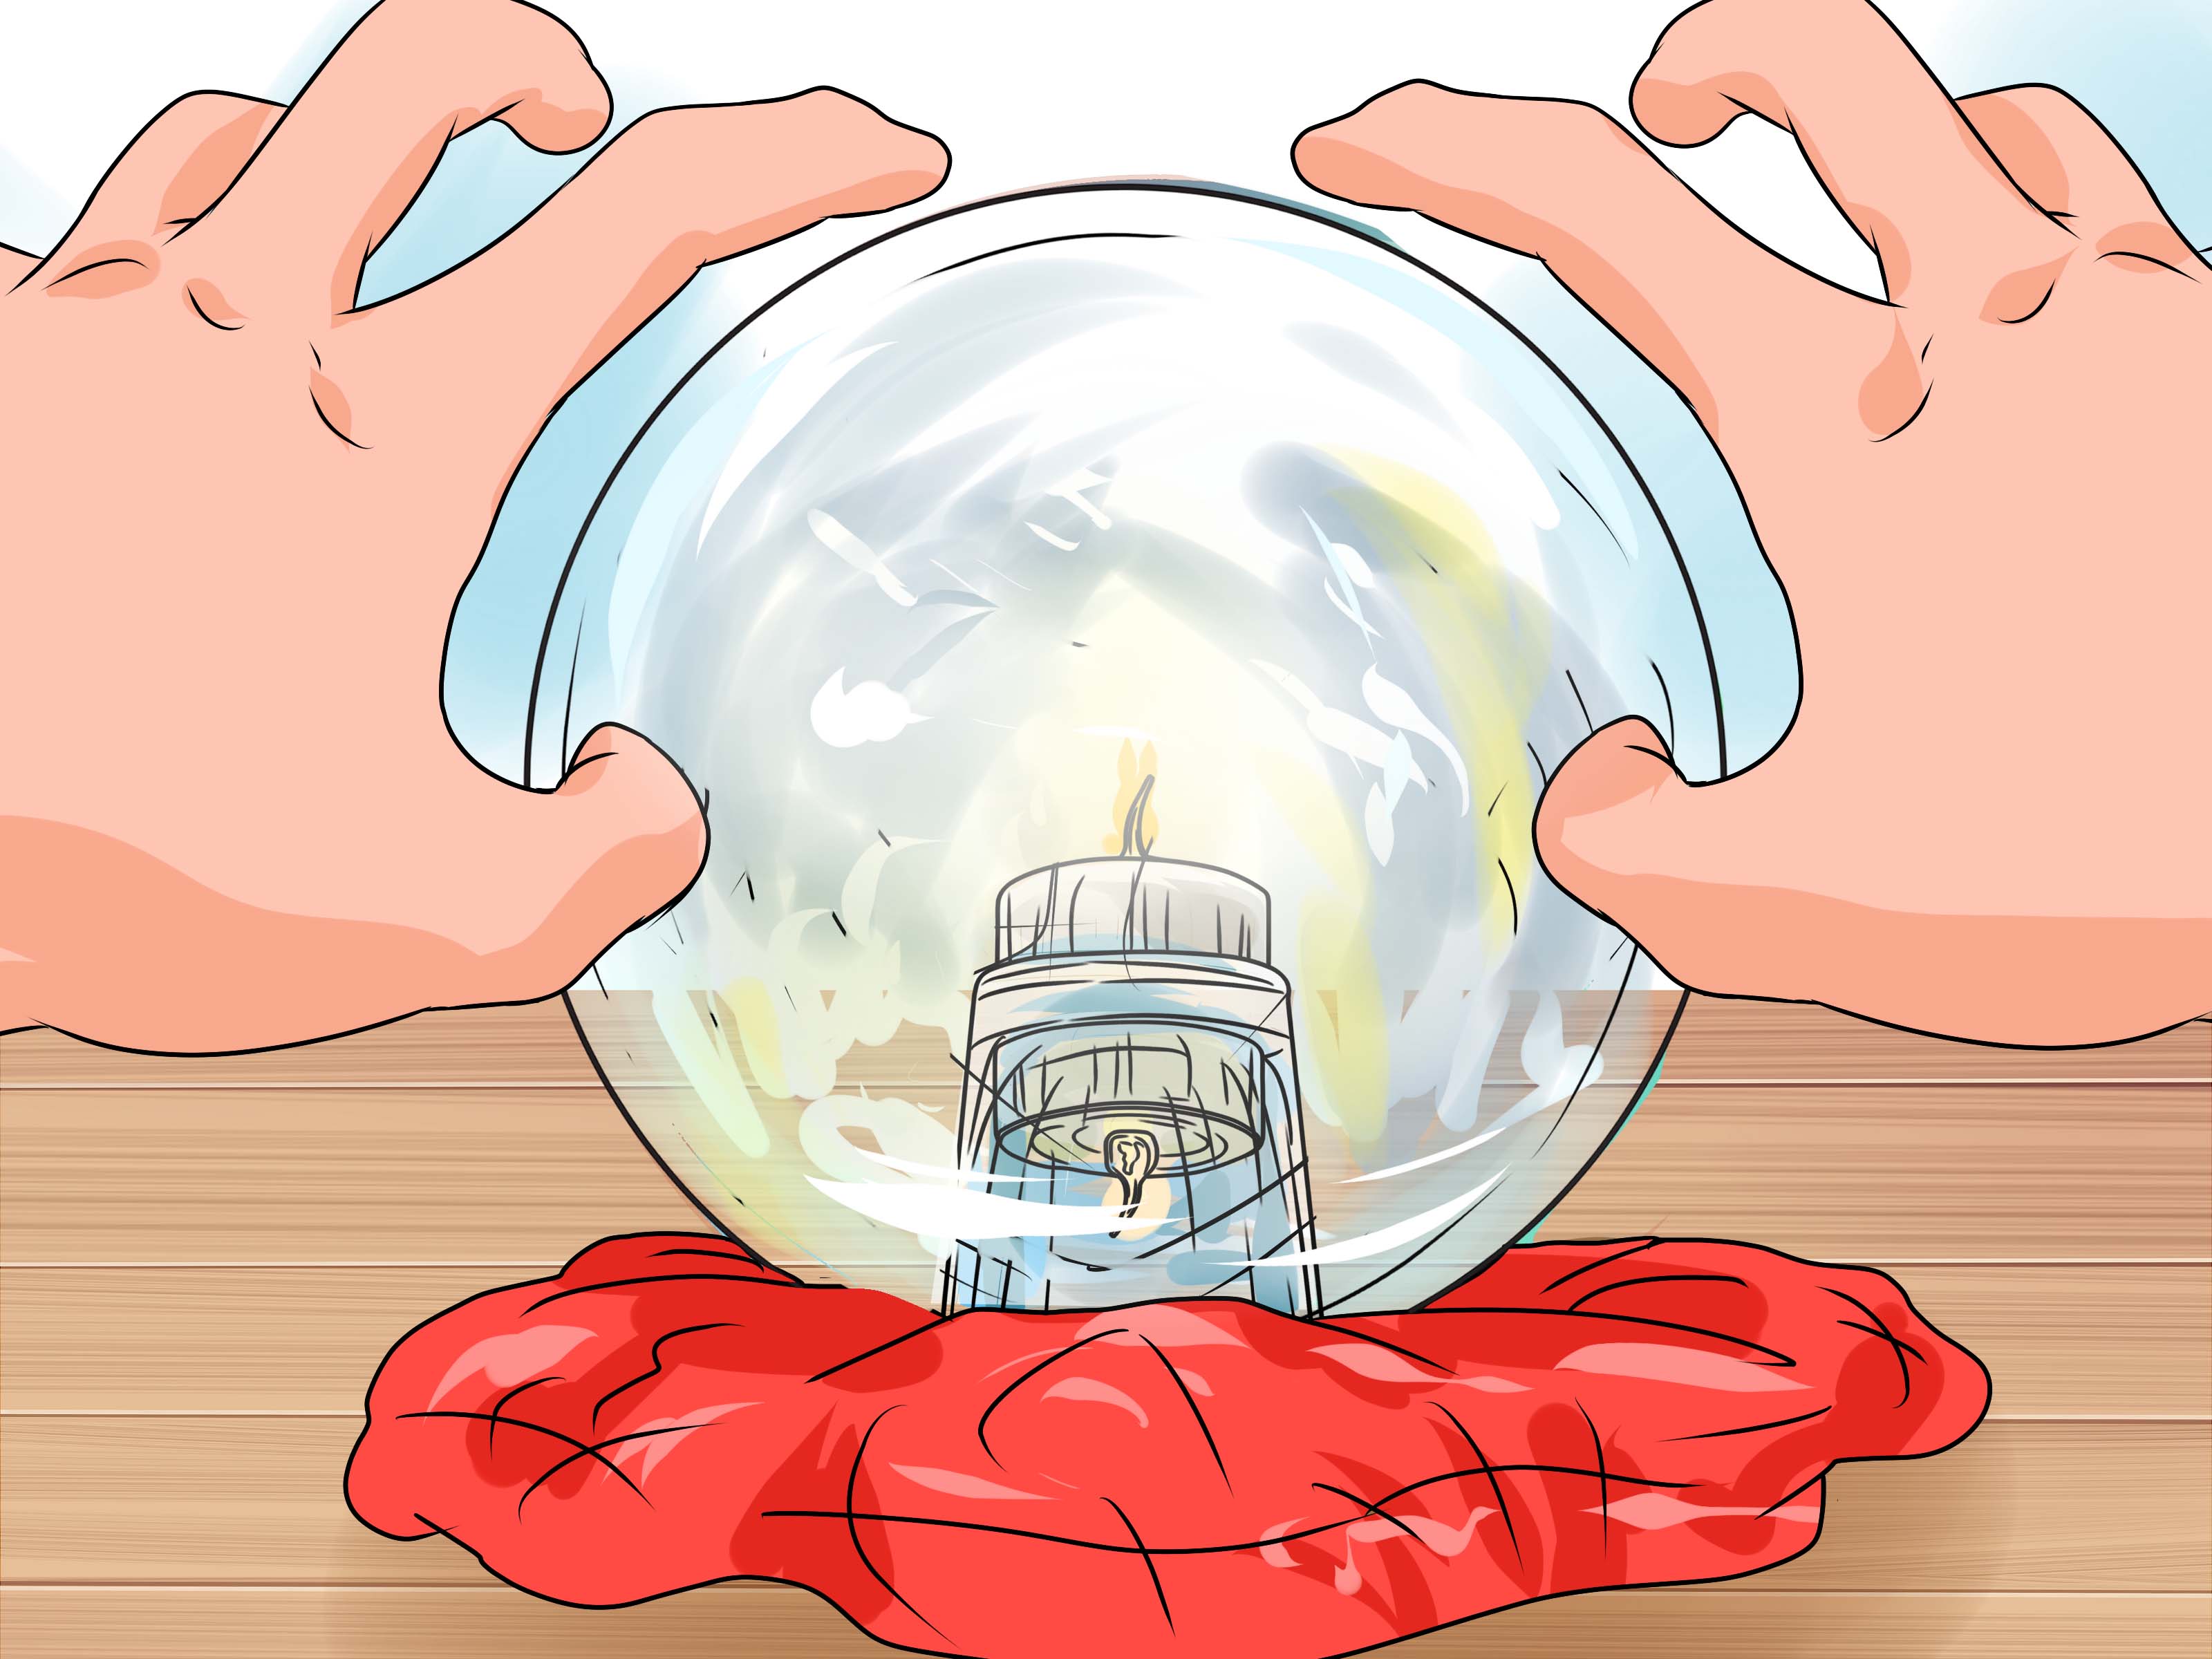
This version uses a glass light globe or clear plastic ornament with battery-powered fairy lights or an LED tea light inside. It is fast, dramatic, and perfect for Halloween, stage props, haunted house displays, or moody mantel decor.
Option 2: Galaxy Water Crystal Ball
This version uses a plastic water globe, cotton, water, food coloring, and glitter to create cloudy swirls inside the ball. It looks like a tiny nebula got trapped in a snow globe and decided to become home decor.
Option 3: Frosted or Mercury Glass Crystal Ball
This version uses frosted glass spray paint, sea-glass paint, or mirror-effect spray paint to create an antique, misty, or reflective look. It is best for decorative centerpieces and gothic table settings.
Option 4: Garden Gazing Ball Style
This is a larger outdoor-inspired version made by covering a sphere, bowling ball, foam ball, or old orb with glass gems, mirror tiles, metallic paint, or decorative stones. It is less “fortune teller tent” and more “my garden has secrets.”
Materials You Will Need
Here is a flexible supply list. You do not need every item; choose based on the version you want to make.
Basic Crystal Ball Supplies
- Clear glass light globe, acrylic sphere, plastic ornament, or empty snow globe
- Battery-powered fairy lights, LED tea light, or color-changing tea light
- Cotton balls, fiberfill, or sheer white tissue for cloud effects
- Glitter, mica powder, iridescent flakes, or tiny star confetti
- Food coloring or liquid watercolor for a galaxy effect
- Hot glue, strong craft glue, or super glue
- A candle holder, small bowl, pedestal, thrifted cup, or cardboard tube for the base
- Acrylic paint in black, gold, silver, bronze, or deep purple
- Paintbrushes, paper towels, and a tray or old newspaper
Optional Decorative Supplies
- Frosted glass spray paint
- Mirror-effect spray paint
- Ribbon, beads, faux gems, charms, or costume jewelry
- Skeleton hands, faux vines, faux spiders, or Halloween rings
- Craft foam or felt pads to keep the ball from sliding
- Clear sealant for painted bases
Safety First: The Crystal Ball Sees All, Including Bad Choices
DIY crafts are fun, but paint fumes, hot glue, and glass shards are not part of the aesthetic. Work in a ventilated area, especially when using spray paint, sealants, or resin. If you spray paint, do it outdoors whenever possible, or open windows and doors and protect surrounding surfaces. Wear gloves when using strong adhesives, and never let kids handle hot glue guns or super glue without close supervision.
If you use glass, handle it carefully and inspect it for cracks before starting. Acrylic and plastic spheres are lighter and more shatter-resistant than glass, but they scratch more easily, so clean them with a soft cloth instead of a scratchy sponge. If you choose epoxy resin for a more advanced crystal ball project, wear nitrile gloves, protect your eyes, and work with good airflow. Resin is not the best beginner method for this project; a clear globe and LED lights give you nearly the same wow factor with far less drama.
How to Make a Glowing Crystal Ball
This is the easiest and most reliable DIY crystal ball method. It looks expensive, photographs well, and can be finished in less than an hour, not counting paint drying time for the base.
Step 1: Choose Your Globe
Start with a glass light shade, plastic ornament, or acrylic globe. A white frosted globe creates a soft, mystical glow. A clear globe shows the lights more sharply. A plastic ornament that opens in half is useful if you want to add fiberfill, glitter, or a tea light inside.
For a classic fortune teller look, choose a round globe between 4 and 8 inches wide. Smaller globes work well as table decorations. Larger globes make excellent party props, but they need a sturdier base. The ball should sit securely without wobbling. A crystal ball that rolls off the table is not mystical; it is just an insurance claim in training.
Step 2: Clean the Globe
Wipe the inside and outside of the globe with a microfiber cloth. If it is glass, you can use a small amount of glass cleaner. If it is acrylic, use mild soap and water, then dry it gently. Avoid rough towels because acrylic can scratch easily.
Step 3: Add the Glow
Place battery-powered fairy lights, a small puck light, or a color-changing LED tea light inside the globe. Purple, blue, white, and green lights tend to look the most magical. Warm white lights make the crystal ball look elegant and antique. Red lights make it look like it has a dramatic backstory and probably knows your browser history.
If you use fairy lights, coil them loosely so the light spreads evenly. Put the battery pack near the opening or hide it under the base so you can turn it on and off. Do not use real candles inside or under the globe. Heat and enclosed glass are not a friendly couple.
Step 4: Add Smoke, Clouds, or Mist
For a foggy look, add a small amount of fiberfill, stretched cotton balls, white tulle, or sheer tissue inside the globe. Less is usually better. You want mysterious mist, not a laundry accident. Pull the cotton apart into wispy strands so the light can pass through. Add a pinch of glitter if you want sparkle, but do not pour in half the jar unless your goal is “craft store explosion.”
Step 5: Make a Stable Base
A good base makes the whole DIY crystal ball look intentional. Try a thrifted candle holder, small metal bowl, wooden ring, ceramic cup, painted flowerpot, or cardboard tube. The base should support the sphere and hide any opening, battery pack, or glue marks.
Paint the base black for a gothic look, gold for an antique fortune teller style, silver for moonlit elegance, or deep purple for a wizard-shop vibe. Dry brushing black paint over gold or bronze creates an aged metal effect. Add beads, trim, charms, or faux gems around the rim to make it look like something discovered in an attic trunk labeled “Absolutely Do Not Open.”
Step 6: Secure the Ball
Place craft foam, felt, or a ring of hot glue on the base where the globe will sit. This prevents slipping. If you want the ball to be removable for battery changes, do not glue the globe permanently. If your light switch is accessible and you are sure about the design, you can glue the globe in place.
How to Make a Galaxy Crystal Ball With Water
If you want a colorful crystal ball that looks like a cosmic storm, use a water globe method. This is a great craft for kids, parties, or fantasy-themed rooms.
Step 1: Test the Globe for Leaks
Fill your empty plastic snow globe with water, close it, and gently turn it upside down over a sink. If it leaks, fix the seal or choose another globe. Testing first saves you from discovering a puddle under your “magical” centerpiece later.
Step 2: Prepare the Cotton
Stretch cotton balls into thin, cloud-like strands. Pack them loosely into the globe. The cotton helps hold color in soft layers and creates the cloudy look that makes the globe feel deep and dimensional.
Step 3: Mix Your Colors
In separate cups, mix water with food coloring or liquid watercolor. Good combinations include blue and purple, teal and green, pink and violet, or smoky gray and silver. Make the colors slightly darker than you think you need because the cotton will soften them.
Step 4: Add Glitter and Colored Water
Sprinkle glitter into the globe, then slowly pour in small amounts of colored water, alternating colors as you go. Use a chopstick or skewer to guide color through the cotton. Do not shake the globe aggressively after filling, or the colors may blend into one muddy shade. That shade is usually called “regret.”
Step 5: Seal the Globe
Fill the globe completely, close it tightly, and wipe away excess water. If you want it to be permanent, seal the lid with strong waterproof glue according to the product instructions. Let it dry fully before turning the globe upright.
How to Make the Crystal Ball Look Expensive
The secret to a professional-looking DIY crystal ball is not expensive supplies. It is layering. Combine glow, texture, height, and a base that looks like it belongs with the orb. A plain plastic ball on a table says “craft project.” A glowing orb on an aged pedestal says “please step into my mysterious parlor.”
Use a Thrifted Base
Thrift stores are treasure caves for crystal ball bases. Look for candle holders, brass dishes, small compotes, old goblets, short vases, or decorative bowls. Even if the color is wrong, paint can fix almost anything except your decision to craft at midnight before a party.
Add Antique Paint Effects
Paint the base metallic gold, bronze, or silver. Once dry, lightly brush black paint into the grooves and wipe away the excess. This makes the piece look aged and detailed. You can also add green-blue paint in tiny amounts to imitate patina on bronze.
Try a Frosted Finish
For a soft, mystical look, spray the outside of a clear glass ball with frosted glass spray paint. Apply thin coats instead of one heavy coat. Heavy spray paint can drip, pool, or turn your orb into something that looks like it sneezed.
Create a Faux Mercury Glass Effect
For an antique mirrored look, lightly mist the globe with a vinegar-and-water mixture, then apply mirror-effect spray paint according to the paint instructions. Blot lightly with a paper towel for a mottled finish. This works best on glass ornaments or smooth glass surfaces. Always spray in a ventilated area.
Common Mistakes and How to Fix Them
The Ball Looks Too Cloudy
You probably used too much cotton, paint, or filler. Remove some material if possible. If the outside is over-frosted, you may need to start with a new globe or turn it into an intentionally smoky Halloween prop.
The Lights Are Too Obvious
Diffuse the light with fiberfill, frosted film, tissue, or a frosted globe. Fairy lights look best when coiled loosely instead of bunched in one glowing knot.
The Base Looks Cheap
Add texture. Glue on rope, beads, trim, raised stickers, costume jewelry, or cardboard shapes before painting. Once everything is painted the same metallic color and aged with black paint, even humble materials can look surprisingly fancy.
The Globe Keeps Sliding
Add felt pads, craft foam, a rubber ring, or a raised bead of hot glue to the top of the base. For large globes, choose a base with a wide footprint so the finished crystal ball does not tip over.
Creative Crystal Ball Ideas
Once you know how to make a crystal ball, you can customize it for almost any theme. A blue-and-silver globe works for winter decor. A purple glowing globe is perfect for Halloween. A clear globe on a brass base looks elegant on a bookshelf. A green glowing orb with plastic vines belongs in a witchy garden scene. A pink and gold version can even work for a whimsical birthday party.
For a theater prop, keep the ball lightweight and durable by using acrylic instead of glass. For photography, place the crystal ball near soft light and avoid cluttered backgrounds. For a party centerpiece, group three different sizes together and add candles nearby, but not directly under the globe. Glass spheres can focus sunlight, so never leave a clear crystal ball in direct sun on a windowsill or near flammable materials.
Experience Notes: What Actually Makes a DIY Crystal Ball Work
After making and studying several crystal ball styles, the biggest lesson is this: the base matters more than beginners expect. The orb gets all the attention, of course, because it glows and sparkles and acts like it has secrets. But the base is what sells the illusion. A beautiful globe sitting on a random plastic lid still looks like a beautiful globe sitting on a random plastic lid. Put that same globe on a painted candle holder with a little aged gold detail, and suddenly it looks like it came from a fortune teller’s velvet-draped table.
The second lesson is to use light gently. The best glowing crystal balls do not blast light like a tiny emergency vehicle. They glow from within. A single LED tea light can look better than a tangled bundle of bright lights if the globe is frosted or filled with wispy fiberfill. If the light source is too harsh, add diffusion. Cotton, frosted glass, vellum, tissue, or even a thin layer of white plastic can soften the effect. The goal is atmosphere, not interrogation room.
For water-filled crystal balls, patience is everything. Pouring colored water too quickly can mix the colors into a single dull tone. Adding small amounts slowly creates layered clouds. Cotton should be stretched thin and packed evenly. If you leave big clumps, the finished globe can look lumpy instead of magical. Glitter is also best used lightly. A little shimmer creates depth; too much glitter turns the project into a snow globe that just won a disco competition.
Another practical discovery: removable parts are your friend. If you use battery-powered lights, design the base so you can reach the switch or replace batteries later. Many beginners glue everything shut because it looks clean on day one. Then, when the batteries die, the crystal ball becomes a very pretty paperweight with trust issues. Hide the battery pack behind the base, underneath a cloth, or inside a hollow pedestal with an access opening.
Finally, imperfections often help. A few cloudy swirls, uneven metallic brush marks, or tiny speckles can make the crystal ball look older and more mysterious. Do not panic if the finish is not perfectly smooth. Real mystical objects in movies rarely look factory-fresh. They look handled, storied, and slightly dramatic. That is good news for DIY crafters, because “slightly dramatic” is usually where handmade projects naturally live.
Conclusion
Learning how to make a crystal ball is less about creating a flawless sphere from raw crystal and more about building a convincing illusion. With a clear globe, soft lighting, a stable base, and a few decorative tricks, you can make a DIY crystal ball that looks magical without needing a workshop full of gem-cutting equipment.
For the fastest project, use a glass light shade, fairy lights, and a thrifted candle holder. For a colorful kid-friendly version, use a plastic water globe with cotton, colored water, and glitter. For a more dramatic display, add a frosted or faux mercury glass finish and an aged metallic base. Keep safety in mind, especially when working with glass, hot glue, spray paint, super glue, or resin.
Note: This project is intended for decorative, craft, party, photography, and prop-making purposes. It will not predict the future, but it may accurately reveal that guests are about to ask, “Wait, you made that?”