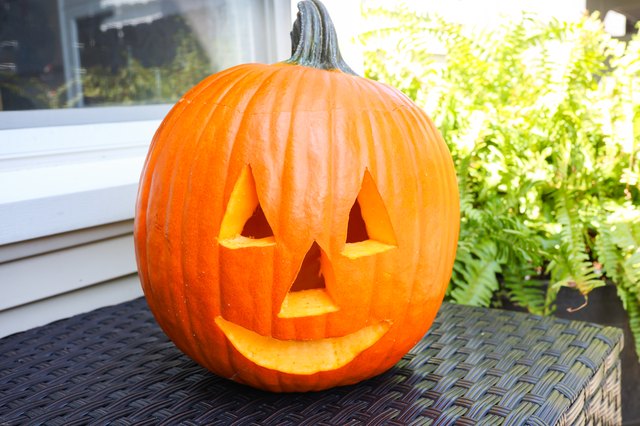
A Halloween pumpkin has a tough job. One day it is sitting proudly at the pumpkin patch, minding its orange business. The next, it is on your kitchen table with a scoop in its head, a crooked grin on its face, and a tiny battery candle in its belly. If you want your jack-o’-lantern to survive long enough for trick-or-treaters, photos, porch compliments, and at least one neighbor saying, “Wow, yours still looks good,” the secret is simple: clean it well, carve it smart, and preserve it before rot throws its annual party.
This guide walks you through the easy steps for cleaning and preserving a Halloween pumpkin, from choosing the right gourd to keeping it fresh after carving. The goal is not to turn pumpkin care into a science fair project. It is to help your pumpkin last longer, smell better, attract fewer bugs, and look delightfully spooky instead of tragically mushy.
Why Halloween Pumpkins Rot So Quickly
A whole pumpkin can last for weeks or even months when stored properly in a cool, dry, dark place. Once you carve it, however, the clock starts ticking. Cutting into the rind exposes the moist flesh to air, bacteria, mold spores, heat, insects, and curious squirrels who think your porch is an all-you-can-eat buffet.
The three biggest enemies of a carved pumpkin are moisture, warmth, and microbes. The stringy pulp inside the pumpkin holds water, and water encourages decay. Warm weather speeds up softening and mold growth. Dirty tools, unwashed surfaces, and leftover pumpkin guts give bacteria and fungi a cozy place to settle in. In other words, a dirty pumpkin is not just messy; it is basically a luxury resort for rot.
The good news is that a few practical habits can slow the process. You cannot preserve a real carved pumpkin forever, but you can often help it stay attractive for several extra days. For Halloween decorating, that is the difference between “festive porch display” and “orange collapse with eyes.”
Step 1: Choose a Pumpkin That Wants to Live
Preserving a Halloween pumpkin starts before you ever pick up a carving knife. A damaged pumpkin will not suddenly become sturdy because you whispered encouraging words at it. Choose one that is firm, heavy for its size, and free of soft spots, deep cuts, cracks, bruises, or oozing areas.
Look for a healthy stem
A strong stem is a good sign, but it is not a handle. Carry the pumpkin from the bottom instead of swinging it by the stem like a trick-or-treat pail. If the stem snaps off, the exposed area can invite decay. A stem of at least an inch or two is helpful because it suggests the pumpkin was harvested carefully and has a better chance of staying fresh.
Pick the right shape for your design
For classic jack-o’-lanterns, choose a pumpkin with a flat bottom so it sits securely. For tall ghost faces, pick a taller pumpkin. For wide grins, choose a round, broad one. If you are carving with children, medium-sized pumpkins are often easier to manage than giant pumpkins, which can be fun until everyone realizes the “quick family activity” has become a full-body workout.
Avoid pumpkins that already look tired
Soft spots, wrinkles, and sunken areas are warning signs. If your thumb easily dents the rind, move on. A pumpkin that is already weakening will rot faster after carving, no matter how carefully you clean it.
Step 2: Store It Correctly Before Carving
If you buy your Halloween pumpkin early, keep it whole until you are closer to the holiday. Carving too soon is one of the most common reasons pumpkins collapse before Halloween night. In cool weather, a carved pumpkin may look good for about a week or a bit longer. In warm, humid conditions, it may start to soften in only a few days.
Before carving, store whole pumpkins in a cool, dry, shaded area. Avoid direct sun, wet grass, damp porches, and hot garages. Keep pumpkins away from ripening fruits such as apples and tomatoes because they release ethylene gas, which can speed aging in nearby produce. Your pumpkin does not need a spa retreat, but it does appreciate shade, airflow, and not being baked on concrete all afternoon.
Step 3: Wash the Outside Before Cutting
Cleaning the outside of the pumpkin is an important step because your knife passes through the rind and can drag dirt or microbes into the flesh. Start by rinsing the pumpkin under running water and gently scrubbing away soil with a clean vegetable brush or cloth.
If the pumpkin is only decorative and will not be eaten, many pumpkin preservation guides suggest a mild sanitizing step after washing. Some people use a diluted bleach solution to reduce mold and bacteria on the surface. A common home approach is about one tablespoon of regular household bleach in one gallon of water, or a stronger short dip used only for decorative pumpkins. Always use bleach in a ventilated area, wear gloves if your skin is sensitive, and never mix bleach with vinegar, ammonia, or other cleaners. That combination belongs in a horror movie, not your kitchen.
If you prefer to avoid bleach, white vinegar diluted with water is a popular alternative for decorative pumpkins. It is gentler, though not as strong as bleach against established mold. Whichever method you choose, let the pumpkin dry completely before carving. Moisture left on the surface can undo your good intentions.
Step 4: Prepare a Clean Carving Station
A clean workspace makes pumpkin carving easier and helps preserve the finished jack-o’-lantern. Cover your table with newspaper, parchment paper, a washable tablecloth, or a large cutting board. Gather your tools before you begin so you are not wandering around the kitchen with pumpkin strings on your hands like a swamp creature.
Helpful tools for cleaning and carving
- A pumpkin carving kit or small serrated carving saw
- A sturdy metal spoon, scoop, or ice cream scoop
- A marker or washable pen for sketching the design
- Paper towels or clean cloths
- A bowl for seeds and pulp
- Gloves, if you dislike pumpkin slime touching your soul
Wash your hands before handling the pumpkin, especially if children are helping. Clean tools matter, too. A dirty knife or scoop can introduce microbes that make the pumpkin spoil faster. For safety, young children can draw the face, scoop seeds, or place battery lights inside, while adults handle the cutting.
Step 5: Cut From the Bottom, Not the Top
The traditional method is to cut a lid around the stem, but cutting from the bottom has advantages. First, the stem stays intact, which helps the pumpkin retain its structure. Second, you can place the pumpkin over a battery light instead of reaching through the top. Third, the bottom opening is less visible from the street, which keeps the design looking cleaner.
To do this, turn the pumpkin on its side and cut a circle or square from the bottom. Make the opening large enough for your hand and scoop. Remove the cut piece and level it if needed so the pumpkin sits flat. If you prefer a top lid, angle your knife slightly inward while cutting so the lid does not fall inside later. A fallen pumpkin lid is not tragic, but it does feel like the pumpkin has given up.
Step 6: Scrape Out Every Bit of Pulp
This is the step where many jack-o’-lanterns win or lose the preservation battle. The slimy strings inside the pumpkin hold moisture, and moisture encourages mold. Scoop out the seeds and pulp thoroughly. Then scrape the inner walls until they feel smoother and drier.
A thinner carving wall is easier to cut and allows light to shine through more clearly. For most designs, leaving about one inch of wall thickness works well. Do not scrape so aggressively that the pumpkin loses strength, especially around large cutouts. Think of it as pumpkin cleaning, not pumpkin excavation.
Save the seeds if you want to roast them, but do it before the carved pumpkin sits out as decoration. Once a pumpkin has been carved and displayed, especially outdoors, it should be treated as decoration rather than food.
Step 7: Dry the Interior Before Carving
After scooping, wipe the inside with paper towels or a clean cloth. Let the pumpkin air-dry for a short time before carving the face or design. A dry interior slows the mushy decline and helps petroleum jelly or other moisture barriers stick better later.
If your pumpkin feels very wet inside, place it upside down on a towel for a little while so excess liquid can drain. This small step makes a noticeable difference, especially in humid climates where pumpkins already have to fight sticky air.
Step 8: Carve With Preservation in Mind
The more you cut, the faster the pumpkin usually dries out and weakens. Intricate designs look amazing, but a pumpkin with many thin bridges and tiny details may collapse sooner than one with simple, sturdy features. If longevity is your priority, choose a bold design with fewer delicate cuts.
Try etching instead of deep carving
Etching removes only the outer layer of skin rather than cutting completely through the pumpkin. It gives a soft glow when lit from inside and often lasts longer than full cutout carving because the pumpkin’s structure remains more intact. Etching is great for patterns, haunted houses, moons, cats, vines, and fancy designs that say, “I own more than one craft tool.”
Smooth rough edges
After carving, gently trim ragged edges. Torn pumpkin flesh dries unevenly and can attract mold faster. Clean cuts look better and help preservation treatments coat the surface more evenly.
Step 9: Sanitize the Cut Surfaces
Once your design is carved, you can lightly treat the exposed surfaces to slow microbial growth. For decorative pumpkins, some people spray or wipe the interior and cut edges with a diluted bleach solution. Another option is a vinegar-water spray. Let the pumpkin sit for several minutes, then dry it well.
The key word is “decorative.” Do not use treated jack-o’-lantern flesh for cooking, and do not feed bleach-treated pumpkins to pets, livestock, or wildlife. If you want pumpkin for pie, soup, muffins, or puree, buy a separate sugar pumpkin and keep the jack-o’-lantern on decoration duty. A carved porch pumpkin has seen things. It does not belong in your dessert.
Step 10: Seal the Edges to Lock In Moisture
After the pumpkin is clean and dry, apply a thin layer of petroleum jelly to the cut edges and carved areas. This helps slow moisture loss and keeps the edges from shriveling quickly. Some decorators also use vegetable oil or coconut oil, but petroleum jelly is a classic choice because it creates a simple barrier over exposed flesh.
Use a light hand. You are not frosting a cake. A thin coat is enough. Too much can feel greasy, collect dust, and make the pumpkin slippery. Apply it to the eyes, mouth, etched sections, lid edge, and any areas where orange flesh is exposed.
Step 11: Use Battery Lights Instead of Candles
Traditional candles look charming, but heat speeds pumpkin breakdown. A candle can warm the inside, dry the flesh unevenly, and make the pumpkin soften faster. Battery-operated tea lights, LED candles, glow sticks, or small rechargeable lights are better choices for preserving a Halloween pumpkin.
Battery lights are also safer around costumes, leaves, pets, and excited children who are operating on sugar and chaos. Many LED lights flicker realistically, so you still get the spooky glow without slow-roasting your jack-o’-lantern from the inside.
Step 12: Display It in the Right Spot
Location matters. Place your carved pumpkin somewhere cool, shaded, and protected from rain. Direct sun, warm porch lights, wet steps, and damp soil can shorten its life. If temperatures are mild, bring the pumpkin indoors or into a garage during the day and display it outside in the evening.
Avoid placing carved pumpkins directly on concrete for long periods. Concrete can hold moisture and temperature changes that may encourage softening. A piece of cardboard, wood, straw, or a tray can create a better barrier. Elevating the pumpkin also helps discourage insects and makes cleanup easier if the pumpkin eventually decides to become soup without permission.
Step 13: Refresh It Daily
A little daily care can keep a jack-o’-lantern looking fresher. Check for soft spots, mold, and pooling liquid. Wipe away moisture with a paper towel. If the edges look dry, add a tiny amount of petroleum jelly. If the pumpkin begins to shrivel, you can revive it temporarily by soaking it in cold water for a few hours, then drying it thoroughly before redisplaying.
This trick can plump up a dehydrated pumpkin, but it is not a miracle cure. If mold is spreading, the pumpkin smells sour, or the walls are collapsing, it is time to say goodbye. There is spooky, and then there is biological warfare.
Common Mistakes That Make Pumpkins Rot Faster
Many pumpkin problems come from simple mistakes. Carving too early is the big one. If Halloween is still two weeks away and you live somewhere warm, wait. Decorate whole pumpkins first, then carve close to the holiday.
Another mistake is leaving too much pulp inside. Those strings may look harmless, but they hold moisture and rot quickly. Poor drying is also common. A wet pumpkin sealed with petroleum jelly can trap moisture instead of protecting the surface. Always dry before sealing.
Heat is another pumpkin villain. Candles, sunny windows, hot porches, and warm indoor rooms all speed decay. Finally, do not ignore pests. Squirrels, raccoons, mice, insects, and deer may snack on pumpkins. If wildlife is a concern, move pumpkins closer to the door, display them only at night, or use faux pumpkins in high-traffic animal zones.
What to Do With the Pumpkin After Halloween
When your Halloween pumpkin has finished its performance, dispose of it responsibly. If it is untreated and free from paint, glitter, wax, and heavy decorations, it can usually be composted. Remove candles, lights, toothpicks, plastic parts, and other non-compostable items first.
If the pumpkin was treated with bleach, paint, glue, glitter, or other chemicals, do not feed it to animals. Composting may still be possible depending on what was used, but when in doubt, check local guidance. Many communities host pumpkin composting events after Halloween. These events keep pumpkins out of landfills and turn them into useful organic matter instead of trash.
Extra Tips for Longer-Lasting Halloween Pumpkins
Decorate before you carve
If you love decorating early, use whole pumpkins first. Paint faces, tie ribbons around stems, add removable stickers, or group pumpkins with mums and gourds. Then carve one or two pumpkins closer to Halloween night.
Use separate pumpkins for cooking
Carving pumpkins are edible when fresh and uncarved, but they are usually stringier and more watery than pie pumpkins. For cooking, choose smaller sugar pumpkins or pie pumpkins. For jack-o’-lanterns, choose sturdy carving pumpkins. Let each pumpkin follow its destiny.
Keep kids involved safely
Children can draw the design, scoop seeds, sort pulp, or choose the light. Adults should handle sharp tools. Pumpkin carving should end with photos and laughter, not a dramatic search for bandages.
Try no-carve options
No-carve pumpkins last longer because the rind stays intact. Paint, markers, stickers, yarn, felt, and faux flowers can turn a pumpkin into a bat, ghost, black cat, monster, or oddly charming celebrity lookalike. No-carve decorating is especially useful for classrooms, apartment balconies, and families with young children.
Personal Experience: What Actually Works When Cleaning and Preserving a Halloween Pumpkin
After years of watching pumpkins go from “adorable autumn centerpiece” to “collapsed orange raisin,” I have learned that pumpkin preservation is less about one magic trick and more about timing and discipline. The best jack-o’-lanterns I have made were not the most complicated ones. They were the pumpkins I carved close to Halloween, cleaned thoroughly, dried carefully, and kept out of the sun. Not glamorous, but very effective.
One of the biggest lessons is that the scooping stage deserves patience. The first time I carved pumpkins with a group, everyone wanted to rush straight to the face. The result was a set of pumpkins that looked fantastic for one evening and suspicious by the next afternoon. The insides were still full of stringy pulp, and the pumpkins were sitting on a warm porch in direct sun. By day three, one pumpkin had a face that looked less “spooky grin” and more “I regret everything.” Since then, I scrape the inside walls until they are smooth and wipe them dry before making any cuts.
Another helpful experience is cutting from the bottom. At first, it feels slightly rebellious, as if you are breaking an ancient Halloween rule. But it makes cleaning easier, keeps the stem intact, and allows the pumpkin to sit neatly over a light. It also avoids the classic problem of a shrinking lid falling into the pumpkin. A bottom opening is especially useful if you want a clean display for porch photos because the top still looks fresh and natural.
I have also found that simple designs last better. A pumpkin with huge dramatic eyes, a bold mouth, and thick borders usually holds up longer than one with lace-like details. Delicate cuts may look impressive, but they dry and curl quickly. If I want detail, I prefer etching. Scraping the surface creates a beautiful glow and keeps more of the pumpkin intact. It is also forgiving. If your hand slips while etching, you can often turn the mistake into “texture,” which is a very elegant word for “oops.”
For preservation, drying is the step people underestimate most. Petroleum jelly works best when the pumpkin is dry first. If the cut surfaces are wet, you may trap moisture instead of slowing dehydration. I usually wipe the carved areas, wait a little while, then apply a thin coat only where the flesh is exposed. A little goes a long way. If your pumpkin feels like it has been dipped in lip balm, you have gone too far.
Lighting also makes a real difference. I used to love real candles, and they do create a classic flicker. But they also heat the inside, leave soot, and shorten the pumpkin’s display life. Battery-operated tea lights are easier, cleaner, and safer. Some even flicker convincingly enough that no one notices the difference unless they are inspecting your pumpkin with the seriousness of a museum curator.
Finally, I have learned not to fight nature forever. A real pumpkin is temporary, and that is part of the charm. The goal is not immortality. The goal is to keep it fresh through Halloween, enjoy the tradition, take the photos, roast the seeds early if you want them, and compost the pumpkin when its big night is over. Halloween pumpkins are like seasonal celebrities: bright, dramatic, beloved, and not built for a long-term contract.
Conclusion
Cleaning and preserving a Halloween pumpkin is easier than most people think. Start with a firm, healthy pumpkin. Store it in a cool, dry place. Wash the outside before cutting. Scoop the inside thoroughly, dry it well, carve with sturdy shapes, sanitize decorative surfaces if desired, seal exposed edges, and use battery lights instead of candles. With those simple steps, your jack-o’-lantern has a much better chance of staying crisp, cheerful, and camera-ready through Halloween night.
The perfect pumpkin does not need to be flawless. A crooked smile, uneven eyebrow, or slightly lopsided tooth can give it personality. But with proper cleaning and preservation, it can be charmingly spooky instead of prematurely squishy. That is a Halloween win worth celebrating.
Note: A carved pumpkin used for decoration should not be eaten after display, especially if it has been treated, exposed outdoors, or left at room temperature. Use a separate fresh pie pumpkin for cooking.