Wedding cake pool steps can turn an awkward climb into your above-ground pool into something that feels much closer to walking down a real staircase. Their broad, tiered treads are comfortable, the handrails offer support, and the curved profile looks far more inviting than a skinny ladder doing its best impression of gym equipment.
The catch? Proper installation matters. Molded pool steps are naturally buoyant, vinyl liners are easier to damage than most homeowners expect, and a loose step system can shift when swimmers enter or exit. Manufacturer instructions for wedding cake-style and comparable molded steps consistently emphasize proper ballast, trapped-air removal, secure mounting, and careful positioning.
This guide explains how to install wedding cake pool steps for a typical above-ground pool with a deck or compatible mounting surface. Because designs differ, your exact product manual always wins when its instructions conflict with general advice. Think of this article as your experienced helper holding the flashlightnot the guy who throws away the manual and announces, “I have assembled a bookshelf before.”
What Are Wedding Cake Pool Steps?
Wedding cake pool steps are wide, molded swimming pool stairs with gradually smaller tiers stacked from bottom to top. Viewed from the front, the tiers resemble a traditional layered wedding cake. Hence the name. Fortunately, no frosting is involved.
Most above-ground versions are made from molded plastic or polyethylene and sit inside the pool. Depending on the model, they may use internal sand-filled compartments, removable ballast systems, or weighted trays to overcome buoyancy. Deck connectors, handrail posts, or mounting brackets then stabilize the upper portion of the step system.
This article focuses on drop-in wedding cake steps for above-ground pools. Permanent molded or vinyl-over steps built into an inground pool are different products and generally require professional pool construction methods.
Before Installing Wedding Cake Pool Steps
Confirm That the Steps Fit Your Pool
Do not assume that every pool step fits every above-ground pool. Check the manufacturer’s specifications for maximum pool depth, wall configuration, required deck height, step footprint, installation surface, and weight capacity.
Measure from the pool floor to the top rail or finished deck surface. Then examine the pool wall where you plan to locate the steps. The entry should not interfere with the skimmer, return fitting, plumbing, structural uprights, or other equipment.
Compatibility is especially important for soft-sided or framed pools. A step designed to attach to a rigid deck or traditional metal-wall above-ground pool may not be suitable for a flexible pool structure. Leslie’s and other pool-accessory guides likewise stress choosing entry equipment that matches the pool’s size and design rather than forcing an incompatible ladder or step system into place.
Read the Exact Manual Before Buying Ballast
Here is one of the biggest lessons in pool step installation: ballast requirements are model-specific.
For example, one detailed molded-step installation manual specifies 70 pounds of sand for its four-tread system. Confer instructions for another curved step system specify different sand quantities, while Main Access step designs may call for roughly 100 to 150 pounds of total stabilizing weight depending on the product.
That enormous variation is why “some guy on a pool forum used two bags” is not an engineering specification. Buy the amount and type of ballast required by your manufacturer.
Tools and Materials You May Need
Gather everything before assembly. A typical installation may require:
- The complete wedding cake pool step kit
- The manufacturer’s assembly instructions
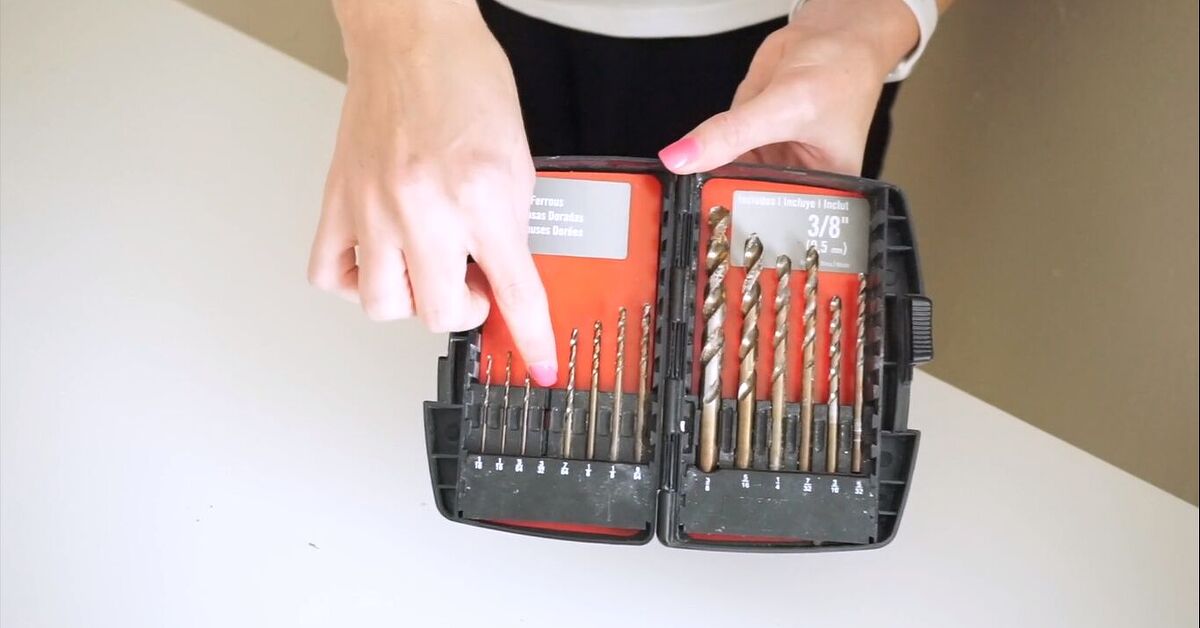
- A cordless drill with the correct driver bit
- A rubber mallet
- A plastic funnel
- A measuring tape
- Manufacturer-approved screws and mounting hardware
- Correct concrete anchors if mounting to concrete
- The specified amount of clean sand or approved ballast
- A pool step pad or liner protector
- A small amount of liquid soap if recommended for fitting plastic parts
- Two or three capable helpers
Use a cordless drill when working around the pool. One wedding cake-style step manual specifically warns against using a corded electric drill in or around the swimming pool. Water and extension cords are not a DIY power couple.
How to Install Wedding Cake Pool Steps: Step by Step
1. Select the Best Entry Location
Choose a section of the pool with a stable, unobstructed bottom and convenient access from the deck. Check both inside and outside the pool before committing to the location.
The step should not block the skimmer or water return. Avoid an area where hoses or plumbing will rub against the stair assembly. You also want enough deck space to secure the mounting connectors exactly as the manufacturer designed them.
Look closely at the vinyl liner. Remove leaves, pebbles, hard debris, or anything else sitting on the pool bottom. A tiny stone trapped beneath a large staircase can become a surprisingly effective liner-abrasion device.
2. Lay Out and Identify Every Part
Assemble the steps close to the swimming pool, but work on a clean, flat surface. Spread out the treads, risers, side panels, stringers, ballast components, handrails, posts, deck connectors, plugs, and hardware.
Compare every component with the manufacturer’s parts diagram. Do not begin installation if important hardware is missing or damaged. Step manufacturers commonly instruct owners to inventory all parts and follow the assembly sequence in the manual rather than improvising.
This ten-minute inventory can save you from discovering, while holding 100 pounds of awkward plastic near the pool, that a critical mounting connector is still theoretically living in the box.
3. Assemble the Step Body in the Correct Order
Start with the lower stringers or structural side panels. Install the lower tread and riser, then work upward according to the manual. Align molded tabs with their slots before applying force.
Many pool steps use snap-fit plastic connections. Push panels evenly into place. When the instructions permit it, use a rubber mallet to seat stubborn components. Never attack molded pool stairs with a steel hammer. You are installing steps, not tenderizing them.
If the manufacturer recommends a small amount of liquid soap on posts or plastic tabs, use only enough to ease assembly. Do not substitute petroleum products or aggressive solvents, particularly around vinyl liners. Latham’s vinyl-care guidance warns that petroleum-based cleaners can damage liner printing and surfaces.
4. Add the Manufacturer-Specified Ballast
Wedding cake pool steps contain large hollow spaces, so they may float or shift unless properly weighted. Add sand or another approved ballast exactly where the manual directs.
When filling molded ballast chambers, use a plastic funnel. Add sand slowly and shake or tap the panel gently so the material settles into the compartment. Install every supplied plug securely.
For systems using ballast bags or trays, seal and position the weights exactly as instructed. Do not toss loose concrete blocks, metal gym weights, bricks, or random landscaping stones into the pool step. Improvised objects can shift, develop sharp edges, stain surfaces, or rub the liner.
More weight is not automatically better. Excess ballast may overstress the step structure or make seasonal removal unnecessarily difficult. The goal is the specified weightnot “until the thing fears gravity.”
5. Install the Handrails and Upper Posts
Insert the handrail posts fully into their designated openings. Check the orientation before fastening them. Some molded rails and posts have flat areas or shaped connections that must align.
Seat the handrails and install the manufacturer-provided self-tapping screws, bolts, or other fasteners. Tighten them firmly but avoid crushing or deforming hollow plastic components.
Grab each rail and apply moderate pressure. A tiny amount of normal flexibility may be expected in some plastic systems, but the rails should not pull out, rotate freely, or feel disconnected from the step body.
6. Place a Step Pad Over the Vinyl Liner
For a vinyl-lined pool, a properly sized pool step pad is a smart layer of protection. Step pads create a cushion between the staircase and liner and can help reduce chafing caused by movement. Blue Wave and In The Swim both describe liner pads as protection against abrasion beneath in-pool ladders and stairs.
Lower the pad into the pool and flatten it at the installation location. Make sure it is free from folds, trapped debris, and curled edges. Follow the pad manufacturer’s instructions regarding which side faces upward.
The entire step footprint should rest on the protective area when possible.
7. Move the Steps Into the Pool With Help
Do not try to prove anything by installing a large wedding cake step alone. One major installation manual specifically calls for two to three people to place its molded step in the pool.
Position one or more helpers in the pool if conditions and safe access permit. Carefully lift the assembled stair system over the pool wall or move it through the designated entry area according to the manual.
Keep the steps away from the vinyl wall and pool frame while lowering them. Move slowly. A handrail swinging into the top rail can damage equipment, and dragging a weighted base over the liner defeats the entire purpose of buying a step pad.
8. Let the Steps Fill With Water and Purge Trapped Air
This is the part that surprises first-time installers. Even properly ballasted steps may initially float because air is trapped inside hollow components.
Hold the staircase away from the pool wall while it fills with water. Allow several minutes for air to escape through the designed openings.
If the stairs remain buoyant, carefully tilt the system backward and from side to side. Watch for bubbles. Continue the process until the bubbling stops and the base sits firmly on the pool bottom. A wedding cake step manual specifically describes this tilting process for releasing trapped air.
Do not immediately assume you need another 50-pound bag of sand because the stairs float during the first minute. Sometimes the problem is air, not ballast.
9. Position the Steps Against the Pool Wall
Once the staircase is fully submerged and stable, move it carefully into its final position.
For models designed to sit at the inside wall, position the rear of the step as instructed to reduce a swim-behind or entrapment hazard. One molded-step manual expressly requires the step to be installed up to the inside pool wall for this reason.
Check the step pad as you move the unit. Do not drag the staircase aggressively across the pool floor. Lift and guide it with helpers whenever possible.
Stand back and visually inspect the stairs. The treads should appear level. Both sides should rest evenly. If the step rocks, stop and determine whether trapped air, debris, a folded liner pad, or an uneven base is causing the problem.
10. Align and Secure the Deck Connectors
Rotate or slide the deck connectors into their installation position according to your product instructions. The brackets should sit naturally on the intended deck or mounting surface without twisting the handrail posts.
Mark the fastener locations. Confirm that you are drilling into a sound structural surface rather than a rotten deck board, thin trim piece, or unsupported edge.
Use the specified screws for a compatible wood deck. For a concrete deck, purchase the proper concrete fasteners or anchors recommended for the substrate and step system. Manufacturer instructions for molded pool steps commonly distinguish between supplied deck screws and appropriate fasteners needed for concrete.
Secure every connector with the required number of fasteners. Then attach the connectors to the handrail posts as directed.
Never rely on ballast alone when the model is designed to be deck-mounted. Ballast helps keep the stairs down. Deck hardware helps control movement at the top. They have different jobs.
11. Test the Installation Before Normal Use
Before opening the pool to swimmers, perform a complete stability check.
Grip both handrails and push gently in several directions. Step onto the lowest tread while holding the rails. Progress upward one tread at a time. Watch for rocking, sliding, unusual flexing, or lifting at the base.
Confirm that:
- The base sits flat on the pool bottom.
- The step pad remains correctly positioned.
- The stairs do not float upward.
- The unit is positioned as required against the pool wall.
- The handrails are fully attached.
- All deck brackets are secure.
- No sharp hardware contacts the liner.
- Safety labels remain visible.
If anything shifts, correct it before swimmers use the steps.
Common Wedding Cake Pool Step Installation Problems
The Steps Keep Floating
First, look for trapped air. Tilt the submerged stairs gently and watch for bubbles. If the unit still rises after all air has escaped, verify that you installed the correct amount of ballast in the correct compartments.
Do not guess. Check the manual and count the ballast you actually added. Memory becomes hilariously optimistic halfway through a long pool project.
The Steps Rock From Side to Side
A rocking staircase may have trapped air in one section, debris beneath the base, a folded liner pad, uneven contact with the pool bottom, or loose deck mounting hardware.
Remove swimmers from the area and inspect the installation. Tightening the top brackets will not fix a pebble trapped beneath one side of the base.
The Step Pad Keeps Moving
Make sure the pad is the correct size and installed with the proper side facing upward. Flatten the pad before positioning the staircase. When moving the steps, lift and guide the base rather than dragging it across the pad.
The Deck Brackets Do Not Line Up
Recheck the step orientation, post position, pool depth, and deck height. Do not force the brackets sideways and bend the handrails into alignment.
A major mismatch can indicate an assembly error or incompatible installation configuration. Contact the step manufacturer before drilling new mystery holes throughout your deck.
Safety Tips After Installing Pool Steps
A beautiful staircase also creates an easy route into the water. That makes access control extremely important.
The U.S. Consumer Product Safety Commission recommends barriers for above-ground pools and states that pool steps or ladders should be secured, locked, removed to prevent access, or surrounded by an appropriate barrier.
Use a compatible safety gate, locking entry system, or pool barrier where required. Follow local building and residential pool codes, which may be more specific than general manufacturer recommendations.
Never treat pool steps as a diving platform. Wedding cake steps are designed for entry and exit in shallow water. Allow one person at a time on the stairs unless your product’s instructions explicitly state otherwise.
Children should receive constant competent adult supervision around the pool. Locking a ladder or installing a fence is an important layer of safety, not a substitute for supervision.
How to Maintain Wedding Cake Pool Steps
Inspect the Hardware Regularly
Periodically check the deck connectors, screws, handrail joints, and molded attachment points. SwimmingPool.com recommends properly installing above-ground entry equipment and checking it regularly to confirm it remains firmly attached.
Retighten hardware only as necessary. Replace cracked parts or heavily corroded fasteners with manufacturer-approved components.
Keep the Treads Clean
Pool entry areas can become low-circulation zones where buildup develops. Brush the treads, risers, and spaces around the stair base regularly. Slime or algae on a step surface can create a slipping hazard.
Use cleaners suitable for your step material and vinyl liner. Soft sponges, mild vinyl-safe products, and gentle brushing are safer choices than harsh solvents or abrasive tools.
Maintain Proper Water Chemistry
Balanced pool water helps protect liners and pool components. Avoid allowing concentrated chlorine granules or other chemicals to sit directly on a vinyl liner or step surface. Latham specifically warns that direct chemical contact can bleach and deteriorate vinyl.
Winterize the Steps According to the Manual
If your climate requires seasonal pool closing, disconnect and remove the steps when the manufacturer instructs you to do so. Large molded stair systems can retain substantial amounts of water.
Drain all internal water before storage. One wedding cake-style step manual instructs owners to tip the unit in different directions to drain the panels fully while leaving permanent sand ballast in the step.
Store the stairs where freezing water, falling objects, and direct abuse will not crack the molded components.
Installation Experiences: What You Learn After Working With Wedding Cake Pool Steps
One of the most useful practical lessons from wedding cake pool step installations is that the project usually feels easy right up until the stairs touch the water. On dry ground, the components are large but manageable. You snap together panels, install treads, add handrails, and begin wondering why anyone would pay a professional. Then the assembled staircase becomes a giant buoyant plastic object with opinions.
Experienced installers plan the water-entry stage before lifting anything. They decide who will hold the left side, who will control the right rail, and who will guide the bottom. This sounds overly organized until three people are standing around a pool saying, “Waityour left or my left?” Having two or three people available, as at least one major molded-step manual requires, makes the process dramatically calmer.
Another common experience is underestimating trapped air. A homeowner may carefully add every pound of required sand and panic when the steps still bob near the surface. The first instinct is often to add more weight. The better move is to wait, tilt the stairs, and watch the bubbles. Large molded panels can trap more air than expected. When the final pockets escape, the unit may suddenly settle onto the pool floor like it has finally accepted its responsibilities.
The liner pad is another detail people appreciate more after installing one. Without a pad, every small movement of the staircase makes owners wonder what is happening beneath several square feet of plastic. A properly fitted pad provides a protective layer and makes the installation feel less like you’re parking a refrigerator on a vinyl tablecloth.
Deck alignment also teaches patience. It is tempting to grab a drill as soon as one connector touches the wood. Experienced DIYers position the stairs completely, purge the air, verify the base, check the wall spacing, and align both handrails before drilling. Marking all mounting holes first helps reveal a twisted post or uneven bracket before the deck acquires permanent evidence of enthusiasm.
Ballast is perhaps the biggest source of bad assumptions. Different models use dramatically different amounts of sand or stabilizing weight. Someone who previously installed a 40-pound-ballast staircase may assume the next system works the same way, only to discover that its manual requires far more weight. Real installation experience quickly teaches one rule: use the manual for the model in front of you, not the memory of the model your neighbor owned six summers ago.
Finally, installers learn that the job is not finished when the last screw goes in. The satisfying moment comes during the slow test climb. Hold the rails. Step onto the lowest tread. Shift your weight slightly. Listen and feel for movement. Continue upward only when the base remains planted and the handrails feel secure.
A successful installation feels almost boring during that testand boring is excellent. No floating. No rocking. No bracket making a noise that sounds like “future repair bill.” Just broad, stable treads leading comfortably into the pool.
Final Thoughts on Installing Wedding Cake Pool Steps
Learning how to install wedding cake pool steps is mostly about respecting a handful of details: confirm compatibility, follow the exact assembly sequence, use the specified ballast, protect the vinyl liner, release trapped air, position the stairs correctly, and secure every mounting connector.
Do those jobs carefully and your new pool steps can provide a comfortable, inviting entry point that is easier to use than a narrow ladder. Rush the project, improvise the ballast, or skip mounting hardware, and your elegant staircase may spend the afternoon practicing synchronized swimming.
Note: Always follow the installation and safety instructions supplied with your exact pool step model. Ballast amounts, pool-depth limits, mounting hardware, weight capacities, and winterization procedures vary by manufacturer. Check local pool barrier and building requirements before installation.