A dirty grill is a little like a sink full of dishes at a dinner party: nobody wants to deal with it, but everybody notices the results. If your burgers taste vaguely like last week’s salmon, your chicken keeps sticking, or your grill puffs out enough smoke to look like a backyard distress signal, it is time for a proper clean. The good news is that grill cleaning is not complicated. It is mostly a mix of timing, a few simple tools, and the willingness to face your grease tray with courage.
Learning how to clean a grill the right way does more than make it look respectable. It helps food taste better, supports safer cooking, reduces flare-ups, and can extend the life of your gas grill, charcoal grill, or pellet grill. A clean grill heats more evenly, leaves better grill marks, and is far less likely to turn your Saturday cookout into an emergency performance of “why is the fire doing that?”
This guide walks you through the best way to clean a grill step by step, including routine cleanup, deep cleaning, and smart habits that make every future BBQ easier. Whether you are cooking on stainless steel grates, cast iron, porcelain-coated grates, or a pellet smoker that seems to attract ash like it is getting paid for it, these methods will help.
Why Grill Cleaning Matters More Than Most People Think
People often clean a grill for cosmetic reasons. That shiny-lid satisfaction is real. But the bigger payoff is performance. Old grease, carbon, sauce residue, and food bits can block airflow, affect burner performance, create hot spots, and leave bitter flavors on fresh food. Even worse, grease buildup can feed flare-ups and turn a casual family dinner into a frantic search for baking soda and emotional support.
Clean grill grates also help food release more easily. When charred residue builds up, proteins cling to the surface, tearing the outside of chicken, fish, and vegetables before they ever make it to the plate. A well-cleaned and lightly oiled grate gives you better searing and fewer culinary heartbreaks.
Then there is food safety. A clean cooking surface, clean tools, and clean platters help reduce cross-contamination during backyard BBQ prep. Grill cleaning and safe grilling go hand in hand, especially when raw meat juices, sauces, and reusable utensils are in the mix.
What You Need to Clean a Grill
You do not need a gadget collection worthy of a cooking show. Most grill cleaning jobs can be handled with a short list of basics:
- A grill brush, grill stone, or bristle-free scraper
- Nylon scrub brush or non-scratch scrub pad
- Mild dish soap
- Warm water
- Microfiber cloths or shop towels
- Paper towels
- Cooking oil
- A plastic putty knife or scraper
- A bucket or sink for soaking removable parts
- A shop vacuum for pellet ash or charcoal debris if needed
- Heat-resistant gloves for warm-but-not-hot cleanup
If you use a wire-bristle grill brush, inspect it often and replace it when it starts shedding. Many grill owners now prefer bristle-free tools because stray bristles are a real hazard. Your steak should come with pepper, not surprise metal.
Before You Start: The Golden Rule of Grill Cleaning
Always begin safely. Turn off the gas or power, unplug pellet grills, and let the grill cool to the right temperature before cleaning. Some messes are easiest to remove when the grill is still warm, but not blazing hot. Warm grease wipes away better. Hot metal, on the other hand, has a nasty habit of introducing your hand to regret.
How to Clean a Grill After Every Use
If you only remember one thing from this article, make it this: small, consistent cleanup is easier than heroic scrubbing once every three months. The best grill maintenance plan is a quick post-cook routine.
1. Burn off food residue
After removing the food, close the lid and run the grill on high heat for several minutes. This helps carbonize leftover food bits so they release more easily from the grate. On charcoal grills, let the remaining heat work for you. On pellet grills, follow the manufacturer’s shutdown cycle first.
2. Brush or scrape the grates
When the grates are still warm, use your preferred grill-cleaning tool to remove loosened debris. A bristle-free scraper, grill stone, or properly maintained brush works well. Brush front to back and check for any stubborn spots. If you use foil as a backup scrubber, hold it with long-handled tongs, not your fingertips. Your fingerprints are not meant to be smoked.
3. Wipe the grates lightly
Once the surface is clean enough, wipe it with a lightly oiled paper towel using tongs. This helps reduce sticking and protects some grate materials from rust. Do not drench it. You want a thin film, not a slip-and-slide.
4. Empty obvious debris
When the grill is fully cool, remove ash from charcoal models and empty grease buckets or trays as needed. Grease buildup is one of the biggest culprits behind unpleasant smoke and flare-ups.
How to Deep Clean a Grill Step by Step
A quick brush-down is great for routine care, but eventually every grill needs a deeper clean. For frequent grillers, that may mean every few weeks during peak season. For casual users, once before and once after grilling season may be enough, plus spot cleaning in between.
Step 1: Disconnect and cool down
Shut off fuel sources, unplug electric or pellet grills, and make sure all parts are cool enough to handle safely. Remove grates, warming racks, drip trays, heat tents, and any removable grease-management parts.
Step 2: Soak removable components
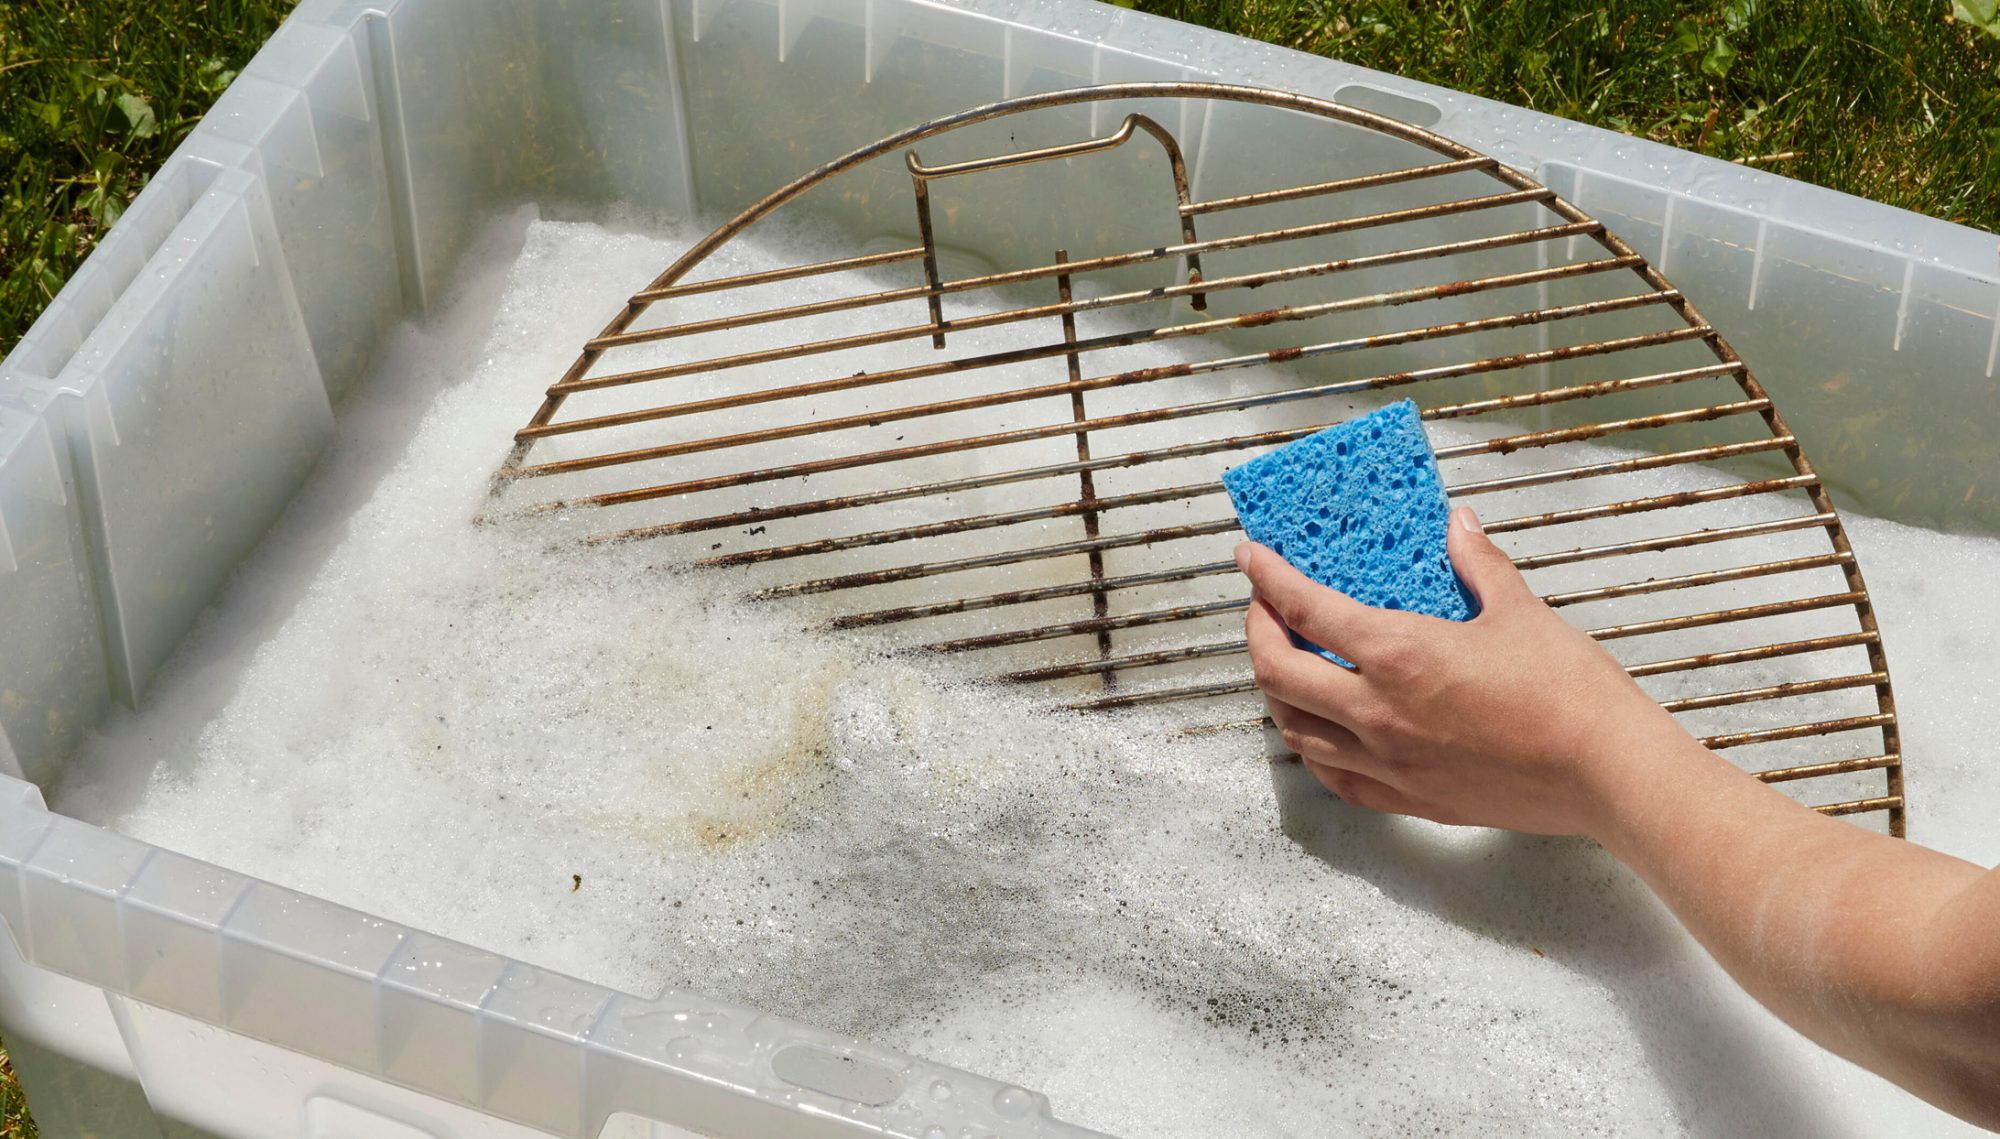
Place grill grates and drip trays in warm, soapy water. Let them soak for 15 to 20 minutes, or longer for heavy buildup. This softens grease and baked-on residue so you do not need to attack everything like you are sanding a boat.
Step 3: Scrape the firebox and interior
Use a plastic putty knife or scraper to loosen carbon flakes and grease from the inside lid and cook box. Focus on large chunks and greasy buildup rather than trying to make the interior look factory-new. A grill interior can be clean without looking like it just left the showroom. Some dark discoloration is normal.
Step 4: Clean burners carefully on gas grills
If you have a gas grill, inspect burner tubes for clogged ports, grease, spider webs, or debris. Brush gently and clear blocked holes carefully according to the manufacturer’s guidance. Avoid soaking burners in water unless the manual specifically permits it. Burners need to stay dry and unobstructed to perform correctly.
Step 5: Remove ash from charcoal and pellet grills
For charcoal grills, dump cold ash and sweep out residue. Ash left inside attracts moisture and can speed rust. For pellet grills, vacuum out cold ash from the fire pot and lower chamber with a shop vacuum designed for dry debris. Also check grease channels and the drip system, because pellet grills love to hide mess in sneaky places.
Step 6: Scrub grates and trays
Use a non-abrasive scrubber, nylon brush, or appropriate grate brush based on the material. Stainless steel grates are sturdy, cast iron needs a little more care, and porcelain-coated grates should not be treated like a driveway. If the finish chips or scratches badly, rust becomes much more likely.
Step 7: Rinse and dry thoroughly
Rinse all washed components with clean water and dry them completely. Moisture left behind invites rust, especially on cast iron and steel parts. Air-drying is fine, but towel-drying is faster and usually smarter.
Step 8: Reassemble and test
Put the grill back together, making sure burners, trays, and grates are seated correctly. For gas grills, briefly test ignition and flame quality. For pellet grills, confirm that the fire pot, drip tray, and grease path are properly aligned before cooking again.
How to Clean Different Types of Grill Grates
Stainless steel grill grates
Stainless steel grates are durable and relatively forgiving. Brush away debris, wash with mild soap when needed, rinse, dry, and lightly oil. For the exterior stainless steel body, wipe with a soft cloth and clean with the grain to reduce visible scratching.
Cast iron grill grates
Cast iron holds heat beautifully, but it is dramatic about moisture. Clean it gently, dry it thoroughly, and apply a thin coat of oil after cleaning. If seasoning looks patchy, re-season the grate before your next cook. Neglect cast iron for one rainy week and it will start auditioning for the role of “rusty antique.”
Porcelain-coated grates
Porcelain-coated grates need a gentler touch. Use non-abrasive tools and avoid overly aggressive scraping that can chip the coating. Once the coating is compromised, rust and sticking become more likely.
How to Clean the Outside of a Grill
A clean grill exterior improves appearance and helps protect the finish. Wipe down the lid, side shelves, control knobs, and handles with warm, soapy water and a soft cloth. For stainless steel surfaces, use non-abrasive cleaners and wipe in the direction of the grain. Avoid harsh abrasives that can dull the finish or scratch printed markings around knobs and controls.
If grease splatter has built up on the cabinet doors or cart, a gentle degreasing cleaner can help. Dry everything thoroughly when done. A grill cover is useful after the unit is clean and fully dry, but covering a damp grill can trap moisture and create a whole new problem.
Common Grill Cleaning Mistakes to Avoid
- Cleaning while the grill is dangerously hot: Warm is helpful. Scalding is unnecessary.
- Ignoring the grease tray: It is not glamorous, but it matters a lot.
- Using overly abrasive tools on delicate surfaces: Especially risky on porcelain-coated parts.
- Leaving ash in the grill: Ash plus moisture is bad news for metal.
- Forgetting to dry parts thoroughly: Rust never misses a chance.
- Reusing dirty platters and utensils: Clean grates do not help much if cooked food goes back onto a raw-meat plate.
How Often Should You Clean a Grill?
For the best backyard BBQ results, use this easy rhythm:
- After every cook: Burn off residue, brush grates, empty obvious debris when cool
- Every few cooks: Wipe grease buildup, check trays and drip systems, inspect burners or fire pot
- At least once or twice a season: Deep clean the entire grill
If you grill burgers, chicken thighs, sausages, or anything especially fatty, clean more often. Grease-heavy cooks create more buildup than a few vegetables or shrimp skewers.
Food Safety Tips That Belong in Every Backyard BBQ Routine
Knowing how to clean a grill is only half the story. Safe grilling habits complete the picture. Wash your hands before and after handling raw meat. Keep separate platters and utensils for raw and cooked food. Use a food thermometer rather than guessing by color alone. Chicken can look done before it is done, and burgers are not taking your feelings into account.
Also, do not let marinades or sauces full of raw meat juices double as finishing sauce unless they have been boiled first. Great BBQ should leave people asking for seconds, not antacids and apologies.
Simple Habits That Keep Your Grill Cleaner Longer
Preheat before cooking
Preheating helps loosen old residue and makes it easier to clean the grate before fresh food goes on.
Oil food lightly instead of flooding the grate
A light coat on the food often works better than over-oiling the grates and creating extra smoke.
Use drip pans when appropriate
Drip pans can reduce greasy mess, especially for fatty meats and indirect cooking.
Empty ash and grease before storage
Do not let the grill sit dirty for weeks. Old grease hardens, ash absorbs moisture, and the next cleanup becomes a punishment.
Backyard BBQ Experiences That Prove a Clean Grill Is Worth It
Anyone who grills regularly has at least one cleaning story. Usually it starts with confidence and ends with someone saying, “Does this taste a little… smoky?” One of the most common experiences happens early in grill ownership. A person buys a beautiful grill, uses it for burgers, wings, hot dogs, and corn every weekend, and assumes the heat will magically sterilize everything forever. Then one day the grill starts smoking before any food even hits the grate. The lid opens, and there it is: layers of sticky grease, carbon flakes overhead, and a drip tray that looks like it has seen things.
That moment teaches a valuable lesson. A grill can still light while performing terribly. Food may cook, but not evenly. One side burns, the other side drags. Chicken welds itself to the grate. Fish falls apart. Vegetables come off tasting like old steak. The cook blames the recipe, the weather, the moon, maybe even the tongs. In reality, the grill just needed a cleaning.
There is also the famous “first cook of the season” experience. After winter, the cover comes off and optimism is high. The host imagines a perfect backyard BBQ with ribs, burgers, and a cooler full of sparkling drinks. But the grill has stale grease in the tray, dust on the grates, and ash sitting in the bottom like it paid rent. The startup is uneven, the smell is off, and suddenly the first 30 minutes of the party become emergency maintenance. Guests pretend not to notice while the host scrubs with paper towels and mutters inspirational phrases not fit for family websites.
On the flip side, there is a wonderful satisfaction that comes from cooking on a properly cleaned grill. The lid opens and the grates are ready. The flames are even. Food releases when it should. The burgers sear beautifully. The chicken skin crisps. The vegetables get char without tasting bitter. Cleanup afterward takes five minutes instead of forty-five. That small routine changes the whole cooking experience. You stop dreading the mess and start enjoying the food.
Many experienced grillers also learn that cleaning is not just about looks. It is about rhythm. The people who seem effortlessly good at backyard BBQ are often the same people who do tiny maintenance tasks without making a big speech about them. They brush the grates while they are still warm. They empty the grease bucket before it becomes a biology experiment. They check the burners, wipe the shelves, and put the cover on only after everything is dry. The grill stays ready, so last-minute weeknight grilling becomes easy.
In other words, a clean grill does not just produce better food. It creates a better cooking mood. And that may be the most underrated BBQ trick of all. When the grill is clean, you cook with more confidence, serve with less stress, and spend more time hanging out in the backyard instead of scraping carbon off metal like you are repaying a debt to the universe.
Conclusion
If you want delicious backyard BBQ, cleaning your grill is not the annoying chore that happens before the fun. It is part of the fun. A clean grill cooks more evenly, tastes better, reduces flare-ups, and helps every steak, burger, rib, or grilled peach show up as its best self. Keep up with quick after-cook maintenance, schedule a deep clean now and then, and treat grease trays and ash pans like the important supporting characters they are. Your grill will last longer, your food will taste fresher, and your guests will remember the meal instead of the mysterious burnt aftertaste.