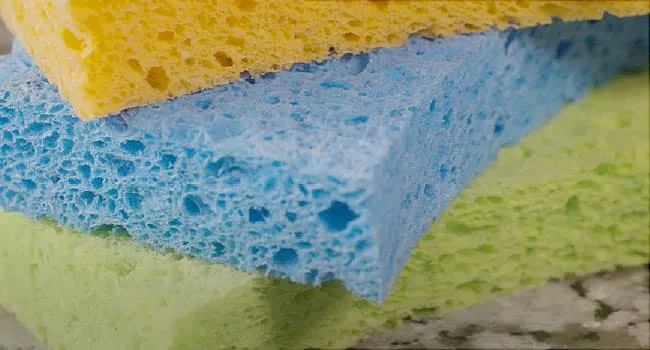
Your kitchen sponge may look innocent, sitting beside the sink in a puddle of dish soap and good intentions. But beneath that cheerful yellow-and-green exterior, it can become a tiny apartment complex for germs, food particles, and suspicious smells that seem to have their own zip code.
That does not mean you need to hold a farewell ceremony every time you wash a coffee mug. A kitchen sponge can still be useful when it is cleaned, dried, and replaced on a sensible schedule. The trick is knowing the difference between a sponge that needs a quick sanitation session and one that has officially entered its retirement era.
This guide explains when to clean a kitchen sponge, when to throw it away, how to reduce cross-contamination, and how to build a kitchen-cleaning routine that does not require a hazmat suit or a doctorate in microbiology.
Why Kitchen Sponges Get Gross So Quickly
A sponge is practically designed to collect the things bacteria enjoy: moisture, warmth, tiny bits of food, grease, and plenty of nooks where debris can hide. Every time you wipe a counter, scrub a pan, or clean a sink, the sponge picks up material that may not rinse away completely.
The real issue is not that a sponge contains bacteria. Almost every kitchen surface encounters bacteria at some point. The concern is that a damp sponge can transfer germs from one place to another. That is called cross-contamination, and it can turn a sponge from a cleaning tool into a very small, very absorbent delivery service.
For example, imagine using the same sponge to wipe up juices from raw chicken, clean the cutting board, scrub a plate, and swipe crumbs from the counter. That sponge has worked a full shift in the germ economy. It deserves neither applause nor a promotion. It deserves retirement.
Clean, Sanitize, and Replace: They Are Not the Same Thing
Kitchen sponge care becomes easier once you separate three different jobs:
- Cleaning removes visible food, grease, soap buildup, and debris.
- Sanitizing reduces germs to a safer level using heat or an appropriate sanitizing method.
- Replacing removes a sponge that is too worn, too contaminated, or too smelly to trust.
A sponge can look clean without being sanitary. It can also be sanitized but still be physically damaged enough to trap food particles and bacteria. Think of it like a worn-out running shoe: you can wash it, but eventually the sole is still going to look like it survived a minor earthquake.
When You Should Clean Your Kitchen Sponge
After Every Use
Your sponge should get a basic cleanup after each use. Rinse it thoroughly under running water, squeeze out as much moisture as possible, and place it somewhere where air can circulate. Leaving it crumpled in the bottom of a wet sink is essentially sending it to a luxury spa for bacteria.
A sponge holder, open rack, or dry ledge near the sink can help it dry faster. The goal is simple: less moisture, fewer opportunities for microbes to throw a pool party.
After Cleaning a Dirty Sink or Countertop
If you use a sponge to scrub the sink, wipe down a greasy stovetop, or clean up food spills, rinse it immediately afterward. Do not let bits of food, sauce, or coffee grounds settle into the sponge and become permanent residents.
For heavy messes, it is smarter to use paper towels, disposable wipes, or a dedicated cleaning cloth that can go straight into the laundry. A sponge is excellent for dishes and light cleaning, but it is not required to be the kitchen’s entire janitorial department.
At Least Once a Week
A regular sanitation routine is wise, especially in busy kitchens. If you cook daily, wash dishes by hand, prepare raw meat, or have several people using the kitchen, clean or sanitize the sponge at least weekly. Many households benefit from doing it more often.
The exact schedule matters less than consistency. A calendar reminder may sound dramatic, but so does realizing you have been using the same mystery sponge since the last season of your favorite show.
How to Clean and Sanitize a Kitchen Sponge Safely
Method 1: Use the Dishwasher
A dishwasher is one of the easiest ways to sanitize many standard kitchen sponges. Place the sponge on the top rack, run a hot cycle, and allow it to go through the drying cycle. The combination of heat and drying helps reduce bacteria, yeast, and mold.
Do not put a sponge with metal scrubber material into the microwave, and always check whether the sponge manufacturer gives special care instructions. If the sponge has started falling apart, skip the dishwasher and toss it instead. No appliance can turn a shredded sponge back into a respectable citizen.
Method 2: Microwave a Wet Sponge
Microwaving can help sanitize some nonmetallic sponges, but only when done carefully. The sponge must be thoroughly wet before it goes into the microwave. A dry sponge can scorch or catch fire, which is a terrible way to add drama to a Tuesday afternoon.
Use only a sponge without metallic scrubber material. Heat the wet sponge according to reliable food-safety guidance and appliance safety recommendations, then allow it to cool before handling it. A freshly heated sponge can hold surprising amounts of steam and may burn your fingers faster than a pan handle with a grudge.
Method 3: Use a Food-Safe Sanitizing Product as Directed
Some households prefer an approved sanitizing solution for kitchen tools and surfaces. When using any commercial sanitizer or bleach-based product, follow the manufacturer’s label exactly. Different products have different dilution instructions, contact times, and rinsing requirements.
Never mix bleach with ammonia, vinegar, or other household cleaners. Chemical combinations are not kitchen hacks; they are chemistry experiments with consequences. When in doubt, use soap and water first, then sanitize according to the product label.
When to Throw Away Your Kitchen Sponge Immediately
Cleaning can extend a sponge’s useful life, but it cannot make every sponge worth saving. Some warning signs are loud, clear, and impossible to negotiate with.
It Smells Sour, Musty, or “Interesting”
If your sponge smells bad after rinsing, it is time to throw it away. A sour, funky, or musty odor is a sign that bacteria and organic material have built up inside. Do not assume that more dish soap will solve the problem. Dish soap is not a witness protection program for odors.
It Is Slimy
A slimy sponge is another immediate discard signal. Slime often means residue and microbial growth have accumulated in the sponge’s pores. Once the texture changes from springy to suspicious, do not try to negotiate. Toss it.
It Is Torn, Frayed, or Falling Apart
A worn sponge has more crevices for food particles and germs to hide in. If the scrubber side is peeling, the foam is crumbling, or pieces are coming loose, replace it. A sponge should not shed more than your pet.
It Has Been Used for Raw Meat, Poultry, Seafood, or Pet Messes
For high-risk contamination, it is often safest to use disposable paper towels or a dedicated cleaning cloth that can be washed immediately. If a sponge was used to wipe up raw meat juices, pet waste, or a spill related to illness, throw it away rather than trying to rescue it.
The cost of a new sponge is tiny compared with the inconvenience of spreading germs to dishware, counters, faucet handles, or ready-to-eat food.
How Often Should You Replace a Kitchen Sponge?
For most households, replacing a kitchen sponge every one to two weeks is a practical rule of thumb. A lightly used sponge may last close to two weeks when it is rinsed, dried, and sanitized regularly. A sponge used heavily every day may need replacement every week.
You should replace sponges more often when:
- You cook frequently and wash many dishes by hand.
- You prepare raw poultry, meat, seafood, or eggs often.
- Several people share the kitchen.
- The sponge stays wet for long periods.
- The sponge has an odor, slime, stains, tears, or discoloration.
- Someone in the household has a weakened immune system or is recovering from illness.
Do not treat the calendar as a legal contract. A sponge can fail before its scheduled replacement date. If it smells like regret on Day Five, Day Five is its final day.
A Better Sponge System for a Cleaner Kitchen
The easiest way to make sponge hygiene less annoying is to give every cleaning task a separate tool. One sponge should not handle dishes, counters, the sink, the stovetop, the refrigerator shelf, and the mysterious spill behind the trash can. That is not efficiency. That is a bacterial road trip.
Create a Two-Tool Routine
Use one sponge or dish brush for washing dishes and a separate washable cloth or scrubber for cleaning countertops and the sink. Labeling them by color is helpful. For example, use a yellow sponge for dishes and a blue cloth for counters.
This small habit lowers the chance that the tool touching raw-food residue later touches plates, cups, or food-prep surfaces.
Consider Dish Brushes and Washable Cloths
Dish brushes can be easier to keep dry because their bristles allow more airflow than a dense sponge. Washable dishcloths, microfiber cloths, and kitchen towels can also work well when they are laundered often on an appropriate hot cycle.
They are not magically germ-proof, of course. A damp dishcloth left in a pile for four days can become just as questionable as an old sponge. The difference is that cloths are easier to wash thoroughly and reuse.
Use Paper Towels for High-Risk Spills
For raw meat juices, egg spills, or anything involving vomiting, diarrhea, pet accidents, or moldy refrigerator leftovers, use disposable paper towels when possible. Throw them away promptly and clean the affected surface with the appropriate product.
This approach may feel less glamorous than a reusable sponge, but food safety is not a fashion contest. Sometimes the safest tool is the one you can discard immediately.
Common Kitchen Sponge Mistakes to Avoid
- Leaving the sponge soaking in dirty sink water overnight.
- Using one sponge for dishes, counters, raw-food messes, and bathroom cleaning.
- Microwaving a dry sponge or any sponge containing metal.
- Assuming dish soap alone sanitizes a sponge.
- Keeping a sponge until it visibly falls apart.
- Using a smelly sponge because it “still has some life left.”
- Mixing cleaning chemicals in an attempt to create a stronger sanitizer.
The main lesson is simple: kitchen hygiene does not depend on having a perfect cleaning routine. It depends on avoiding the easy mistakes that allow germs to travel from one surface to another.
Real-World Kitchen Sponge Experience: What Actually Works
In real kitchens, the best sponge routine is rarely the most complicated one. People tend to abandon systems that require twelve steps, a color-coded spreadsheet, and a certification in advanced sink management. The habits that last are usually the boring ones: rinse the sponge, squeeze it dry, store it where air can reach it, and replace it before it gets weird.
One useful habit is keeping a small supply of fresh sponges where you can see them. When replacements are hidden in the back of a crowded cabinet, it is easy to keep using the old sponge for “just one more day.” That one more day somehow turns into two weeks, then a vague personal relationship with a sponge that has seen too much. Store new sponges under the sink or in a nearby drawer so replacing one feels automatic.
Another practical trick is assigning jobs by color. A dish sponge can be one color, a counter-cleaning cloth another, and a scrubber for pots and pans a third. This avoids the classic moment when someone wipes the stove, washes a glass, and cleans the sink using the exact same tool without pausing for a single second of self-reflection.
Busy households also benefit from a “Friday sponge reset” or another regular weekly cue. Pair it with something you already do, such as taking out the trash, wiping the refrigerator shelves, or running the dishwasher. The goal is not to turn sponge care into a major event. The goal is to make replacement predictable enough that you do not have to inspect the sponge like a detective every morning.
For people who hate wasting sponges, it helps to remember that the sponge does not need to go from dish duty straight to the landfill at the first sign of wear. Before it becomes smelly or contaminated, an older sponge can sometimes be downgraded to a low-risk job, such as scrubbing outdoor planters, cleaning a garbage can, or washing muddy garden tools. Once it is used for those jobs, however, keep it out of the kitchen for good. A sponge should not receive a comeback tour after cleaning the trash bin.
Finally, do not underestimate the value of drying. Many sponge problems begin because the sponge never gets a chance to dry between uses. A sponge holder with airflow, a small rack, or a spot away from the deepest part of the sink can make a noticeable difference. The less time a sponge stays warm, wet, and full of crumbs, the less likely it is to become the household’s least welcome science project.
Conclusion: A Clean Sponge Has an Expiration Date
A kitchen sponge is useful, inexpensive, and surprisingly hardworking. It can also become a source of cross-contamination when it stays damp, traps food particles, or is used far beyond its best days.
Clean and dry your sponge after each use. Sanitize it regularly using a safe method suited to the sponge type. Replace it about every one to two weeks, or sooner if it smells, becomes slimy, tears, stains heavily, or handles a high-risk mess. Your sponge does not need a dramatic ending. It just needs a sensible one.
{

  "meta_title": "When to Clean or Throw Away a Kitchen Sponge",

  "meta_description": "Learn when to clean, sanitize, and replace a kitchen sponge, plus warning signs and easy habits that reduce cross-contamination.",

  "sapo": "Your kitchen sponge may be small, but it works overtime collecting moisture, food residue, and germs. Learn when a sponge needs a quick cleanup, when it needs proper sanitizing, and when it is officially time to throw it away. This guide covers the warning signs of a bad sponge, safe cleaning methods, replacement schedules, cross-contamination mistakes, and practical routines that make kitchen hygiene easier. Keep your dishes clean, your counters safer, and your sponge from becoming the grossest employee in the house.",

  "keywords": [

    "when to replace kitchen sponge",

    "how to clean a kitchen sponge",

    "sanitize kitchen sponge",

    "kitchen sponge bacteria",

    "how often to change sponge",

    "prevent cross-contamination",

    "kitchen cleaning tips"

  ]

}/pre>