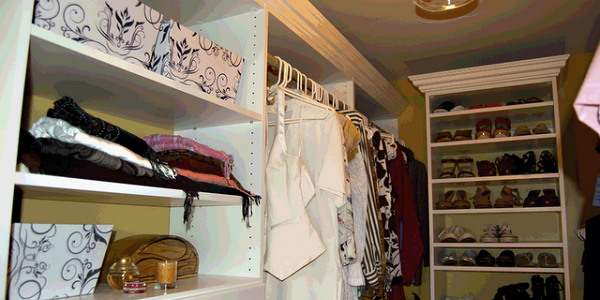
A self assembled master closet redo sounds simple at first: buy a closet system, clear a Saturday, drink heroic amounts of coffee, and magically become the sort of person who folds sweaters like a boutique employee. Then reality appears with a tape measure, three missing screws, and one shelf that absolutely insists the wall is crooked. Still, a DIY master closet makeover is one of the most satisfying home upgrades because it turns daily chaos into daily calm.
The beauty of a self assembled closet system is control. You can choose the layout, adjust the storage zones, decide where shoes go, build double-hanging sections for shirts and pants, and create a home for all those “I’ll wear this someday” pieces that have been living rent-free in the laundry basket. Whether you use a modular wardrobe system, wire shelving, wood closet organizers, open cubbies, drawers, or a combination of everything short of a tiny chandelier, the goal is the same: make your primary closet easier to use every single morning.
This guide walks through planning, designing, installing, organizing, and living with a self assembled master closet redo. It includes practical measurements, smart layout ideas, beginner-friendly installation advice, and real-world experience from the glorious battlefield of DIY storage.
Why a Self Assembled Master Closet Redo Is Worth It
A master closet is not just a place where shirts go to wrinkle. It is a small but powerful part of your daily routine. When the closet works, mornings feel smoother. When it fails, you find one shoe, three belts, and a mystery scarf from 2014 before giving up and wearing the same black sweater again.
A self assembled master closet redo can help you:
- Use vertical space that was previously wasted
- Create dedicated zones for hanging clothes, folded items, shoes, accessories, and seasonal storage
- Improve visibility so you actually wear what you own
- Reduce clutter without needing a fully custom luxury closet
- Customize the system around your real wardrobe instead of someone else’s catalog photo
The biggest advantage is flexibility. Professional custom closets can be beautiful, but self assembled closet systems let homeowners create a tailored look with modular parts, adjustable shelves, cut-to-fit rods, drawers, baskets, and wall-mounted components. You can start with one wall and expand later, which is perfect if your budget needs a warm-up lap before sprinting.
Step One: Empty the Closet and Face the Truth
Before buying shelves, rods, baskets, bins, or that fancy pull-out valet rod that makes you feel like a hotel concierge, empty the closet completely. Yes, completely. The closet must become a blank room, not a negotiation table.
Sort items into clear categories: keep, donate, repair, seasonal storage, and “why do I own this?” Be honest but not cruel. Clothes that fit, feel good, and match your current life deserve prime space. Items that are damaged, uncomfortable, or tied to an imaginary future version of you can probably move on. A closet redo should not be a bigger container for old clutter. It should be a smarter system for the wardrobe you actually use.
This is also the moment to count what you own. How many pairs of shoes need shelves? How many long-hanging items do you have? Do you fold jeans or hang them? Do you need more drawers for workout clothes, or are you pretending that leggings are not multiplying in the dark? Your answers will shape the entire closet design.
Step Two: Measure Like Your Shelves Depend on It
Because they do. Accurate measurements are the backbone of a successful DIY closet remodel. Measure the closet width, height, depth, side walls, back wall, door swing, baseboards, outlets, vents, light switches, trim, and any weird bump-outs that the builder apparently installed for dramatic tension.
For most closets, a comfortable depth for hanging adult clothing is around 24 inches. Shallow areas may still work for shelves, shoes, handbags, or folded garments, but hanging sections need enough room so clothes do not scrape the wall or get crushed by doors. If your master closet is a walk-in, measure walking clearance too. Storage that looks wonderful on paper becomes annoying if you have to turn sideways like a crab every morning.
Helpful Closet Measurement Guidelines
- Single hanging rods often work well around 60 to 70 inches high, depending on garment length.
- Double-hanging sections usually place the lower rod around 40 inches and the upper rod around 80 inches.
- Shelves for folded clothes are often easiest to use when they are adjustable.
- High shelves are ideal for luggage, seasonal bins, extra bedding, or rarely used items.
- Shoe shelves should match the type of shoes you own, not the fantasy closet in a magazine.
Take measurements twice and write them down clearly. Better yet, sketch the closet from above and label each wall. The sketch does not need to be architectural art. A rectangle with numbers is perfectly fine. If it prevents one wrong cut, it is a masterpiece.
Step Three: Choose the Right Self Assembled Closet System
There are several popular routes for a self assembled master closet redo. The best option depends on your budget, skill level, closet size, and desired look.
Wire Closet Systems
Wire shelving is affordable, ventilated, and lightweight. It works well for practical storage and is often easier for beginners to install. The downside is that small items can tip, heels may wobble, and the look is more utility-room than boutique dressing room unless you style it carefully.
Wood and Laminate Closet Systems
Wood or laminate closet organizers create a more built-in appearance. Many come with predrilled panels, adjustable shelves, drawers, hanging rods, and towers. They are heavier than wire systems, so secure installation matters. When done well, they make a master closet feel intentional, polished, and less like a storage cave with pants.
Modular Wardrobe Systems
Modular systems, such as cabinet-style wardrobe frames, are great when you want a semi-custom design. You can combine drawers, doors, shelves, rods, baskets, and inserts. These systems are especially useful for walk-in closets where you want a furniture-like effect. Just remember to check ceiling height before buying tall units. Building a frame on the floor is only fun until you realize it cannot stand upright under the ceiling.
DIY Built-Ins
If you are comfortable with plywood, cleats, trim, and a saw, DIY built-ins can be highly customized. You can create towers, cubbies, shoe shelves, and long hanging sections that fit your exact wall. This option gives maximum flexibility but requires more tools, patience, and confidence. It also requires accepting that caulk is not a personality trait, even if it solves many problems.
Step Four: Design Storage Zones That Match Real Life
A good closet layout is not about cramming in the most shelves. It is about creating zones that make sense. Think of the closet as a tiny department store where every department has a job.
Hanging Zones
Use double rods for shirts, pants, skirts, and shorter jackets. Reserve single long-hang space for dresses, coats, robes, jumpsuits, and anything that needs room to drape. Many master closets waste space by using only one rod across the wall. Adding double-hanging sections can dramatically increase usable storage without expanding the closet footprint.
Shoe Zones
Shoes deserve a plan. Flat shelves work for sneakers, flats, and folded sandals. Taller spaces are better for boots. Adjustable shelves are ideal because shoe collections change. Today it is running shoes and loafers; tomorrow it may be wedding heels, hiking boots, or one very optimistic pair of white shoes.
Folded Clothing Zones
Sweaters, jeans, sweatshirts, and knitwear often do better folded than hung. Hanging heavy knits can stretch them out, which is tragic because sweaters already have enough emotional weight. Use shelves, drawers, or baskets for folded items and keep stacks shallow enough that you can see what is there.
Accessory Zones
Belts, ties, scarves, hats, handbags, jewelry, and watches become clutter when they lack a home. Add hooks, drawer dividers, trays, peg rails, shelf dividers, or small bins. Accessories are small, but they are chaos ninjas. Contain them early.
Seasonal and Occasional Storage
Top shelves are perfect for out-of-season clothes, luggage, formalwear boxes, spare linens, and memory items. Use labeled bins so you do not need to open six containers just to find one wool hat. Clear bins are practical; matching opaque bins are prettier. Choose the one that your brain will actually maintain.
Step Five: Prep the Closet Before Installation
Once the old closet is empty, clean the walls, vacuum the floor, patch holes, and paint if needed. A fresh coat of light-colored paint can make the closet feel larger and brighter. It also makes the redo feel finished rather than “we installed shelves in a tired box.”
Lighting is another underrated upgrade. A dark closet makes every navy shirt look black, which is how people accidentally dress like stagehands. Consider replacing dim bulbs, adding LED strip lights, or installing motion-sensor lighting where appropriate. Good lighting makes the closet easier to use and instantly more upscale.
Also locate wall studs before mounting rails, cleats, or heavy units. Use proper anchors when studs are not available, but whenever possible, attach structural components into studs. Closet systems carry real weight. Clothes are sneaky; individually they seem light, collectively they become a fabric boulder.
Step Six: Install Slowly, Level Everything, and Do Not Trust the Floor
Self assembly rewards patience. Read the instructions before starting, lay out all parts, sort hardware, and confirm you have the correct tools. A cordless drill, level, stud finder, measuring tape, pencil, step ladder, clamps, and a rubber mallet are common heroes of the process.
Start with the main support system, such as a wall rail, cleats, or vertical panels. Keep everything level. If the floor slopes, and many floors do, use shims or adjustable feet where the system allows. Do not force shelves to follow a crooked floor if the rods and drawers need to operate cleanly.
Assemble large units close to where they will live. For tall wardrobe frames, confirm whether they must be assembled upright or can be built flat and lifted. This detail matters more than pride. Pride will not help when a cabinet frame is wedged diagonally between the ceiling and floor like a wooden apology.
Step Seven: Add the Details That Make It Feel Custom
The secret to making a self assembled master closet redo look expensive is finishing. Add trim where appropriate, cover visible holes with plugs, use matching hangers, align shelf heights, and leave breathing room. A closet does not look luxurious because it is packed. It looks luxurious because it is edited.
Consider these finishing touches:
- Matching slim hangers to save space and create visual calm
- Drawer dividers for socks, underwear, ties, watches, or workout gear
- Labels for bins and seasonal storage
- Valet hooks for planning outfits
- Mirrors to reflect light and help with dressing
- Small rugs for comfort in walk-in closets
- Decorative baskets for soft storage
Be careful not to overbuy organizers. More bins do not automatically create order. Sometimes they simply create labeled clutter, which is clutter wearing a name tag. Buy storage accessories after you know what needs storing.
Common Mistakes to Avoid in a DIY Master Closet Makeover
Buying Before Decluttering
This is the classic mistake. People buy bins, baskets, rods, and shelves for items they should have donated. Declutter first, design second, shop third.
Ignoring Long-Hang Needs
Double rods are efficient, but not everything can be folded into a short section. Leave room for dresses, coats, robes, and long garments.
Making Shelves Too Deep
Deep shelves sound generous, but they can become caves where sweaters disappear. For folded clothing, shallower and adjustable shelves are often easier to maintain.
Forgetting About Daily Habits
A beautiful closet that fights your routine will not stay beautiful. Store frequent-use items at eye level and less-used items higher or lower. Design for behavior, not perfection.
Skipping Anchoring
Wall-mounted systems, tall units, and heavy shelves need secure anchoring. A closet redo should end with admiration, not a shelf avalanche.
Budget-Friendly Ideas for a Better Master Closet
You do not need a celebrity-size dressing room to create a better closet. Even modest upgrades can make a major difference. Add a second hanging rod. Replace bulky hangers with slim ones. Install hooks on unused wall space. Add shelf dividers. Use labeled bins for high shelves. Move non-clothing clutter somewhere else. Place a hamper where clothes actually land, not where you wish they would land.
If the closet has open floor space, use it thoughtfully. A low shoe rack, laundry sorter, or rolling drawer unit can add function without permanent installation. For renters, tension rods, over-the-door organizers, freestanding shelves, and removable hooks can create structure without angering the lease agreement.
How to Maintain the Closet After the Redo
The closet is not finished when the last shelf goes in. It is finished when the system survives real life. Build a simple maintenance routine: return items to their zones, do a five-minute reset once a week, and review clothing seasonally. When a zone becomes too full, edit before expanding.
Use the one-in, one-out rule for categories that tend to overflow. Bought new sneakers? Consider releasing an old pair. Added three sweaters? Remove the ones you never choose. Your closet has boundaries. Respecting them keeps the system from becoming a very organized landslide.
Experience Notes: What a Self Assembled Master Closet Redo Really Feels Like
The first lesson from a self assembled master closet redo is that the planning phase matters more than the shopping phase. It is tempting to start with the fun part: browsing closet systems, imagining rows of shoes, and convincing yourself that drawer inserts will turn you into a more disciplined person. But the best decisions happen before anything arrives in a box. The most useful step is standing inside the empty closet and noticing how you move. Which side do you naturally reach for first? Where does laundry pile up? Which wall has the best light? Where would a hamper actually get used? These questions sound small, but they determine whether the finished closet feels natural or annoying.
The second lesson is that self assembly takes longer when you care about the result, and that is not a bad thing. Rushing usually creates tiny mistakes that become daily irritations. One shelf installed slightly off level can make every folded stack lean like it is trying to escape. One rod placed too high can make shirts difficult to reach. One drawer tower positioned without thinking about door clearance can become a comedy routine every time you open it. Slow installation is not failure. It is craftsmanship wearing weekend clothes.
The third lesson is that walls and floors are not always honest. You may measure perfectly and still discover that the back wall bows, the floor slopes, or the corner is not square. This is normal. Older homes especially have opinions. Keep shims, a level, and patience nearby. The goal is not to prove the room is perfect. The goal is to make the closet system function beautifully inside an imperfect room.
The fourth lesson is that the closet should be designed for your least glamorous habits. If you drop workout clothes near the door, create a basket there. If you repeat the same five outfits, give those pieces the easiest access. If you hate folding, add drawers or bins that forgive you. If you own more shoes than shelf space, do not pretend the shoes will become smaller. A successful master closet redo is not about becoming a different person. It is about building a system that supports the person who actually lives in the house.
The fifth lesson is that finishing touches are surprisingly powerful. Matching hangers, clean labels, bright lighting, and consistent bins can make a self assembled closet look far more custom than it is. Even simple changes, such as grouping clothes by category and color, make the closet easier to scan. The first morning after the redo is usually the big reward. You open the door, see everything clearly, and feel a tiny burst of domestic victory. No parade arrives, unfortunately, but finding both shoes on the first try is basically confetti for adults.
Finally, expect the system to evolve. After a few weeks, you may realize that sweaters need more room, shoes need a different angle, or accessories need a drawer instead of hooks. That is the advantage of a self assembled master closet redo: adjustable shelves, modular units, and flexible zones can change as your life changes. The closet does not have to be perfect on day one. It only has to be thoughtful, sturdy, and easy enough to maintain when life gets busy.
Conclusion
A self assembled master closet redo is one of those home projects that pays you back every morning. It turns a cluttered, frustrating space into a practical dressing area with zones for hanging clothes, folded pieces, shoes, accessories, and seasonal storage. The best results come from measuring carefully, decluttering honestly, choosing the right closet system, installing everything securely, and designing around real habits instead of fantasy routines.
You do not need a massive budget or professional carpentry skills to create a better master closet. With smart planning, adjustable storage, good lighting, and a little patience, a self assembled closet can feel organized, personal, and surprisingly polished. And if one shelf takes three attempts to get right, congratulations. You are not failing. You are simply participating in the ancient DIY tradition of learning through mild frustration.