Note: This article is written for web publishing and synthesizes practical guidance from reputable American baking educators, yeast manufacturers, culinary test kitchens, and food publications.
Dried yeast looks like tiny beige confetti, which is not exactly inspiring until you realize those sleepy granules can lift a loaf of bread, puff up pizza dough, and turn cinnamon rolls into soft spirals of happiness. The trick is knowing how to wake it up properly. Activate dried yeast the right way, and your dough rises like it just heard good news. Do it wrong, and your bread may sit there with the emotional range of a brick.
The good news: learning how to activate dried yeast is simple. You do not need a bakery degree, a marble countertop, or a dramatic slow-motion flour toss. You need warm liquid, the right type of yeast, a little patience, and a basic understanding of what yeast wants. Think of yeast as a very small houseguest. It likes warmth, food, moisture, and time. It does not like boiling water, expired packets, or being drowned in salt before breakfast.
This guide walks you through the complete process in eight easy steps, explains how to tell whether your yeast is alive, and shares real-world baking experience so your next loaf, pizza crust, dinner roll, or doughnut batch gets off to a strong start.
What Does It Mean to Activate Dried Yeast?
To activate dried yeast means to rehydrate dormant yeast granules in warm liquid so the yeast can begin feeding and producing carbon dioxide. That carbon dioxide is what creates bubbles in dough, helping bread rise and develop a light texture. This process is often called proofing yeast, blooming yeast, or waking up yeast.
Active dry yeast is the type most commonly activated before baking. It has larger granules than instant yeast and traditionally performs best when dissolved in warm water or milk before being mixed into dough. Modern active dry yeast is more reliable than old-fashioned versions, so some bakers mix it directly with flour. Still, activating it first is useful because it confirms that the yeast is alive before you sacrifice perfectly innocent flour to a doomed dough.
Instant yeast, rapid-rise yeast, and bread machine yeast usually do not need to be activated first. They are made with smaller particles that absorb moisture quickly and can be mixed directly into dry ingredients. However, you can still test them in warm liquid if you suspect they are old or if your pantry has become a retirement home for forgotten baking supplies.
How to Activate Dried Yeast: 8 Steps
Step 1: Check the Type of Yeast You Have
Before adding anything to a bowl, read the label on the package. The instructions for active dry yeast are slightly different from those for instant or rapid-rise yeast. If the package says active dry yeast, activating it in warm liquid is a smart move. If it says instant yeast, bread machine yeast, or rapid-rise yeast, you can usually add it directly to the flour unless the recipe says otherwise.
This distinction matters because yeast type affects timing. Active dry yeast may rise more slowly than instant yeast, especially in enriched doughs that contain butter, eggs, or sugar. If you substitute active dry yeast for instant yeast, you may need to give the dough a little more rising time. Bread does not care about your schedule. Bread follows bread time.
Step 2: Check the Expiration Date
Dried yeast is alive but dormant. That means it can lose strength over time, especially if it has been stored in a warm or humid place. Before activating yeast, check the “best by” or expiration date. If the date has passed, the yeast may still work, but testing it becomes more important.
A sealed packet stored in a cool, dry pantry is usually reliable until the date printed on the package. Once opened, yeast lasts longer when stored in an airtight container in the refrigerator or freezer. If you bake often, a jar of yeast can be economical. If you bake once every leap year, individual packets may save you from the mystery jar hiding behind the mustard.
Step 3: Measure the Right Amount
Most standard packets of dried yeast contain about 2 1/4 teaspoons, or roughly 7 grams. Many bread recipes are written around that amount. If your recipe calls for one packet, measure 2 1/4 teaspoons from a jar. If it calls for a specific weight, use a kitchen scale for accuracy.
Too little yeast can slow fermentation, while too much yeast may create dough that rises too quickly and develops less flavor. Yeast is powerful, but it is not a magic shortcut. A moderate amount gives the dough time to build structure, aroma, and that warm bakery smell that makes people wander into the kitchen pretending they “just happened to be nearby.”
Step 4: Warm the Liquid Correctly
The ideal liquid temperature for activating active dry yeast is generally around 100°F to 110°F, though many baking guides use a nearby range of about 105°F to 115°F. The exact target can vary by brand and recipe, but the rule is simple: the liquid should feel warm, not hot.
Use a kitchen thermometer if you have one. It removes the guesswork and prevents accidental yeast drama. If you do not have a thermometer, test the liquid on the inside of your wrist. It should feel comfortably warm, like bath water for a very relaxed adult, not hot enough to make you flinch.
Water that is too cool may wake yeast slowly. Water that is too hot can damage or kill it. If the liquid is steaming aggressively, it is not “cozy.” It is a tiny yeast sauna with no survivors.
Step 5: Add a Small Amount of Sugar
Add the warm liquid to a bowl or measuring cup, then stir in a small amount of sugar if your recipe allows it. A common amount is 1 teaspoon of sugar for 1 packet of active dry yeast. Sugar gives the yeast quick food and helps produce visible bubbles during activation.
That said, sugar is not always required. Yeast can feed on starches from flour once the dough is mixed. For lean breads such as baguettes or pizza dough, recipes may skip sugar entirely. If you are simply testing whether old yeast is alive, a small spoonful of sugar helps make the result easier to see.
Avoid adding salt directly to the yeast mixture at this stage. Salt is important for bread flavor and gluten strength, but concentrated salt can slow yeast activity. Add salt later with the flour, where it can distribute evenly.
Step 6: Stir in the Yeast Gently
Sprinkle the dried yeast over the warm liquid and stir gently. You do not need to whisk like you are auditioning for a cooking competition. A few slow stirs are enough to moisten the granules. Let them sit so they can soften and dissolve.
At first, the mixture may look cloudy, grainy, or unimpressive. That is normal. Active dry yeast often starts as little floating pellets before it absorbs water. After a few minutes, the yeast should begin producing small bubbles. Those bubbles are a good sign that fermentation is starting.
Step 7: Wait 5 to 10 Minutes
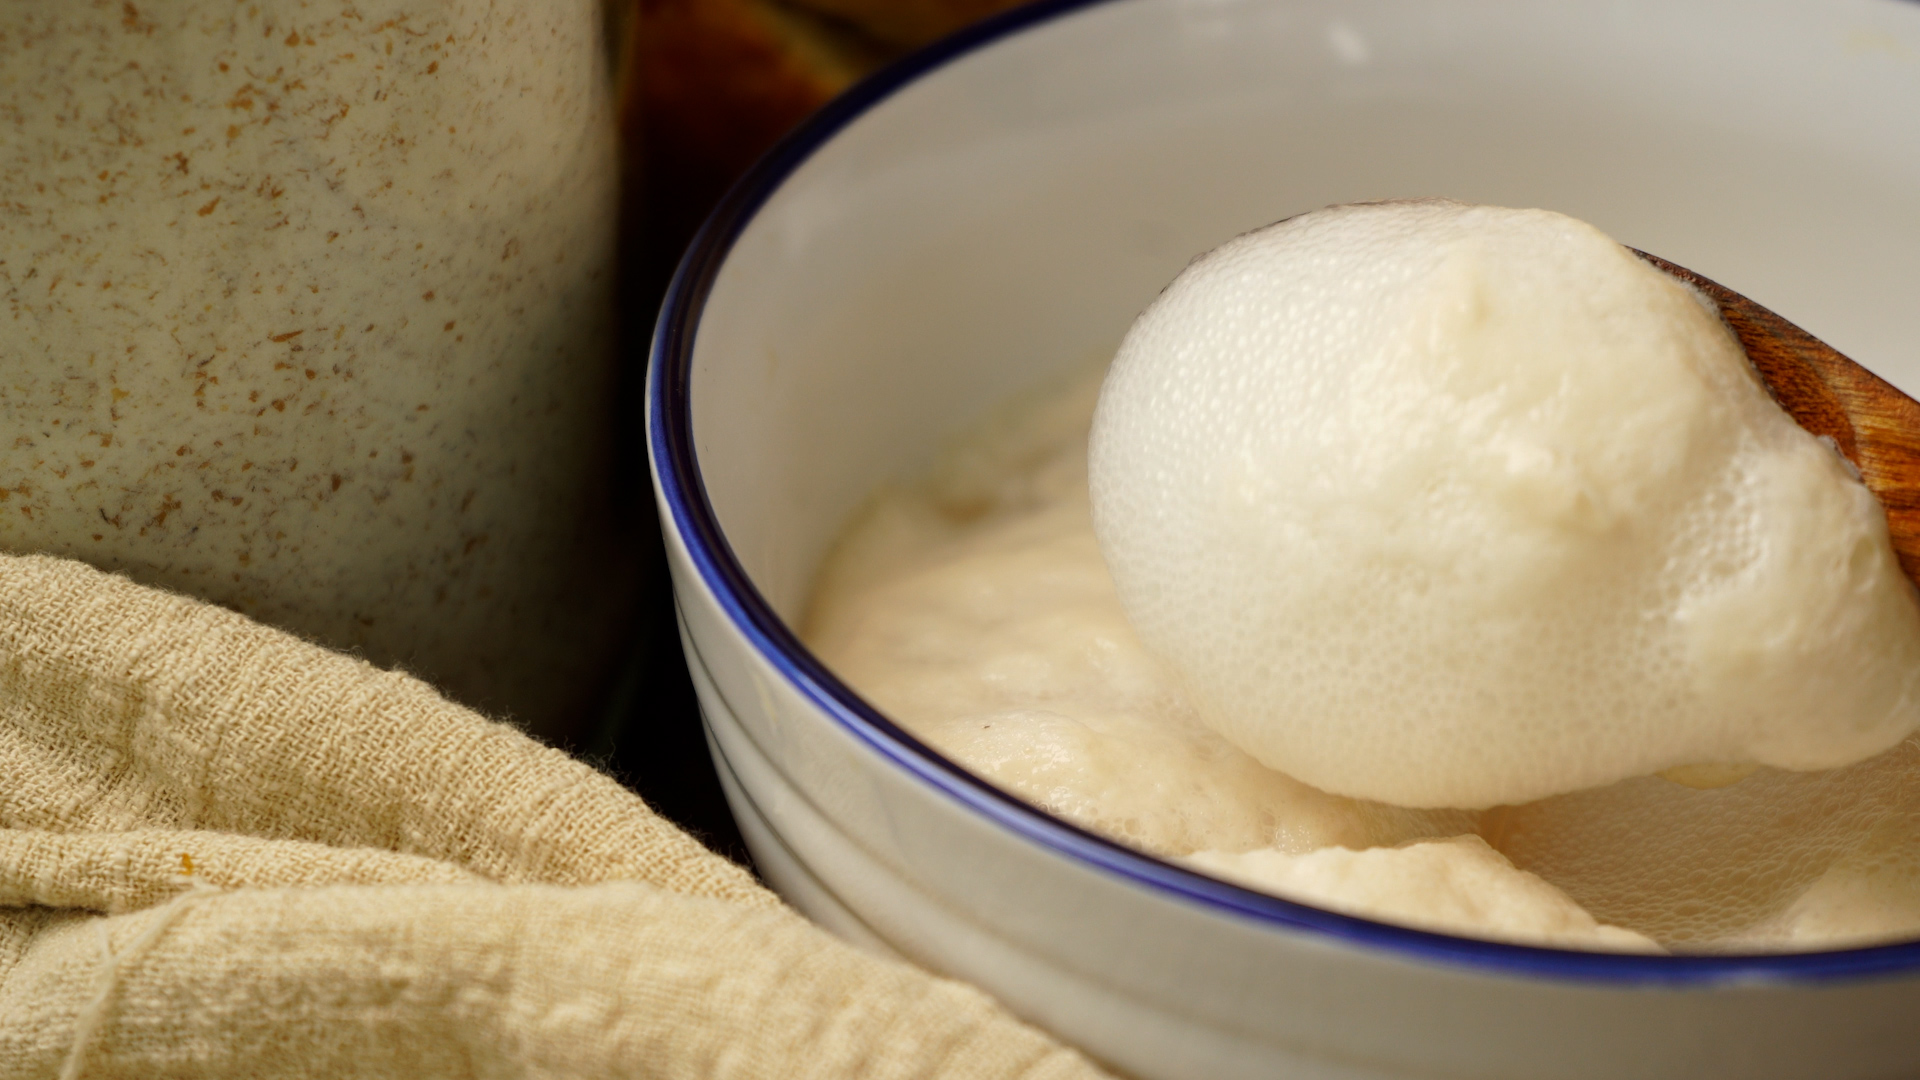
Let the yeast mixture stand for about 5 to 10 minutes. During this time, the yeast should become creamy, bubbly, or foamy. A healthy yeast mixture may form a tan foam on top and smell slightly bready, warm, or pleasantly fermented.
The foam does not need to look like a bubble bath in a luxury hotel. Some yeast foams dramatically; some simply shows bubbles around the edges. What matters is activity. If the mixture becomes frothy or visibly alive, your yeast is ready to join the recipe.
If nothing happens after 10 minutes, wait another few minutes and check the temperature of the room. A cold kitchen may slow the process. If there is still no bubbling, the yeast may be expired, the liquid may have been too hot, or the water may have contained something that interfered with yeast activity.
Step 8: Add the Activated Yeast to Your Dough
Once the yeast is bubbly, add the entire mixture to the rest of your recipe. Use both the liquid and the foam. The foam is not a decoration; it is part of the yeast mixture. If your recipe did not already account for the activation liquid, reduce the recipe’s total liquid by the amount you used to activate the yeast.
For example, if you activated yeast in 1/4 cup of warm water and your recipe calls for 1 cup of water total, add only 3/4 cup more water later. This keeps the dough from becoming too wet. Dough hydration matters, especially in bread, pizza, and rolls. A little extra water can be helpful in some recipes, but too much can turn kneading into a sticky wrestling match.
How to Tell If Dried Yeast Is Active
Activated yeast should show signs of life within 5 to 10 minutes. Look for foam, bubbles, or a creamy layer on the surface. The mixture may expand slightly and give off a mild, yeasty aroma. That smell is a good thing. It means fermentation is underway.
If the yeast sinks, stays flat, and does absolutely nothing, it may be dead or weak. Do not add inactive yeast to dough and hope for a miracle. Flour is not cheap, and hope is not a leavening agent. Start over with fresh yeast and check your liquid temperature carefully.
Signs Your Yeast Is Healthy
Healthy activated yeast usually looks foamy, creamy, or bubbly. It may form a light cap on top of the liquid. The smell should be pleasant and bread-like, not rotten or sharply unpleasant. A little beer-like aroma is normal because yeast fermentation produces alcohol and carbon dioxide.
Signs Your Yeast May Be Dead
Dead yeast remains flat and lifeless. The liquid may look almost exactly the same as when you started. If the yeast is clumped, stale-smelling, or past its expiration date, it may not produce enough gas to raise dough properly. When in doubt, test a small amount before mixing a full batch.
Common Mistakes When Activating Dried Yeast
Using Water That Is Too Hot
This is the classic mistake. Hot water can kill yeast before it has a chance to work. Yeast likes warmth, not punishment. Use a thermometer whenever possible, especially if you are new to bread baking.
Using Water That Is Too Cold
Cold water usually will not kill yeast, but it can make activation slow. If your yeast is fresh and your kitchen is cool, it may simply need more time. For recipes with long fermentation, cool water can even be intentional. For quick activation, warm liquid is better.
Adding Salt Too Early
Salt belongs in bread dough, but not directly on top of dry yeast in a tiny bowl of warm water. Concentrated salt can slow yeast. Mix salt with the flour or add it after the yeast has been diluted into the dough.
Forgetting to Adjust the Recipe Liquid
If you use extra water to proof yeast but do not reduce the remaining liquid, your dough may become wetter than intended. This is especially noticeable in recipes that require kneading or shaping, such as dinner rolls, sandwich bread, and pizza dough.
Expecting Instant Yeast to Behave Exactly Like Active Dry Yeast
Instant yeast often activates faster and does not require proofing. Active dry yeast may take a little longer. Both can make excellent bread, but they are not always identical in timing. Watch the dough, not just the clock.
Can You Activate Dried Yeast in Milk?
Yes, you can activate dried yeast in warm milk if the recipe calls for milk. Milk creates a softer, richer dough and is common in cinnamon rolls, dinner rolls, doughnuts, brioche-style breads, and sweet breads. Warm the milk carefully to the same gentle temperature range used for water. If it feels hot, let it cool before adding yeast.
Milk contains natural sugars that yeast can use, but adding a small amount of sugar can still help show visible activity. Be careful not to overheat milk, because it can form a skin, scorch at the bottom of the pan, or become too hot for yeast. Microwaving in short bursts and stirring between each burst works well.
Can You Activate Dried Yeast Without Sugar?
Yes. Sugar helps yeast foam quickly, but it is not absolutely required for every recipe. Yeast can feed on carbohydrates in flour once the dough is mixed. Traditional lean breads often contain only flour, water, yeast, and salt. In those recipes, sugar may be unnecessary.
However, if your goal is to test whether the yeast is alive, a small amount of sugar makes the test more obvious. It gives yeast an easy snack and helps produce foam faster. Think of sugar as the yeast equivalent of coffee: not always required, but often appreciated.
Best Storage Tips for Dried Yeast
Store unopened dried yeast in a cool, dry place. Once opened, transfer it to an airtight container and refrigerate or freeze it. Moisture, heat, and air are the enemies of long-lasting yeast. Label the container with the date you opened it so you do not have to play pantry detective six months later.
If frozen, dried yeast can usually be used directly from the freezer, but letting it come closer to room temperature before activation may help it wake more evenly. Always test older yeast before using it in an important recipe. Nobody wants birthday cinnamon rolls that rise like pancakes with low self-esteem.
Experience-Based Tips for Better Yeast Activation
After working with dried yeast in real kitchens, one lesson becomes obvious: yeast is not difficult, but it is sensitive to small details. The most reliable habit is to treat the activation step as a quick check-in, not a mysterious ritual. When the water is warm, the yeast is fresh, and the bowl is clean, the process almost always works.
A thermometer is the simplest upgrade. Many beginners rely on touch, which is fine once you have experience, but hands are not always honest. If you just washed dishes in cold water, lukewarm water may feel hotter than it really is. If you have been holding a warm mug, the same water may feel cooler. A thermometer gives you the truth without the kitchen mind games.
Another practical tip is to activate yeast in a clear glass measuring cup. This makes it easier to see bubbles forming around the edges and foam rising on top. In a dark bowl, early activity can be harder to spot. A measuring cup also helps you track how much liquid you used so you can subtract it from the recipe later.
Room temperature matters more than many people expect. In a warm kitchen, yeast may foam quickly and dough may rise faster than the recipe predicts. In winter, the same recipe may move slowly, as if the dough has decided to take a personal day. If your kitchen is cold, place the yeast mixture in a warm, draft-free spot. Do not put it on direct high heat. A slightly warm oven that has been turned off can work, but check that it is not hot.
For enriched doughs, patience is essential. Doughs with butter, eggs, milk, and sugar often rise more slowly because fat and sugar can affect gluten development and yeast activity. If you are making cinnamon rolls and the dough takes longer than expected, that does not automatically mean you failed. It may simply need more time. Watch for the dough to become puffy and expanded rather than obeying the timer like it is a school bell.
One common beginner worry is whether the yeast foam should be huge. It does not need to erupt like a science fair volcano. A modest creamy layer and visible bubbles are usually enough. Different brands, ages, and temperatures produce different levels of foam. The key is whether the mixture changes from flat and grainy to active and bubbly.
It also helps to keep expectations realistic. Activating yeast confirms that the yeast is alive, but it does not guarantee perfect bread. Flour type, kneading, hydration, salt, fermentation time, shaping, and baking temperature all matter. Yeast activation is the opening scene, not the whole movie. Still, a good opening scene makes the rest of the story much easier.
If a batch fails, do not take it personally. Even experienced bakers occasionally meet a stubborn packet of yeast or misjudge water temperature. The best response is to troubleshoot calmly: check the yeast date, measure the liquid temperature, use a small amount of sugar, wait 10 minutes, and look for bubbles. Once you understand those basics, dried yeast becomes less intimidating and much more predictable.
Frequently Asked Questions About Activating Dried Yeast
How long does dried yeast take to activate?
Most active dry yeast activates in 5 to 10 minutes when mixed with warm liquid. If your kitchen is cool or the yeast is older, it may take a little longer. If there is no activity after 15 minutes, start over with fresh yeast.
What temperature kills yeast?
Very hot liquid can damage or kill yeast. For activating active dry yeast, stay near the recipe or brand recommendation, commonly around 100°F to 110°F or slightly warmer depending on the source. Avoid boiling, steaming, or uncomfortably hot liquid.
Do I stir the foam into the dough?
Yes. Add the entire activated yeast mixture, including the foam and liquid, to the recipe. The foam contains active yeast and should not be discarded.
Can I use honey instead of sugar?
Yes. A small amount of honey can feed yeast and help it foam. Use a modest amount, such as 1 teaspoon, unless the recipe calls for more. Too much sweetener can slow fermentation in some doughs.
Can I activate yeast in a metal bowl?
Yes, a clean metal bowl is fine. Glass measuring cups are simply easier for beginners because they let you see the bubbles clearly.
Conclusion
Learning how to activate dried yeast is one of the easiest ways to improve homemade bread, pizza dough, rolls, and sweet baked goods. The process is simple: check the yeast type, measure correctly, use warm liquid, add a little sugar if helpful, wait for bubbles, and mix the activated yeast into your dough. Once you understand what healthy yeast looks and smells like, bread baking becomes far less mysterious.
The most important rule is temperature. Warm liquid wakes yeast; hot liquid can ruin it. The second rule is patience. Yeast works on its own schedule, and good dough often rewards bakers who know when to wait. With these eight steps, you can activate dried yeast confidently and give your baked goods the rise they deserve.