Pumpkin carving sets are the unsung heroes of Halloween. Sure, the pumpkin gets the spotlight, the porch gets the compliments, and the candle gets to glow dramatically like it has just solved a Victorian mystery. But the real magic starts with the tools. A good pumpkin carving set turns a stubborn orange gourd into a grinning jack-o’-lantern, a haunted mansion, a cat silhouette, or at the very least something that looks less like a potato having an existential crisis.
For years, many people attacked pumpkins with oversized kitchen knives, soup spoons, and heroic optimism. That method can work, but it is messy, tiring, and not always safe. Modern pumpkin carving kits are designed to make the process easier, cleaner, and more precise. They usually include small serrated saws, scoop tools, pokers, detail blades, stencils, and sometimes LED lights. Whether you are carving with kids, decorating for a Halloween party, or trying to win the neighborhood’s unofficial “spookiest porch” competition, the right set matters.
This guide explains what pumpkin carving sets include, how to choose one, which tools are worth paying for, how to carve safely, and how to make your finished pumpkin last longer. Grab your favorite fall drink, roll up your sleeves, and prepare to become the Michelangelo of squash.
What Are Pumpkin Carving Sets?
Pumpkin carving sets are tool kits made specifically for cutting, scraping, shaping, and decorating pumpkins. Unlike regular kitchen knives, most carving tools are smaller and easier to control. Many are serrated rather than razor-sharp, which helps them saw through pumpkin skin without requiring the same force as a large chef’s knife.
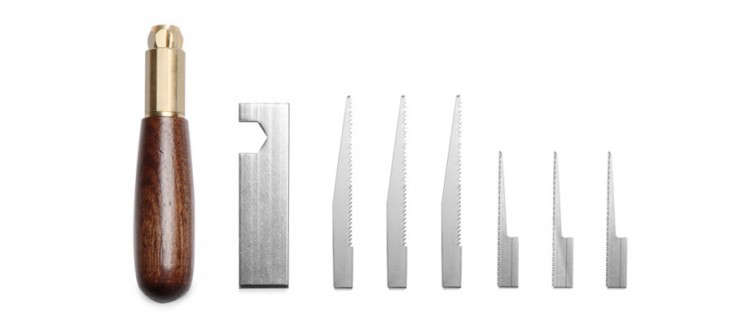
A basic pumpkin carving kit usually includes a carving saw, a scoop, a poker wheel or punch tool, and a few printed patterns. More advanced sets may include etching tools, sculpting loops, drill bits, detail knives, replacement blades, storage cases, and reusable stencils. Some premium kits are made with stainless steel handles and stronger blades, while budget kits often use plastic handles and lightweight saws.
The best pumpkin carving sets are not necessarily the biggest. A 20-piece kit sounds exciting until you realize 11 of the pieces look suspiciously like tiny medieval dental instruments. What matters most is whether the tools feel sturdy, comfortable, and suitable for your design goals.
Why Use a Pumpkin Carving Set Instead of a Kitchen Knife?
A kitchen knife can cut a pumpkin, but it is not always the smartest tool for the job. Pumpkins have thick skin, slippery flesh, and awkward curves. A large knife can get stuck, twist unexpectedly, or require too much pressure. That is when accidents happen, and no Halloween decoration is worth turning your evening into an urgent care field trip.
Pumpkin carving sets offer better control. Their saws are short, narrow, and flexible enough to follow curves. Detail blades can cut small features like teeth, eyebrows, stars, or spooky little bat wings. Scoops remove pulp faster than a tablespoon, which means less time elbow-deep in pumpkin goo and more time admiring your artistic genius.
Carving kits are especially useful for families. Children should not handle sharp tools without close adult supervision, but kid-friendly carving sets often make it easier for adults to guide the process safely. Younger kids can help draw the face, clean seeds, choose stencils, or decorate with paint and stickers while adults handle the cutting.
Common Tools Found in Pumpkin Carving Sets
Carving Saws
The carving saw is the star of most pumpkin carving sets. It looks like a tiny serrated knife and is used to cut through the pumpkin shell. Thin saws are great for curves and detailed shapes, while thicker saws work better for large openings and bold designs.
Scoops and Scrapers
A scoop removes seeds, stringy pulp, and loose flesh from inside the pumpkin. A good scraper can also thin the pumpkin wall, making it easier to carve detailed designs and allowing light to shine through more evenly. If your jack-o’-lantern looks dim, it may not be haunted; it may simply have walls thicker than a hardcover dictionary.
Poker Tools and Pattern Transfer Wheels
Poker tools help transfer stencil patterns onto the pumpkin. You tape the pattern to the surface and poke small holes along the lines. When the paper comes off, the dotted outline tells you where to cut. This is very helpful for beginners and anyone attempting a design more complicated than “triangle eyes, triangle nose, business-casual mouth.”
Etching and Sculpting Tools
Etching tools remove the outer skin without cutting all the way through the pumpkin. This creates shaded areas that glow softly when lit from inside. Sculpting tools are great for layered effects, realistic faces, textured fur, moonlit clouds, or dramatic monster wrinkles.
Detail Knives
Detail knives handle small cuts, sharp corners, and tight spaces. They are useful for advanced designs, but they should be handled carefully. If you are new to carving, use slow, short cuts rather than trying to slice through the pumpkin in one heroic motion.
LED Lights
Some pumpkin carving kits include battery-operated lights. These are safer and cooler than candles, especially around kids, pets, dry leaves, costumes, and porch decorations. LED lights also come in colors, flickering modes, and waterproof versions for outdoor displays.
How to Choose the Best Pumpkin Carving Set
Consider Your Skill Level
Beginners should look for a simple kit with a sturdy saw, scoop, poker tool, and easy stencils. Intermediate carvers may want multiple saw sizes and etching tools. Advanced pumpkin artists should consider stainless steel tools, sculpting loops, and ergonomic handles.
Check Tool Durability
Cheap pumpkin carving sets can work for one night, but flimsy handles may bend or snap during thicker cuts. If you carve pumpkins every year, invest in a reusable set with metal blades and comfortable grips. A durable kit saves money over time and reduces the frustration of a saw handle giving up halfway through a vampire mouth.
Look for Comfortable Handles
Comfort matters more than people think. Pumpkin carving takes repetitive motion, and hard plastic handles can become uncomfortable. Rubberized or rounded handles are easier to hold, especially during longer carving sessions.
Choose the Right Kit for Kids
For family carving, choose tools labeled for pumpkin carving rather than general craft knives. Keep sharp tools in adult hands and let children help with drawing, scooping, sticker placement, and choosing the final glowing location. A safe pumpkin night is a successful pumpkin night.
Think About Storage
A storage case is a bonus. It keeps sharp tools organized and prevents the annual October tradition of asking, “Where did we put the pumpkin stuff?” while opening every drawer in the house like a detective in a fall-themed crime drama.
How to Use Pumpkin Carving Sets Like a Pro
Step 1: Pick the Right Pumpkin
Choose a pumpkin that feels firm, has no soft spots, and sits flat. A smooth face makes stencil work easier. A strong stem is nice, but do not carry the pumpkin by the stem because it can break. Medium-sized pumpkins are usually easiest for beginners because they provide enough surface area without becoming a wrestling match.
Step 2: Prepare Your Workspace
Carve in a clean, dry, well-lit area. Cover the table with newspaper, kraft paper, or a disposable tablecloth. Dry your hands and tools before carving. Moisture makes everything slippery, and slippery tools are where Halloween fun goes to meet bad decisions.
Step 3: Cut the Opening
Many people cut around the stem, but cutting from the bottom has advantages. It keeps the stem intact, makes the pumpkin look cleaner, and allows you to place the pumpkin directly over a light. If you cut a top lid, angle the blade inward so the lid does not fall into the pumpkin.
Step 4: Scoop and Thin the Walls
Use the scoop to remove seeds and pulp. Scrape the inside wall behind your design until it is about half an inch to one inch thick. Thinner walls are easier to carve and produce a brighter glow. Save the seeds if you like roasted pumpkin seeds; toss the stringy pulp unless your compost pile is hungry.
Step 5: Transfer the Design
Draw directly on the pumpkin with a washable marker or tape a stencil to the surface and use a poker tool to mark the design. Start with simple shapes if you are new. Detailed stencils look impressive, but they can quickly become a pumpkin-based patience test.
Step 6: Carve Slowly
Use short, controlled sawing motions. Start from the center of the design and work outward so the pumpkin stays stable. Push cut pieces out gently from the inside. If a tooth or tiny detail breaks, do not panic. Toothpicks can reattach small pieces, and from the sidewalk at night, most people will think it was intentional.
Step 7: Add Light
Battery-operated LED lights are the easiest and safest choice. They do not produce flame, they last longer than candles, and they reduce heat inside the pumpkin. If you use a real candle, keep the pumpkin away from flammable decorations and never leave it unattended.
Pumpkin Carving Safety Tips
Safety is not the glamorous part of pumpkin carving, but it is the part that keeps the evening from becoming memorable for the wrong reason. Always carve on a stable surface. Keep tools dry. Cut away from your body and hands. Use small motions instead of forceful stabbing or deep slicing. Adults should handle cutting tasks when children are involved.
Avoid using power tools unless you are experienced and have proper protective equipment. Drills can create fun dotted patterns, but they are not toys. If your pumpkin plan requires goggles, clamps, and a safety briefing, maybe consider a stencil shaped like a ghost and call it charming.
Keep a first-aid kit nearby. Minor cuts should be cleaned and covered. For deep cuts, heavy bleeding, numbness, or trouble moving fingers, seek medical attention. The goal is to carve the pumpkin, not audition for a medical drama.
How to Make a Carved Pumpkin Last Longer
Carved pumpkins naturally break down because cutting exposes moist flesh to air, bacteria, mold, and curious squirrels. Still, you can slow the process with a few smart steps.
First, clean the pumpkin thoroughly before carving. Remove as much pulp as possible because stringy pulp holds moisture and encourages mold. After carving, some people lightly wipe or spray cut surfaces with a diluted bleach solution or vinegar solution, then allow the pumpkin to dry fully. The key is not to leave it wet. Moisture is mold’s favorite welcome mat.
Next, coat exposed cut edges with petroleum jelly or vegetable oil to reduce moisture loss. However, do not combine oily coatings with real candles because they can be flammable. Use LED lights instead. Store the pumpkin in a cool, shaded place when possible. Heat and direct sun speed up decay. If the weather is warm, refrigerating the pumpkin overnight can help preserve it.
Finally, raise the pumpkin off damp ground. A porch step, tray, or piece of cardboard can reduce contact with moisture and insects. Your jack-o’-lantern may not last forever, but with care, it can survive long enough to greet trick-or-treaters with dignity.
Best Pumpkin Carving Set Features for Different Users
For Beginners
Choose a kit with fewer tools, clear instructions, and simple patterns. A sturdy saw, scoop, and poker tool are enough to create a classic jack-o’-lantern. Beginner kits should feel approachable, not like a surgical tray for gourds.
For Families
Look for sets with large handles, safe storage, and kid-friendly templates. Add washable markers, stickers, paint, and LED lights so younger children can participate without handling blades.
For Serious Halloween Decorators
Choose a premium reusable set with stainless steel tools, etching blades, sculpting loops, and multiple saw sizes. A good set can handle layered designs, shaded carvings, and annual porch displays.
For Party Hosts
Buy multiple affordable kits so guests are not all waiting for one saw. Set up stations with bowls for seeds, towels, printed patterns, markers, and battery lights. Also provide simple no-carve options for guests who prefer decoration over excavation.
Creative Ideas to Try With Pumpkin Carving Sets
Classic faces never go out of style, but pumpkin carving sets can do much more. Try a haunted house silhouette with glowing windows, a crescent moon and stars, a black cat profile, a stack of tiny ghost faces, or your house number for a festive porch marker. Etching tools are excellent for leaf patterns, spider webs, and shaded lettering.
You can also mix carving with painting. Paint the pumpkin black, carve stars, and place a warm LED light inside for a night-sky effect. Carve small holes with a drill-style tool for a glowing polka-dot pumpkin. Use cookie cutters and a rubber mallet for simple shapes, though you still need adult supervision and a steady surface.
For a funny pumpkin, carve exaggerated eyebrows. Eyebrows do 70 percent of the emotional labor in jack-o’-lantern design. Add one raised brow and suddenly your pumpkin looks judgmental, mysterious, or like it just read your group chat.
Common Mistakes to Avoid
One common mistake is choosing a pumpkin that is too large or uneven. Giant pumpkins are impressive, but they can be hard to turn, scrape, and carve. Another mistake is carving too early. A pumpkin carved two weeks before Halloween may look like soup by the big night, especially in warm weather.
Do not skip thinning the wall behind the design. Thick pumpkin walls make carving harder and reduce the glow. Do not rush the cutting, either. Most broken details happen because someone gets impatient near the finish line. Finally, do not use a dull or damaged tool. A weak blade requires more force, and more force means less control.
Are Expensive Pumpkin Carving Sets Worth It?
Expensive pumpkin carving sets are worth it if you carve every year, create detailed designs, or host carving parties. Better tools last longer, feel safer, and produce cleaner lines. However, casual carvers do not need a professional kit. A mid-range set with strong saws and a good scoop will satisfy most households.
The cheapest kits can be fine for one simple pumpkin, especially if the design is basic. But if the blade bends before you finish the first eye, you may wish you had spent a few extra dollars. Think of it this way: a good pumpkin carving set is not just a Halloween purchase. It is an annual ticket to less mess, fewer mistakes, and more porch glory.
Real-Life Experience With Pumpkin Carving Sets
The first time I used a proper pumpkin carving set, I realized I had spent years making Halloween harder than it needed to be. Before that, my tool kit was basically a kitchen knife, a soup spoon, and confidence I did not deserve. The pumpkin always rolled, the lid was crooked, and the face usually looked surprised to be alive. Once I switched to a real carving set, the whole process felt calmer and more creative.
The biggest difference was control. A small serrated saw did not look powerful, but it followed curves much better than a large knife. Instead of forcing the blade through the pumpkin, I could use short, careful strokes. The eyes came out cleaner, the mouth had actual corners, and the pumpkin did not look like it had lost a fight with a raccoon. The scoop also made a huge difference. A metal scraper removed pulp faster and thinned the walls behind the design, which made the finished jack-o’-lantern glow brighter.
Another lesson came from carving with kids. Children usually want to do everything themselves, including the parts that make adults silently panic. A pumpkin carving set made it easier to divide the job. The kids drew the face, picked the stencil, scooped seeds, and pushed out the cut pieces. Adults handled the saws. Everyone felt involved, and nobody had to hear the phrase “please put down the knife” more than absolutely necessary.
I have also learned that simple designs often look better than complicated ones. A clean ghost, a bold grin, or a row of stars can be more striking than an ultra-detailed haunted castle that collapses after one wall gets too thin. Pumpkin carving sets encourage ambition, which is wonderful, but pumpkins have structural opinions. They do not care about your Pinterest board. If a design has too many narrow bridges, tiny teeth, or floating shapes, it may break unless you carve slowly and plan carefully.
Preservation is another area where experience helps. The pumpkins that lasted longest were the ones I cleaned thoroughly, dried well, lit with LEDs, and kept out of direct sun. The ones left in warm, wet weather became tragic very quickly. Nothing humbles a person like checking the porch and finding yesterday’s masterpiece slumping into itself like a haunted pudding.
My favorite approach now is to prepare everything before the first cut. I lay down paper, set out bowls for seeds and pulp, tape patterns in place, dry the tools, and place LED lights nearby. That small setup step makes carving feel less chaotic. A good pumpkin carving set does not turn everyone into a professional artist, but it does make the process safer, neater, and much more enjoyable. And honestly, that is the real win: a glowing pumpkin, a clean table, happy carvers, and no emergency search for bandages.
Conclusion
Pumpkin carving sets make Halloween carving easier, safer, and more creative. The right kit helps you cut cleaner shapes, scoop faster, transfer patterns accurately, and add impressive details without turning your kitchen into a pumpkin crime scene. Beginners can succeed with a simple set, while serious decorators may enjoy premium tools for etching and sculpting.
Choose a sturdy kit, carve in a dry and well-lit space, use slow controlled motions, and light your pumpkin with LEDs whenever possible. With proper cleaning and preservation, your jack-o’-lantern can stay fresh long enough to delight neighbors, welcome trick-or-treaters, and prove once again that Halloween is better when squash has facial expressions.