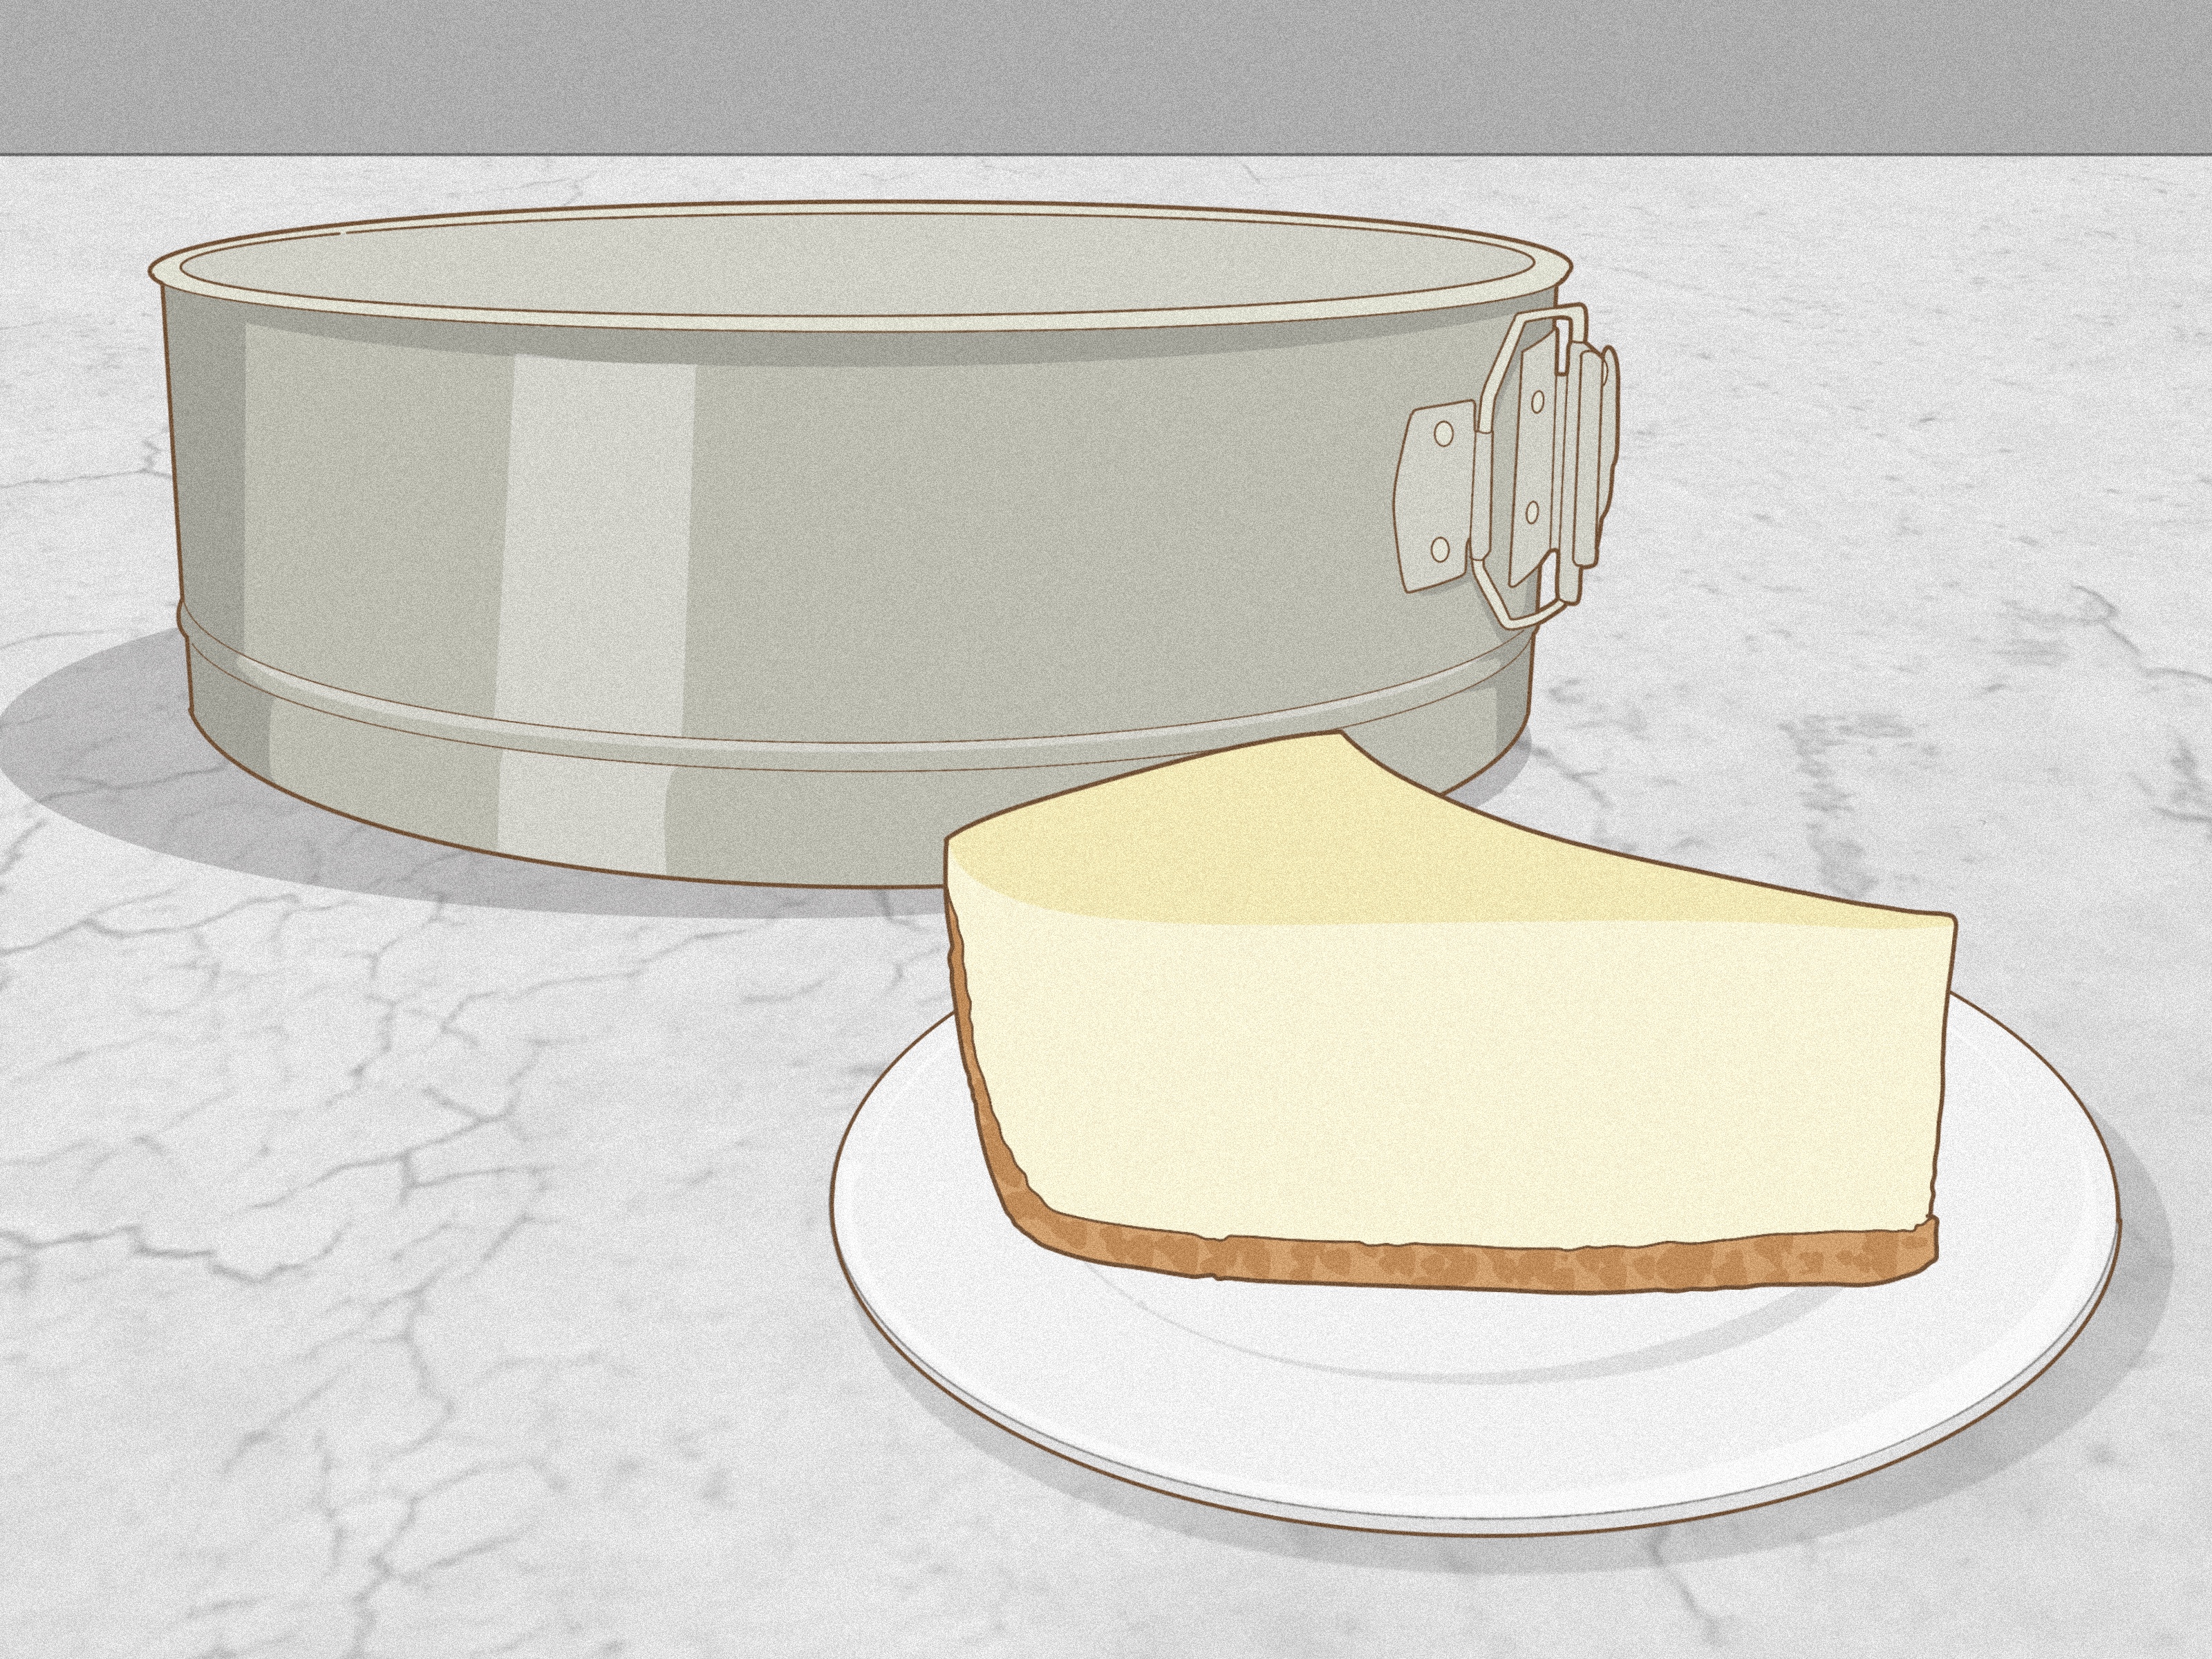
A springform pan looks like a regular cake pan that attended engineering school. It has a removable bottom, a tall ring, and a side latch that opens and closes like a tiny gatekeeper guarding your cheesecake dreams. If you have ever tried to remove a creamy cheesecake, delicate torte, ice cream cake, or deep-dish savory pie from a normal pan without turning it into dessert rubble, you already understand why this clever tool exists.
In simple terms, a springform pan is made for recipes that should not be flipped upside down. That includes classic cheesecake, no-bake cheesecake, flourless chocolate cake, mousse cake, tortes, quiche, deep-dish pizza, frozen desserts, layered dips, and even tall coffee cakes. Instead of wrestling the baked good out of the pan, you release the latch, lift away the sides, and let the dessert sit proudly on the base like it just won a small kitchen award.
This guide explains what a springform pan is, how to use a springform pan correctly, what it is best for, how to prevent leaks, how to clean it, and what mistakes to avoid. Think of it as the owner’s manual your pan should have come with, only friendlier and less likely to be printed in microscopic gray text.
What Is a Springform Pan?
A springform pan is a round baking pan with two main parts: a flat removable base and a high-sided metal ring with a latch. When the latch is closed, the ring tightens around the base and forms a pan. When the latch is opened, the ring expands and can be lifted away from the finished dessert.
Most springform pans are 8, 9, or 10 inches wide, with 9 inches being the most common size for cheesecake recipes. They are usually made from aluminized steel, carbon steel, anodized aluminum, or nonstick-coated metal. Some have a raised or extended base, which makes the pan easier to move and helps with serving. Others include silicone seals or special locking systems designed to reduce leaking.
The key feature is not just the removable bottom. It is the ability to remove the sides without disturbing the food. That is why a springform pan is especially useful for delicate, sticky, tall, layered, or creamy recipes that would crack, collapse, or smear if you tried to invert them onto a plate.
What Is a Springform Pan Used For?
The most famous springform pan recipe is cheesecake, and for good reason. Cheesecake is dense, creamy, and fragile. It has a crumb crust, a custard-like filling, and a surface that can crack if handled roughly. A springform pan lets the cheesecake bake tall, chill completely, and release cleanly.
But cheesecake is only the beginning. A springform pan is also excellent for:
- No-bake cheesecakes: The removable ring keeps the filling shaped while it chills.
- Flourless chocolate cakes: These are often rich and delicate, so easy release matters.
- Tortes and mousse cakes: Layered desserts hold their shape beautifully in a springform pan.
- Ice cream cakes: The pan acts like a mold, then releases the frozen cake cleanly.
- Quiche and savory pies: Tall sides allow room for fillings, crusts, and toppings.
- Deep-dish pizza: A springform pan can help build a dramatic crust and generous filling.
- Layered dips: A seven-layer dip unmolded from a springform pan looks surprisingly fancy for something that may be eaten with chips.
- Coffee cakes and crumb cakes: Especially useful when the topping is too delicate to flip.
Can you use a springform pan for regular cake? Yes, in many cases. Once latched, it behaves much like a standard round cake pan. However, thin batters may leak through the seam, so it is best for thicker batters, crumb crusts, dense cakes, and recipes that specifically benefit from removable sides.
How to Use a Springform Pan Step by Step
1. Inspect the Pan Before You Start
Before adding crust, batter, or filling, open and close the latch a few times. Make sure the ring tightens smoothly around the base. Check that the base sits evenly in the groove and does not wobble. If the base is upside down, crooked, or not seated correctly, the pan may leak or bake unevenly.
Some springform pans have a slightly raised lip on the base. Depending on the design, the lip may face up or down. Follow the manufacturer’s instructions if available. If not, assemble the pan and check which direction creates the tightest, most level seal.
2. Test for Leaks
Even good springform pans can leak a little. Before using a new pan, latch it closed and fill it with water over the sink. If water runs out quickly, do not use it for thin batters or water-bath baking without protection. If only a few drops appear, you can usually manage it with parchment, foil, and a rimmed baking sheet.
This test is simple, but it can save you from the tragedy of butter dripping onto the oven floor and turning your kitchen into a smokehouse.
3. Line the Base with Parchment Paper
For cleaner release, place a round of parchment paper on the base before locking the ring. You can trace the base on parchment and cut a circle, or you can lay a larger sheet over the base, clamp the ring around it, and trim the excess. The second method creates a tight parchment layer that helps keep crusts and sticky cakes from clinging to the metal.
Parchment is especially helpful for cheesecake, flourless chocolate cake, ice cream cake, and anything with caramel, fruit, chocolate, or a crumbly crust.
4. Grease the Sides
Even if your springform pan is nonstick, grease the sides unless the recipe says otherwise. A light coating of butter, shortening, baking spray, or neutral oil helps the dessert release without tearing. For chocolate cakes, dusting the greased sides with cocoa powder instead of flour avoids pale streaks. For cheesecakes, greasing the sides also helps the filling pull away gently as it cools, reducing the risk of cracks.
5. Add the Crust or Batter
If you are making cheesecake, press the crumb crust firmly into the base and slightly up the sides. Use the bottom of a measuring cup or flat glass to compact it evenly. A tight crust helps prevent melted butter from escaping and gives the filling a sturdy foundation.
If you are making cake, add the batter as directed. For very thin batters, place the springform pan on a rimmed baking sheet before filling. This catches drips and makes the pan easier to move in and out of the oven.
6. Bake According to the Recipe
Springform pans can bake slightly differently depending on their color and material. Dark pans absorb heat more quickly and may brown edges faster. Lighter pans often promote gentler, more even browning. If your pan is dark and your recipe was developed for a light pan, start checking a few minutes early.
For cheesecake, avoid overbaking. The edges should look set, while the center should still have a gentle wobble. Cheesecake continues to firm as it cools. If you wait until the center is completely firm in the oven, the final texture may be dry or cracked.
7. Cool Before Releasing the Ring
Patience is not optional here. Let baked goods cool according to the recipe before unlatching the pan. Cheesecake usually needs to cool gradually, then chill for several hours or overnight. No-bake cheesecakes and ice cream cakes must be fully set before release.
Before opening the latch, run a thin knife or offset spatula around the inside edge of the pan. This separates the dessert from the ring and prevents tearing. Then release the latch slowly. If the sides stick, do not yank the ring away like you are starting a lawn mower. Gently loosen stuck spots and try again.
How to Prevent a Springform Pan from Leaking
Leak prevention is the springform pan’s great kitchen drama. The removable design is useful, but any pan with seams can allow liquid, melted butter, or water to escape or enter. The goal is not to panic; the goal is to manage the seam like a responsible adult with aluminum foil.
Use a Rimmed Baking Sheet
For most recipes, place the springform pan on a rimmed baking sheet. This catches small butter leaks from crumb crusts and protects the oven. It also makes the pan easier to carry. A filled springform pan can feel wobbly, and the baking sheet adds stability.
Wrap the Outside with Heavy-Duty Foil
If your recipe calls for a water bath, wrap the outside of the springform pan with heavy-duty aluminum foil before adding it to the larger pan of water. Use two layers if needed, and make sure the foil comes up the sides. Avoid tearing or crinkling the foil at the bottom, because small holes can let water in.
A water bath helps cheesecake bake slowly and evenly, reducing cracks and dry edges. However, it also introduces the risk of water sneaking into the pan. If you have ever eaten a soggy cheesecake crust, you know it tastes like disappointment wearing graham cracker perfume.
Try the Steam Method Instead
If you are nervous about putting a springform pan directly in water, use steam. Place a skillet or roasting pan filled with hot water on the oven rack below the cheesecake. This creates moisture in the oven without submerging the springform pan. It may not be identical to a classic water bath, but it is much easier and greatly reduces the risk of a soaked crust.
Avoid Thin Batters
Springform pans are not ideal for very runny batters. Angel food cake, sponge cake, loose custards, flan, and thin cake batters generally do better in other pans. Use a springform pan when the recipe is thick enough to stay put or when it includes a sturdy crust.
When Not to Use a Springform Pan
A springform pan is useful, but it is not magic. Do not use it for recipes that require a perfectly sealed container unless you have a pan specifically designed and tested to be leakproof. Avoid using a standard springform pan for thin custards, very loose cake batter, or anything that must be inverted after baking.
Also be cautious with broilers and very high heat. Many nonstick springform pans have temperature limits, often around 450 degrees Fahrenheit. Always check the manufacturer’s instructions. If you ignore the temperature limit, the pan may warp, the coating may degrade, and your dessert may acquire a smoky personality it did not ask for.
How to Choose the Right Springform Pan
The best springform pan depends on what you bake most often. For classic cheesecake, a 9-inch pan is the safest choice because many recipes are written for that size. For smaller households, a 6- or 7-inch pan is useful for mini cheesecakes and Instant Pot-style desserts. For dramatic tortes, deep-dish pizza, or layered frozen cakes, look for taller sides and a sturdy latch.
Here are the most important features to consider:
- Tight seal: The ring should clamp firmly around the base without wobbling.
- Sturdy latch: A weak latch can loosen during filling, baking, or washing.
- Even material: Carbon steel, aluminized steel, and anodized aluminum are common choices.
- Nonstick surface: Helpful for release and cleanup, but still use parchment and grease.
- Extended base: Makes the pan easier to lift and can double as a serving platform.
- Appropriate depth: A deeper pan is better for tall cheesecakes, quiches, and layered desserts.
If you bake often, it is worth choosing a durable pan with a reliable seal. A cheap pan may work for an occasional no-bake dessert, but frequent cheesecake bakers will appreciate better construction. In baking, “almost leakproof” can be the difference between a perfect crust and a buttery oven puddle.
Springform Pan Substitutes
If you do not have a springform pan, you still have options. A deep cake pan lined with parchment can work for cheesecake, especially if you use a parchment sling. A pie dish can work for rustic cheesecakes, quiches, and tortes, though the presentation will be different. A 9-by-13-inch pan is useful for cheesecake bars, which are easier to slice and serve.
The tradeoff is appearance. A springform pan gives you tall, clean sides and a bakery-style look. Substitutes can taste just as good, but they may not deliver the same dramatic reveal. And let’s be honest: half the fun of a springform pan is unlatching it while everyone pretends not to be impressed.
How to Clean and Care for a Springform Pan
Good care keeps the latch working and the nonstick surface intact. After baking, let the pan cool before washing. Disassemble it completely so crumbs, butter, and batter do not hide in the seam. Wash the base and ring in warm, soapy water with a soft sponge or nylon brush. Dry both pieces thoroughly before storing.
Avoid abrasive pads, harsh cleaners, sharp utensils, and cutting directly on the base. Even if a pan is labeled dishwasher safe, hand washing is usually gentler, especially for nonstick finishes and metal latches. Prolonged soaking can also encourage discoloration or rust on some pans.
Store the pan unlatched or loosely latched so the mechanism is not under constant tension. If you stack pans, place a paper towel or soft cloth between them to protect the coating.
Common Springform Pan Mistakes
Opening the Pan Too Soon
The fastest way to ruin a cheesecake is to release the sides before the filling has cooled and set. Warm cheesecake is soft, delicate, and dramatic. Let it chill fully before unmolding.
Skipping Parchment
Parchment is cheap insurance. It makes release easier, protects the base, and helps you transfer slices more cleanly.
Forgetting the Baking Sheet
A rimmed baking sheet catches leaks and makes the pan easier to handle. It is a small step with a big payoff.
Using the Wrong Size
Pan size affects thickness, baking time, and texture. A 10-inch pan makes a thinner cheesecake than a 9-inch pan. An 8-inch pan makes a taller one and may require more baking time. When changing sizes, watch doneness carefully instead of relying only on the clock.
Cutting on the Pan Base
Serving directly from the base is convenient, but cutting with a sharp knife can scratch nonstick coating. Use a plastic knife, nylon server, or transfer the dessert to a serving plate if possible.
Real-World Experience: What Using a Springform Pan Actually Teaches You
The first time many home bakers use a springform pan, they expect a glamorous, effortless dessert reveal. Sometimes that happens. Other times, the pan leaks butter, the crust sticks, or the latch opens with the suspense of a game show finale. The good news is that every springform pan mishap teaches a useful lesson.
One of the biggest lessons is that assembly matters more than it seems. A springform pan may look simple, but the base must sit correctly inside the ring. If it is slightly tilted, upside down, or not fully locked, the pan can leak. Before filling the pan, take ten seconds to check the seal. Press gently on the base. Close the latch firmly. If anything feels loose, fix it before adding batter. This tiny habit prevents many problems.
Another practical lesson is that parchment paper is not just for perfectionists. It helps with release, cleanup, and presentation. When making cheesecake, a parchment circle on the base keeps the crust from bonding to the metal. For ice cream cake, parchment makes it easier to lift or slice the frozen dessert. For flourless chocolate cake, it can prevent the bottom from tearing when the cake is dense and fudgy.
Experience also teaches that “leakproof” is a hopeful word, not a sacred promise. Some pans seal beautifully; others allow small drips. Even premium pans can leak if the base is not seated correctly or if the batter is too thin. That is why seasoned bakers often place the pan on a rimmed baking sheet. It is not glamorous, but neither is scraping burnt butter off the bottom of the oven while questioning your life choices.
Cheesecake reveals another truth: cooling is part of baking. The cake may leave the oven looking slightly jiggly, and that is usually correct. As it cools, the filling firms. If you rush the process and open the ring too early, the sides may slump or crack. A fully chilled cheesecake releases better, slices better, and tastes creamier. In other words, your refrigerator is doing important work. Let it have its moment.
Water baths are where many bakers become cautious. A classic water bath can produce a smooth, creamy cheesecake, but it can also invite leaks. Wrapping the pan in heavy-duty foil helps, but foil can tear. Some bakers prefer placing a pan of hot water on the rack below the cheesecake to create steam instead. This method is less fussy and avoids direct contact between water and the springform pan. For beginners, the steam method can feel like training wheels in the best possible way.
Finally, using a springform pan teaches you to match the tool to the recipe. It is brilliant for cheesecakes, tortes, mousse cakes, frozen desserts, crumb-crust pies, and savory bakes with structure. It is less brilliant for watery custards and thin batters. Once you understand that, the pan becomes less mysterious and much more useful. It stops being “that weird pan in the cabinet” and becomes the tool you reach for when a dessert needs height, clean sides, and a little dramatic flair.
Conclusion
A springform pan is one of the most useful specialty pans in home baking because it solves a very specific problem: how to remove a delicate dessert without flipping, cracking, or crushing it. Its removable ring makes it ideal for cheesecake, no-bake desserts, tortes, ice cream cakes, quiche, deep-dish pizza, coffee cakes, and other recipes that need clean sides and gentle release.
To use a springform pan correctly, assemble it carefully, test for leaks, line the base with parchment, grease the sides, bake on a rimmed sheet, cool completely, and run a knife around the edge before unlatching. For cheesecake, be especially patient. A slow bake, gradual cooling, and proper chilling time are what turn a good cheesecake into the kind people talk about in hushed dessert tones.
The springform pan is not perfect for every recipe, but when it is the right tool, it makes baking easier, cleaner, and more impressive. Treat it well, keep it clean, and it will reward you with desserts that release beautifully instead of clinging to the pan like they have abandonment issues.