Note: This project is designed for safe, low-voltage learning. Use only a small household battery, never plug your wire into a wall outlet, and disconnect the wire whenever it feels warm.
Making a magnet with a wire and a nail sounds like something a cartoon scientist would do right before shouting, “It’s alive!” Fortunately, this experiment is much calmer, safer, and far less likely to attract lightning. With a simple iron nail, insulated copper wire, and a battery, you can build a working electromagneta temporary magnet powered by electricity.
This classic science activity shows the connection between electricity and magnetism in a way you can see, touch, and test. When electric current moves through a coil of wire, it creates a magnetic field. When that coil is wrapped around an iron nail, the nail strengthens the field and behaves like a magnet. Turn off the current, and the nail loses most of its magnetic power. In other words, you get a magnet with an on/off switchfinally, a magnet that understands boundaries.
What Is an Electromagnet?
An electromagnet is a magnet created by electric current. Unlike a permanent magnet, such as the one holding your grocery list to the refrigerator, an electromagnet works only while electricity is flowing through it. The basic design is simple: a wire coil carries current, and a ferromagnetic coreusually iron or steelhelps concentrate and strengthen the magnetic field.
In this project, the nail acts as the core. The copper wire acts as the path for current. The battery provides the electrical energy. Together, they form a small but surprisingly impressive magnet that can pick up paper clips, pins, staples, or other lightweight iron-based objects.
How the Wire-and-Nail Magnet Works
Electricity and magnetism are closely related. When electrons move through a wire, they create a magnetic field around that wire. If the wire is straight, the field is fairly weak and spreads around it in circles. But when the wire is wrapped into many loops, the magnetic fields from each loop combine. This creates a stronger field through the center of the coil.
Adding an iron nail makes the effect stronger because iron contains tiny magnetic regions called domains. When the coil is energized, many of those domains line up in the same direction. That alignment turns the nail into a temporary magnet. When the battery is disconnected, most of the domains relax again, and the nail stops acting like a strong magnet.
Materials You’ll Need
Before you begin, gather your supplies. You do not need fancy equipment, a lab coat, or hair that stands straight up, although the lab coat is always a nice dramatic touch.
- 1 large iron nail, about 3 to 4 inches long
- 2 to 3 feet of insulated copper wire
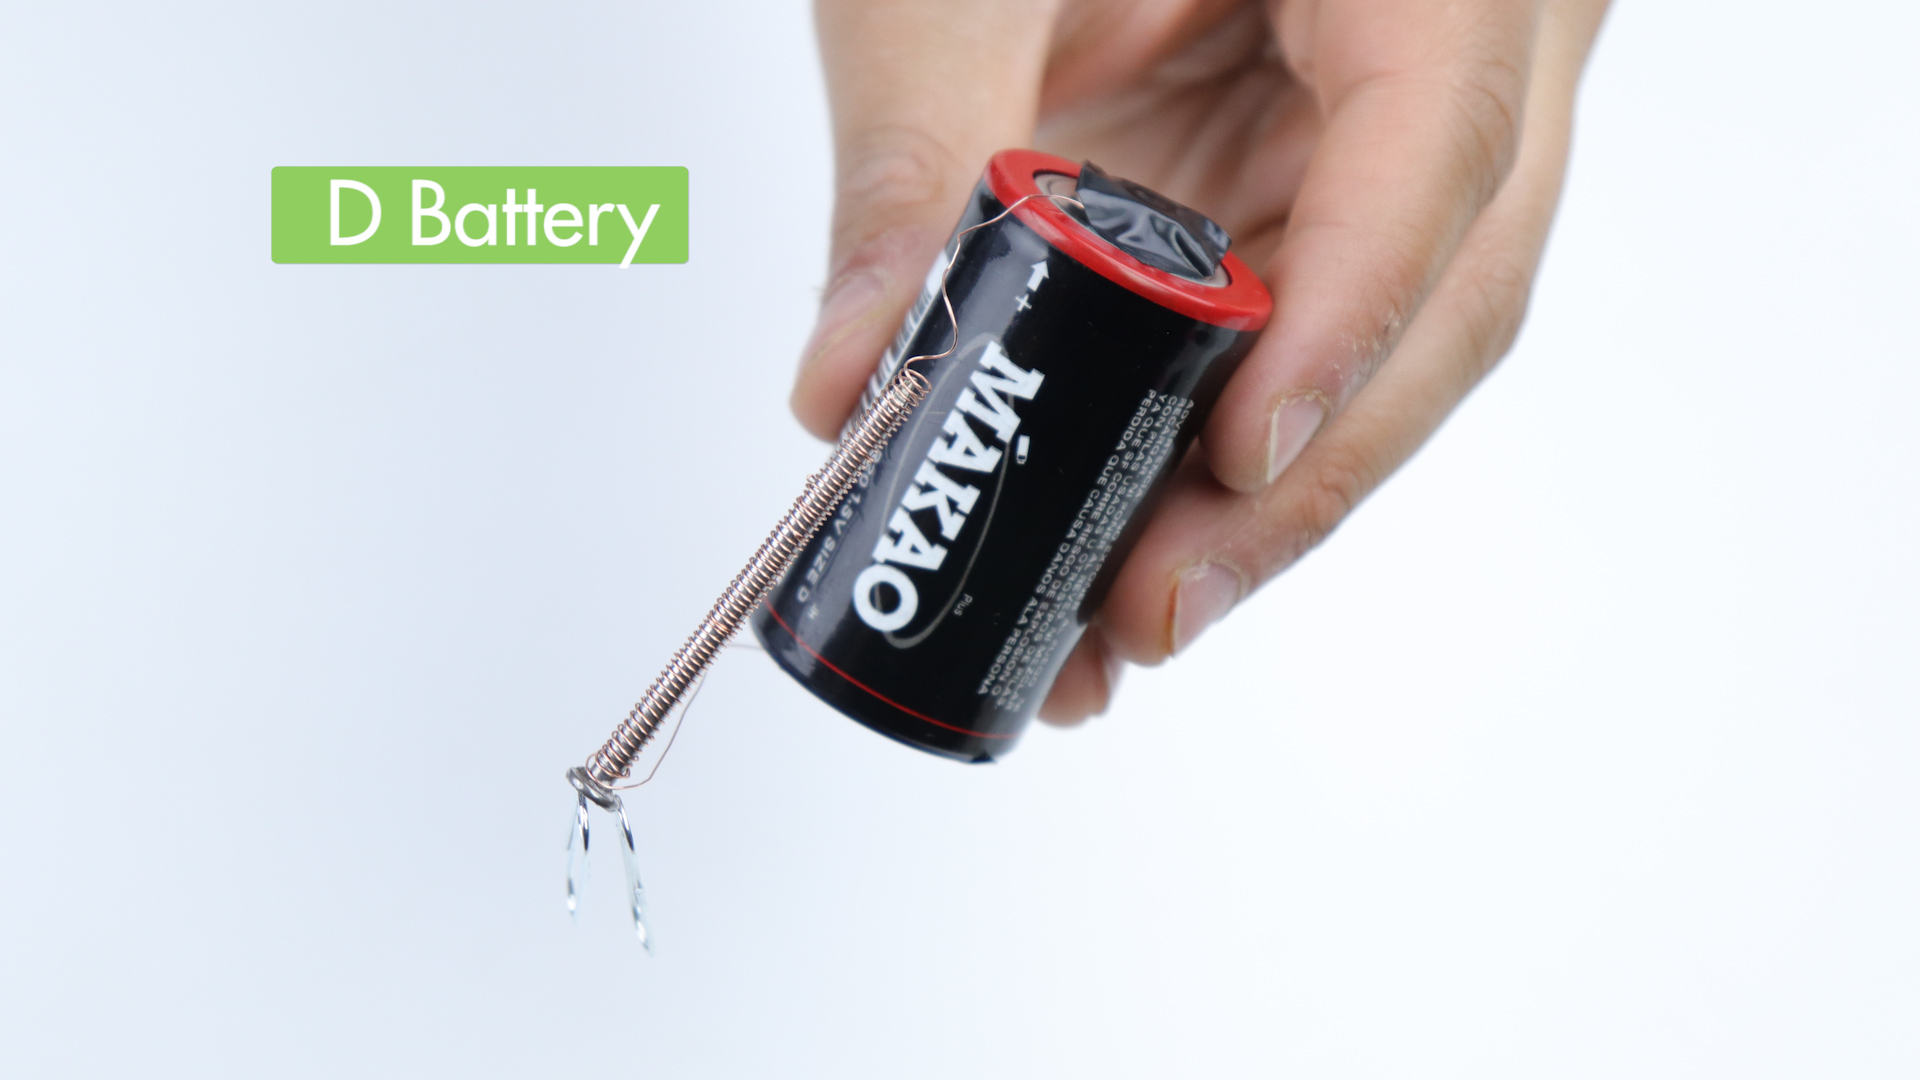
- 1 D-cell battery or AA battery
- Electrical tape or masking tape
- Sandpaper or wire strippers
- A handful of paper clips, staples, or small iron objects
- Optional: a small switch for easier control
Safety Tips Before You Start
This is a low-voltage project, but it still deserves respect. A battery connected directly to wire can heat up because the wire has low resistance. Always disconnect the wire after a few seconds of testing. If the battery or wire becomes hot, stop immediately and let everything cool.
Do not use a car battery, power outlet, phone charger, or any high-voltage source. This project is meant for small batteries only. Also, avoid placing the electromagnet near credit cards, hard drives, medical devices, or electronics. Your tiny nail magnet is not a supervillain machine, but it is still better to keep magnets away from sensitive devices.
How to Create a Magnet With a Wire and a Nail: 9 Steps
Step 1: Choose the Right Nail
Start with a clean iron nail. A larger nail usually works better because it gives the coil more core material to magnetize. If the nail is rusty, dirty, or coated with paint, wipe it clean first. A smooth, bare nail makes wrapping easier and improves contact between the coil and the core.
Step 2: Prepare the Copper Wire
Use insulated copper wire, not bare wire. The insulation keeps the loops from touching each other directly, which helps current travel around the coil instead of taking shortcuts. Leave about 6 inches of loose wire at each end so you can connect it to the battery later.
Step 3: Wrap the Wire Around the Nail
Starting near the head of the nail, wrap the wire tightly around the nail in one direction. Make each loop neat and close to the next loop, but avoid overlapping if possible. Aim for 25 to 50 turns for a strong beginner electromagnet.
The direction matters. Keep wrapping the same way from start to finish. If you reverse direction halfway through, part of the magnetic field can work against itself. That is science’s polite way of saying, “Please don’t make the coil argue with itself.”
Step 4: Strip the Wire Ends
Remove about half an inch of insulation from both free ends of the wire. You can use sandpaper, wire strippers, or careful scraping. The exposed copper must touch the battery terminals directly. If the insulation stays on, electricity cannot flow, and your electromagnet will become a very decorative nail sweater.
Step 5: Connect One Wire End to the Battery
Attach one exposed wire end to the positive terminal of the battery. Use tape to hold it in place. Make sure copper touches metal. A loose connection may cause weak performance or no magnetism at all.
Step 6: Connect the Other Wire End Briefly
Touch the second exposed wire end to the negative terminal of the battery. The circuit is now complete, and current flows through the wire coil. Do this only for a few seconds at a time. The nail should now behave like a magnet.
Step 7: Test Your Electromagnet
Bring the tip of the nail near paper clips or staples. If the setup is working, the nail should attract and lift them. Try counting how many paper clips your electromagnet can pick up. This turns the activity into a simple science test and gives you a clear way to compare results.
Step 8: Disconnect the Battery
Remove one wire end from the battery. The current stops, and the magnetic field becomes much weaker. Some nails may keep a tiny amount of magnetism for a short time, but most of the strong pulling power disappears when the circuit is open.
Step 9: Improve and Experiment
Now comes the fun part: change one variable at a time. Try more wire loops, a longer nail, a different battery size, or tighter wrapping. Test each version by counting how many paper clips it lifts. More turns usually create a stronger electromagnet, and a good iron core can increase the magnetic field significantly.
Why More Coils Make a Stronger Magnet
Each loop of wire creates its own magnetic field when current flows through it. When many loops are wrapped in the same direction, their fields combine. That is why a coil with 50 turns is generally stronger than a coil with 10 turns, assuming the battery can still provide enough current.
However, more is not always better forever. Very long wire adds electrical resistance, which can reduce current. If the wire becomes too long or too thin, your magnet may stop improving. The best design balances coil turns, wire thickness, battery strength, and safety.
Common Problems and Easy Fixes
The Nail Does Not Pick Up Paper Clips
Check the wire ends. The most common problem is insulation still covering the copper. Scrape the ends again and reconnect them firmly to the battery terminals. Also confirm that you used an iron or steel nail, not aluminum, brass, or another non-magnetic metal.
The Wire Gets Hot
Disconnect the battery immediately. Heat means current is flowing strongly through a low-resistance path. Use the electromagnet only in short bursts. You can also use a battery holder or switch to make connecting and disconnecting easier.
The Magnet Is Weak
Try adding more turns of wire, wrapping the coil more tightly, or using a larger iron nail. Make sure the loops all go in the same direction. A fresh battery can also improve performance.
The Battery Dies Quickly
This type of electromagnet can drain batteries fast because it creates a near-direct path between the terminals. Disconnect it when not testing. A switch makes this much easier and prevents accidental battery drain.
Real-Life Uses of Electromagnets
Your nail-and-wire magnet may look simple, but it demonstrates the same principle used in many modern devices. Electromagnets appear in electric motors, doorbells, speakers, relays, magnetic cranes, generators, MRI machines, and electric locks. Any time engineers need a magnet that can be controlled, adjusted, reversed, or turned off, an electromagnet is a strong candidate.
For example, scrapyard cranes use powerful electromagnets to lift heavy steel objects. When the operator turns off the current, the metal drops. Speakers use electromagnets to move parts back and forth, creating sound waves. Electric motors rely on magnetic forces to create rotation. Your small nail magnet is basically the friendly desk-sized cousin of these bigger technologies.
Science Fair Ideas Using a Nail Electromagnet
If you want to turn this project into a science fair experiment, ask a testable question. For example: “How does the number of wire turns affect the strength of an electromagnet?” Then build several electromagnets with different coil counts, such as 10, 20, 30, 40, and 50 turns. Use the same battery, same nail type, and same paper clips for each trial.
Record how many paper clips each version lifts. Repeat each test three times and calculate the average. A simple chart can show whether magnet strength increases with the number of coils. This approach gives your project real data instead of just a cool demonstration. Science teachers love data almost as much as they love reminding everyone not to eat in the lab.
Helpful Tips for Better Results
- Use insulated copper wire so the current travels through each loop.
- Wrap the wire tightly and neatly around the nail.
- Leave enough wire at both ends for battery connections.
- Use short testing bursts to avoid overheating.
- Try paper clips instead of heavy objects for easier testing.
- Change only one variable at a time during experiments.
- Disconnect the battery when the magnet is not in use.
Experience Notes: What You Learn by Building a Nail Electromagnet
The first time you create a magnet with a wire and a nail, the most surprising part is how ordinary the materials look. Nothing about a nail, a battery, and a coil of wire screams “future engineer at work.” Yet when the final wire touches the battery terminal and the nail suddenly grabs a paper clip, the effect feels almost magical. It is one of those small science moments where the invisible becomes visible.
One useful lesson from this activity is patience. If the magnet does not work immediately, it does not mean the project failed. Usually, the problem is simple: the wire ends are not stripped well enough, the coil is too loose, or the battery connection is weak. Fixing those issues teaches troubleshooting, which is one of the most valuable habits in hands-on science. Real experiments rarely behave perfectly the first time. They prefer to make you earn your victory.
You also learn that design choices matter. A coil with only a few turns may barely lift anything. Add more loops, and the magnet becomes noticeably stronger. Wrap the wire neatly, and performance improves again. Use a better iron core, and the magnetic field becomes more focused. These changes help explain why engineers test prototypes instead of guessing. Small adjustments can produce big differences.
Another experience worth noticing is heat. After a few seconds, the wire or battery may begin to feel warm. That warmth is a reminder that electrical energy is being transformed, and not all of it becomes useful magnetism. Some becomes heat because the wire resists the flow of current. This is why safety matters, even in simple projects. It is also why real electromagnets in machines often need careful design, cooling, and current control.
For students, this project makes abstract vocabulary easier to understand. Words like current, circuit, magnetic field, coil, core, and polarity can sound intimidating on a worksheet. But once you build the device, those words connect to real actions. Current flows when the circuit closes. The coil is the wrapped wire. The core is the nail. The magnetic field is what pulls the paper clip. Suddenly, physics is not just a chapter in a textbook; it is sitting on the table wearing a tiny copper jacket.
For parents and teachers, the wire-and-nail magnet is a great reminder that effective science activities do not need expensive kits. A simple experiment can open the door to bigger conversations about motors, generators, renewable energy, electronics, and engineering. The project is quick enough for a classroom demonstration but flexible enough for deeper investigation.
The best part is that the electromagnet invites curiosity. What happens if you reverse the battery connections? What if you use thicker wire? What if you compare a steel nail with an iron rod? What if you add a switch? Every answer leads to another question, which is exactly how good science should feel. It starts with “Will this work?” and ends with “What else can I test?” That is the real power of this little magnet: it attracts more than paper clips. It attracts questions.
Conclusion
Learning how to create a magnet with a wire and a nail is one of the easiest ways to explore electromagnetism at home or in the classroom. With a battery, insulated copper wire, and an iron nail, you can build a temporary magnet that turns on and off with electric current. The project is simple, affordable, and packed with science lessons about circuits, magnetic fields, coil turns, iron cores, and energy transfer.
Whether you are preparing a science fair project, teaching a lesson, or just trying to make paper clips behave dramatically, this experiment delivers. Start with the 9 steps, follow the safety tips, and experiment with different coil counts to see how your electromagnet changes. A small nail may not lift a car, but it can lift curiosityand honestly, that is a pretty strong start.