Wine corks are tiny things with big main-character energy. They sit quietly on the counter after dinner, looking like they have no future beyond rolling under the refrigerator. But with a little glue, a sharp blade, and a creative mood, those humble corks can become coasters, trivets, garden markers, bulletin boards, keychains, wreaths, ornaments, and home decor that says, “Yes, I am craftyand yes, I may have enjoyed a nice cabernet while collecting supplies.”
A DIY wine corks project is one of the easiest ways to turn leftover materials into something useful and charming. Cork is lightweight, naturally textured, easy to cut, and surprisingly versatile. Whether you have five corks from a recent dinner party or a giant jar that looks like evidence from a very social decade, there is a project waiting for you.
This guide covers practical wine cork craft ideas, prep tips, beginner-friendly projects, safety advice, styling suggestions, and hands-on experience from making cork projects that actually look goodnot like a kindergarten art table had a dramatic breakup with a glue gun.
Why Wine Corks Are Perfect for DIY Projects
Wine corks work beautifully for crafts because they combine texture, warmth, and function. Natural cork has an earthy, rustic look that fits farmhouse, coastal, vintage, modern organic, and cottage-style decor. Synthetic corks are usually smoother and more consistent, which can be helpful when you need a uniform shape or a sturdier piece for practical hacks.
Another reason cork is popular is that it is forgiving. Wood can split. Glass can shatter. Metal can require special tools. Cork, on the other hand, can be sliced, sanded, glued, drilled, painted, stamped, or arranged into patterns without demanding a full workshop or a dramatic YouTube intro.
Wine cork projects also support the idea of creative reuse. Instead of tossing small materials into the trash, you give them a second life as home accessories, party decorations, garden tools, or handmade gifts. The best part? Most cork crafts require inexpensive supplies: a utility knife, cutting board, glue, backing surface, ruler, pencil, and maybe a frame or tray.
Before You Start: How to Choose and Prepare Wine Corks
Natural Cork vs. Synthetic Cork
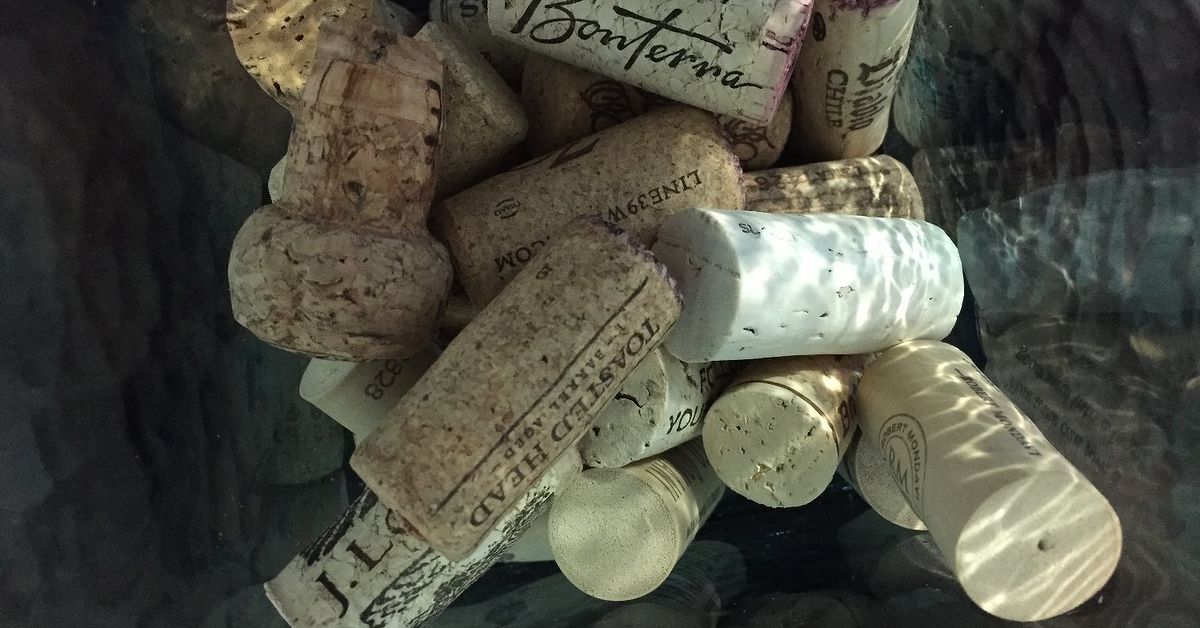
Before starting your project, separate your corks into natural and synthetic piles. Natural cork usually has an uneven, woody, speckled texture. Synthetic cork often looks smoother, foam-like, or rubbery. Natural cork is best for decorative projects, rustic coasters, garden markers, ornaments, and pieces where texture matters. Synthetic cork works well for projects that need durability, moisture resistance, or cleaner cuts.
If you plan to compost cork pieces or use cork in garden soil, stick with natural cork only. Synthetic corks are not compostable and should be used for crafts or disposed of according to local waste rules.
Clean the Corks
Most corks only need a quick wipe with a damp cloth. If they are stained or smell strongly of wine, soak them briefly in warm water with a little mild dish soap, rinse, and let them dry completely. Do not leave natural corks soaking overnight unless you enjoy the look of swollen corks with commitment issues.
Make Cutting Easier
Corks can crumble when cut dry, especially natural ones. To make slicing easier, steam them for 5 to 10 minutes or soak them in hot water for a short time, then pat them dry. Use a sharp utility knife or serrated knife on a stable cutting board. Always cut away from your fingers. For kid-friendly projects, adults should handle all cutting and drilling.
Basic Supplies for DIY Wine Cork Projects
You do not need a garage full of tools. Start with the basics and upgrade only when your cork obsession becomes official.
- Clean wine corks
- Hot glue gun or strong craft adhesive
- Utility knife or serrated knife
- Cutting board
- Ruler and pencil
- Sandpaper
- Picture frame, tray, plywood, or cardboard backing
- Acrylic paint, stain, or markers
- Small hooks, screw eyes, magnets, skewers, or twine
- Clear sealant for pieces exposed to moisture
Easy DIY Wine Corks Project Ideas
1. Wine Cork Coasters
Coasters are the classic beginner project. Cut corks in half lengthwise, arrange them on a square backing, and glue them down tightly. You can make a striped pattern, checkerboard design, circular layout, or random mosaic. Cork naturally feels at home under a glass, which is convenient because it probably remembers where it came from.
For a cleaner look, use a wooden tile, ceramic tile, or thick felt backing. Add felt pads underneath to protect the table. Seal the top lightly if you expect condensation from cold drinks.
2. Wine Cork Trivet
A trivet is like a coaster that went to the gym. Glue corks upright inside a metal hose clamp, embroidery hoop, or shallow wooden frame. You can also cut corks in half and glue them flat onto a heat-safe backing. The finished piece protects your table from hot dishes and adds a cozy, handmade touch to the kitchen.
Important note: cork handles warm dishes well, but do not place it directly under cookware pulled from extremely high heat unless your adhesive is rated for that temperature. Glue can be the weak link, and nobody wants a casserole landing in the lap like a dinner-party plot twist.
3. Wine Cork Bulletin Board
A wine cork bulletin board is practical, attractive, and perfect for a kitchen, office, pantry, or home bar. Use an old picture frame as the base. Remove the glass, keep the backing, and glue corks in rows, diagonals, or herringbone patterns. Once dry, hang it and use pushpins for notes, recipes, photos, reminders, or that one coupon you swear you will remember to use.
4. Garden Markers
Wine cork garden markers are simple and useful. Write herb or vegetable names on corks with a permanent marker, push a wooden skewer into one end, and place them in pots or garden beds. They look charming beside basil, thyme, rosemary, and tomatoes. Natural cork works especially well for this rustic garden style, though sealing the writing can help it last longer outdoors.
5. Floating Keychain
Cork floats, which makes it a smart material for a pool, boat, beach, or lake keychain. Twist a small screw eye into one end of the cork, add a split key ring, and you have a lightweight keychain that is actually useful near water. Paint the end a bright color if you want it easier to spot.
6. Wine Cork Wreath
A cork wreath is ideal for front doors, dining rooms, wine bars, or holiday decorating. Start with a foam wreath form or grapevine base. Glue corks around the form in layers, mixing directions for texture. Add ribbon, faux greenery, dried oranges, bells, berries, or mini ornaments depending on the season. For a year-round look, keep it natural with burlap ribbon and a few sprigs of faux eucalyptus.
7. Cork Bath Mat
A wine cork bath mat takes more corks and patience, but the result is beautiful. Cut corks in half lengthwise and glue them flat-side down onto a non-slip mat or waterproof backing. Keep the rows tight and even. Because bathrooms are humid, use a water-resistant adhesive and allow the piece to dry completely before use. Add sealant if needed, but avoid making the surface slippery.
8. Mini Succulent Magnets
For a cute refrigerator project, hollow out the top of a cork with a craft knife, add a tiny faux succulent or air plant, and glue a strong magnet to the back. Natural corks give this project a warm, organic look. These mini planters are great for gifts, party favors, or adding personality to a home office.
9. Wine Cork Place Card Holders
Hosting dinner? Cut a shallow slit lengthwise across the top of each cork and slide in a name card. These place card holders are inexpensive, elegant, and perfect for weddings, Thanksgiving, wine tastings, birthday dinners, and holiday tables. They also quietly tell guests, “I planned this,” even if you were folding napkins 12 minutes before the doorbell rang.
10. Cork Wall Art
Wine cork wall art can be as simple or detailed as you want. Arrange corks into a heart, letter, state outline, grape cluster, starburst, or abstract pattern. Glue the design onto plywood or canvas. Paint the ends of selected corks to create color blocks, ombre effects, or seasonal palettes. This project is a great way to use corks with printed winery logos because they add visual interest and a little storytelling.
Featured Project: DIY Wine Cork Bulletin Board
If you want one project that is beginner-friendly, useful, and stylish, make a cork bulletin board. It is easy to customize and does not require perfect cutting.
Materials
- 40 to 80 wine corks, depending on frame size
- Picture frame or shallow tray
- Strong craft glue or hot glue
- Cardboard, plywood, or frame backing
- Utility knife
- Ruler
- Optional paint or stain for the frame
Step 1: Plan the Layout
Place the corks inside the frame before gluing. Try vertical rows, horizontal rows, diagonal lines, or a herringbone pattern. If corks vary in size, alternate them so the board looks intentional rather than like it was assembled during a power outage.
Step 2: Trim Corks as Needed
Some corks may need trimming to fit the edges. Mark the length with a pencil and cut carefully. Sand rough ends if needed. If the frame is deep enough, you can leave corks whole. For a thinner board, cut them in half lengthwise.
Step 3: Glue in Sections
Work in small sections so the glue does not cool or dry before the corks are placed. Press each cork firmly into position. Keep the rows snug. A little variation is fine; too much space can make the board look messy.
Step 4: Let It Cure
Allow the board to dry fully according to your adhesive instructions. Hot glue sets quickly, but stronger craft adhesives may need several hours or overnight curing. Do not hang the board too soon unless you enjoy testing gravity indoors.
Step 5: Hang and Use
Add hanging hardware if your frame does not already have it. Use the board for notes, photos, recipes, invitations, grocery lists, or small reminders. It works especially well in a kitchen, home office, pantry, mudroom, craft room, or wine nook.
Design Tips for Better-Looking Wine Cork Crafts
The difference between “handmade and charming” and “craft drawer explosion” often comes down to layout. Sort corks by size, color, and printed design before gluing. Use similar corks for clean modern pieces and mixed corks for rustic decor. Place logo sides facing up when you want character. Turn plain sides up when you want a calmer, more uniform look.
Frames make cork crafts look more polished. Even a simple thrift-store frame can turn loose corks into a finished bulletin board or wall art piece. For coasters and trivets, choose a strong backing so the project feels substantial. Add felt pads under anything that touches furniture.
Color can also help. Paint only the ends of corks for a subtle pop, or dip corks in acrylic paint for a playful pattern. White, black, gold, navy, sage, and terracotta pair well with natural cork. For holiday projects, add red ribbon, evergreen sprigs, bells, or metallic accents.
Common Mistakes to Avoid
Using Weak Glue
Cork is lightweight, but projects still need proper adhesive. Hot glue is fine for decorative pieces, but use stronger craft glue, construction adhesive, or epoxy for items that will be handled often.
Skipping the Dry Fit
Always arrange corks before gluing. A dry fit helps you catch awkward gaps, uneven rows, and the dreaded “one cork too many, one inch too little” problem.
Cutting Too Fast
Cork can crumble when rushed. Use steady pressure and a sharp blade. If you need many equal pieces, create a simple cutting guide from scrap wood or cardboard.
Ignoring Moisture
For bathrooms, kitchens, patios, or garden projects, choose water-resistant adhesives and sealants. Natural cork handles moisture better than many materials, but glue and backing boards may not.
Best DIY Wine Cork Projects for Gifts
Wine cork crafts make excellent handmade gifts because they feel personal without requiring a huge budget. A set of coasters is perfect for a housewarming. A cork trivet works well for someone who loves cooking. A framed cork board is useful for a teacher, home office worker, or busy family. Place card holders make thoughtful wedding or dinner-party favors. A cork wreath is a fun gift for a wine lover, especially when decorated to match their home style.
To make the gift feel more finished, package it nicely. Tie coasters with twine, add a small kraft tag, or place a trivet in a shallow gift box. For a bulletin board, include a few decorative pushpins. Small details make DIY gifts feel intentional rather than last-minute, even if you were absolutely crafting at midnight in your pajamas.
Sustainability and Smart Reuse
A DIY wine corks project is not just cute; it is also a small act of reuse. Natural cork comes from cork oak bark, and it is valued because the tree does not need to be cut down for harvesting. Still, not every cork belongs in the same waste stream. Natural cork can often be reused, recycled through cork-specific programs, or broken down for composting in the right conditions. Synthetic corks are better saved for durable crafts, household hacks, and decorative projects.
The most sustainable project is the one you will actually use. A beautiful cork board that holds family notes for years is better than a novelty item that falls apart after one weekend. Choose projects that fit your home, habits, and style. Reuse is most powerful when it becomes practical.
Conclusion
DIY wine cork projects prove that small materials can become surprisingly useful, stylish, and personal. With a handful of corks and basic supplies, you can create coasters, trivets, bulletin boards, garden markers, wreaths, keychains, bath mats, ornaments, and thoughtful handmade gifts. The key is preparation: clean the corks, sort them by type, dry-fit your pattern, use the right adhesive, and give the project enough time to cure.
Whether your style is rustic farmhouse, modern organic, coastal casual, or “I found this in my craft bin and made it work,” wine corks offer endless creative possibilities. They are affordable, forgiving, and full of character. So the next time you open a bottle, save the cork. Your future self may need a coaster, a garden marker, or a tiny excuse to bring out the glue gun.
Real-World Experience With DIY Wine Corks Projects
After making several wine cork projects, the biggest lesson is simple: corks look easy until you try to make them behave in straight lines. They are a little like relatives at a family photosimilar in theory, wildly different in practice. Some are taller, some are wider, some have rounded edges, and some seem personally offended by symmetry. That is why sorting corks before starting matters more than most beginners expect.
For my first cork coaster project, I made the classic mistake of grabbing random corks, cutting them quickly, and gluing as I went. The result worked, technically, but it had the elegance of a very enthusiastic pothole. The second time, I arranged all the pieces first, trimmed them to similar sizes, and used a square tile as the backing. Suddenly, the project looked less like “craft emergency” and more like something you could place under a glass without apologizing.
The cork bulletin board was the most satisfying project because it turned out useful right away. A medium frame required more corks than expected, so collecting enough took time. One helpful trick was asking friends to save corks after gatherings. People are usually happy to contribute, especially when the request sounds creative rather than suspicious. Once the board was finished, it became a great spot for grocery lists, receipts, appointment cards, and photos. It also looked warmer than a plain office board.
The trivet was the most practical project, but it taught an important adhesive lesson. Basic hot glue held the corks together for light use, but stronger adhesive made the piece feel much more durable. For anything that gets handled, moved, warmed, or wiped down often, it is worth choosing glue based on function, not just convenience. Hot glue is fast; strong craft adhesive is patient. Sometimes patient wins.
Garden markers were the easiest and most charming. A permanent marker, a skewer, and a cork are all you need. The only issue is weather. Outdoor projects fade faster than indoor ones, so sealing the writing helps. Also, natural cork looks better in the garden than synthetic cork because the texture blends with soil, herbs, and terracotta pots.
The best overall advice is to start small. Make a coaster set before attempting a bath mat. Make plant markers before building wall art. Cork crafting is relaxing when the project matches your patience level. It becomes less relaxing when you are 200 corks deep, covered in glue strings, and questioning every life choice that led to a “quick weekend project.” Begin with something useful, keep the layout simple, and let the natural charm of cork do most of the decorating.