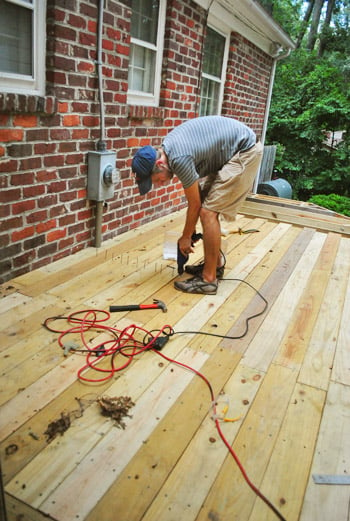
Building a deck sounds simple until you are standing in the yard with a tape measure, a stack of lumber, and the sudden realization that “square” is not just a shapeit is a personality test. A well-built deck is more than a pretty platform for a grill, patio chairs, and heroic weekend lounging. It is a structural extension of your home, and every step matters: design, permits, footings, framing, decking, railing, stairs, flashing, fasteners, and maintenance.
The process of building a deck begins long before the first board is cut. A safe, durable deck depends on smart planning, code-compliant construction, proper water management, and the right materials for your climate. Whether you are building a small ground-level deck or a raised backyard entertainment space, the goal is the same: create an outdoor living area that looks great, feels solid, drains properly, and does not wobble like a folding table at a family reunion.
This guide walks through the deck building process from idea to final inspection, using practical examples, professional construction principles, and homeowner-friendly explanations. Before starting, always check your local building department’s requirements. Deck codes vary by city, county, climate zone, soil condition, and deck height. Local code wins every argument, even the ones you have with your cousin who “built one back in 1998 and it’s still standing.”
1. Start With A Clear Deck Plan
The first step in building a deck is deciding what the deck needs to do. A deck for a quiet coffee corner can be simple and compact. A deck for hosting cookouts, outdoor dining, a hot tub, or a full patio furniture set needs more space, stronger framing, and careful traffic flow. Think about how people will move from the house to the yard, where the grill will sit, whether stairs are needed, and how much sunlight or shade the area receives.
A good deck plan should include the overall size, shape, height, stair location, railing layout, beam and joist direction, footing placement, and material choices. For example, a 12-by-16-foot attached deck off a kitchen door may need a ledger board at the house, support posts and beams at the outside edge, joists running away from the house, guardrails if the walking surface is high enough above grade, and stairs leading to the backyard.
Use stakes, string lines, batter boards, and marking paint to lay out the proposed deck area. Measure diagonally from corner to corner to confirm the layout is square. If the two diagonal measurements match, your rectangle is behaving itself. If they do not, adjust before digging. Fixing layout errors on paper is cheap; fixing them after concrete is poured is the kind of character-building experience nobody requested.
2. Check Permits, Codes, And Utility Lines
Many deck projects require a building permit, especially attached decks, raised decks, decks with stairs, or decks above a certain height. Your building department may ask for drawings showing footing size, post size, beam span, joist span, ledger attachment, stair details, railing height, and hardware. This may sound bureaucratic, but the permit process is designed to prevent unsafe construction and costly mistakes.
Before digging, contact 811 or your local utility marking service so buried gas, electric, water, cable, or sewer lines can be located. A deck footing hole is not the place to discover a utility line. It is also wise to check property setbacks, homeowners association rules, easements, and drainage patterns. If water already pools near the house, a deck will not magically solve it. Proper grading and drainage should be addressed first.
3. Choose The Right Deck Materials
Deck materials affect cost, appearance, maintenance, and long-term performance. Pressure-treated lumber is widely used for framing because it resists insects and decay when used correctly. For the visible deck surface, homeowners commonly choose pressure-treated wood, cedar, redwood, tropical hardwood, PVC, or composite decking. Each option has trade-offs.
Pressure-Treated Wood
Pressure-treated wood is budget-friendly and familiar to most builders. It can be stained or sealed, but it may crack, cup, or splinter over time if neglected. It is a practical choice for many DIY deck projects, especially when cost matters.
Cedar And Redwood
Cedar and redwood offer natural beauty and better dimensional stability than basic treated lumber, but they usually cost more. They still need regular cleaning and finishing to maintain color and resist weathering.
Composite Decking
Composite decking is popular because it requires less maintenance than wood and resists rot, splintering, and insect damage. However, it still needs proper framing, spacing, ventilation, and manufacturer-approved fasteners. Composite boards are not a magic carpet. They depend on a strong frame underneath.
PVC Decking
PVC decking is highly moisture-resistant and often performs well in wet areas, but it can be more expensive and may expand or contract with temperature changes. Follow the manufacturer’s spacing and fastening instructions carefully.
4. Prepare The Site
Once the design and permit are ready, clear the deck area. Remove grass, roots, loose soil, and debris. If the deck is low to the ground, consider using landscape fabric and gravel beneath it to reduce weeds and improve drainage. Ground-level decks especially need airflow under the frame because trapped moisture can shorten the life of wood framing.
Establish the finished deck height early. Most decks are set slightly below the door threshold so water, snow, and debris do not push into the house. This small height difference can prevent big headaches. A deck should invite people outside, not invite rainwater inside.
5. Install Footings Correctly
Footings transfer the deck load into the ground. Their size and depth depend on soil type, frost depth, deck size, local code, and the weight the deck must support. In cold climates, footings often need to extend below the frost line to prevent frost heave. In warmer areas, the required depth may be shallower, but soil bearing capacity still matters.
Common footing types include poured concrete piers, formed concrete tubes, precast footings, helical piles, and engineered systems. For many residential wood decks, builders dig holes, place concrete forms, pour concrete, and install post bases or anchors. Posts should be connected to footings with approved hardware rather than simply buried in soil, unless local code and material specifications allow a particular method.
Take time to align footings accurately. A misplaced footing can throw off the beam, which throws off the joists, which throws off the decking, which eventually throws off your mood. Use string lines and a level or laser to keep the foundation organized.
6. Attach The Ledger Board With Proper Flashing
For an attached deck, the ledger board connects the deck to the house. This is one of the most important parts of the entire structure. A ledger must be fastened to the correct structural framing, not just siding, brick veneer, thin sheathing, or decorative trim. In many cases, siding must be removed so the ledger can bear directly against the house framing.
Flashing is essential at the ledger. It directs water away from the wall and helps protect the house framing from rot. Poor ledger flashing is one of the classic deck problems because water can sneak behind the board and damage the rim joist or wall sheathing. Use approved metal or compatible flashing materials, install them shingle-style so water drains outward, and avoid mixing metals that can react with treated lumber or fasteners.
If the house framing, veneer, cantilever, or wall system is not suitable for a ledger connection, build a freestanding deck instead. A freestanding deck uses posts and beams near the house rather than relying on the house wall for support. This can be a smart option when the existing structure is difficult to verify.
7. Set Posts And Build Beams
Posts carry the load from the beams down to the footings. They must be sized and spaced according to the deck design, beam span, and local code. Posts should be plumb, securely anchored, and cut to the correct height. Temporary bracing helps keep everything stable while the frame goes together.
Beams support the joists and distribute deck loads to the posts. Beams may be built from multiple layers of dimensional lumber or engineered materials, depending on the design. They can sit on top of posts or connect to posts with approved hardware. Notching posts or bolting beams incorrectly can weaken the structure, so follow code-approved connection details.
Think of the beam as the deck’s backbone. If it is undersized, poorly connected, or uneven, everything above it will complain. And unlike people, decks complain with bounce, sag, and expensive repairs.
8. Frame The Deck With Joists, Rim Boards, And Blocking
Joists create the floor frame of the deck. They usually run perpendicular to the decking boards and are spaced according to the decking material and span requirements. Many residential decks use joists at 16 inches on center, while some composite decking patterns or diagonal installations may require 12 inches on center. Always check the decking manufacturer’s instructions and span tables.
Joists should be attached with approved joist hangers, fasteners, or bearing details. Hangers must be installed with the correct nails or screws specified by the hanger manufacturer. Drywall screws are not deck fasteners. They belong indoors, living a quiet life far away from structural loads.
Blocking between joists can reduce twisting, stiffen the frame, and provide support for rail posts, picture-frame borders, seams, and decking patterns. If you plan to install railing posts, stairs, or heavy features, add the required blocking during framing. Retrofitting blocking later is possible, but it often involves awkward crawling and vocabulary unsuitable for polite company.
9. Protect The Frame Before Installing Decking
Before the deck boards go down, inspect the frame. Check that it is square, level, properly fastened, and braced. This is also a good time to apply joist tape or flashing tape to the tops of joists and beams. These tapes help shed water away from screw holes and horizontal framing surfaces, which are common places for moisture to linger.
Good water management extends the life of a deck. Even pressure-treated lumber benefits from staying as dry as possible. Keep soil, mulch, and leaves away from the frame. Provide ventilation below low decks. Design gaps so water can drain instead of sitting between boards.
10. Install Deck Boards With Proper Spacing
Deck boards create the walking surface, so this is the stage where the project finally starts to look like a deck instead of a very organized lumber puzzle. Start with a straight reference line. If the first board goes crooked, the rest of the boards may follow it like loyal but misguided ducklings.
Wood decking needs spacing for drainage and seasonal movement. Wet pressure-treated boards may shrink as they dry, while dry boards may need a planned gap at installation. Composite and PVC boards require manufacturer-specific side gaps, end gaps, and fasteners to handle expansion and contraction. Hidden fastener systems can create a clean look, while face screws may be easier for certain wood decks.
Stagger board joints when possible, land all seams over proper framing, and avoid tiny end pieces that look like leftovers from a birdhouse project. For a polished appearance, consider a picture-frame border around the deck perimeter. It takes more planning and blocking, but it gives the deck a finished, intentional look.
11. Build Safe Stairs
Deck stairs require careful layout. A small error in stair math can create uneven steps, and uneven steps are excellent at catching toes. Stair stringers are commonly cut from 2-by-12 lumber and supported at the top and bottom. The rise and run must meet local code. In many residential applications, stairways are at least 36 inches wide, risers are limited to a maximum height, and treads must provide adequate depth.
The landing at the bottom of the stairs should be stable, level, and properly drained. It may be concrete, pavers, compacted gravel, or another approved surface. Stair railings and handrails may be required depending on the number of risers and deck height. Do not guess. Stair and railing rules are specific because falls are one of the biggest safety concerns on decks.
12. Install Railings And Guards
Guardrails are required for many elevated decks. Common residential requirements include guard heights around 36 inches and openings small enough to prevent a 4-inch sphere from passing through, but local code must be verified. Rail posts must be securely attached to the frame with proper blocking and hardware. Simply screwing a post into the rim board and hoping for the best is not a construction strategy; it is a suspense film.
Railing systems may be wood, composite, aluminum, steel, cable, glass, or vinyl. Each system has its own installation instructions. Pay attention to post spacing, bracket type, fastener compatibility, and stair angle requirements. A railing should feel firm when pushed, not decorative and emotionally fragile.
13. Use The Right Fasteners And Connectors
Outdoor decks live in a harsh environment. Rain, snow, sun, humidity, temperature swings, and treated lumber chemicals can all attack hardware. Use corrosion-resistant fasteners and connectors rated for exterior use and compatible with the lumber or decking material. Hot-dipped galvanized and stainless steel fasteners are common choices, with stainless steel often preferred in coastal or high-corrosion environments.
Structural connectors such as joist hangers, post bases, beam connectors, tension ties, and stair stringer hardware must be installed exactly as specified. The correct connector is only as good as the correct fastener. If the hanger calls for specific nails or structural screws, use them. Substituting random screws from a coffee can is how decks develop trust issues.
14. Schedule Inspections And Finish The Details
If your deck is permitted, inspections may be required at several stages: footing holes before concrete, framing before decking, and final completion. Inspectors are not there to ruin the fun. They help confirm that the deck is built safely before problems are hidden behind boards and trim.
After framing and decking are complete, finish the edges with fascia, trim, stair risers, post caps, and lighting if desired. Low-voltage deck lighting can improve safety on stairs and create a warm evening atmosphere. Just remember to plan wiring before everything is buttoned up, unless you enjoy removing freshly installed boards while whispering motivational speeches to yourself.
15. Maintain The Deck After Building
The process of building a deck does not end the day the last screw goes in. A deck needs regular maintenance to stay safe and attractive. Inspect the ledger, flashing, joist hangers, rail posts, stairs, fasteners, boards, and footings at least once a year. Look for rot, rust, loose connections, movement, cracks, soft spots, and water damage.
Wood decks should be cleaned and sealed or stained as needed. A simple water test can help: if water soaks into the wood quickly, it may be time for a water-repellent finish. Composite and PVC decks require less maintenance, but they still need cleaning to remove dirt, pollen, mildew, food spills, and the mysterious sticky substance that appears after every barbecue.
Common Deck Building Mistakes To Avoid
One common mistake is underbuilding the frame. Homeowners may focus on the visible deck boards and forget that the frame does the real work. Another mistake is ignoring drainage. Water trapped against the house or between boards can cause rot, staining, and structural damage. Poor ledger attachment, missing flashing, undersized footings, incorrect joist spacing, weak railing posts, and improper stair dimensions are also frequent problems.
Do not skip permits because the deck “looks small.” Do not assume every online plan matches your local code. Do not mix incompatible metals with treated lumber. Do not build over unstable soil. And please, do not use interior screws outside. They are not brave; they are simply in the wrong profession.
Example: A Simple Backyard Deck Workflow
Imagine a homeowner building a 12-by-16-foot deck outside a back door. The deck surface will sit about 32 inches above grade, so guardrails and stairs are likely required. The homeowner starts with a sketch, checks local code, applies for a permit, and calls the utility marking service. Next, they lay out the deck with strings and stakes, confirm square corners, and mark footing locations.
After the footing holes are approved, concrete piers are poured and post bases are set. The ledger board is installed against the house framing with proper flashing. Posts are anchored to the footings, beams are assembled and connected, and joists are installed with hangers. Blocking is added for rail posts and board seams. Joist tape is applied, decking boards are installed with proper spacing, and the perimeter is trimmed with fascia.
Finally, stairs and railings are built, the hardware is checked, and the final inspection is scheduled. The finished deck becomes an outdoor dining area with space for a grill, chairs, planters, and a cooler that somehow becomes the most popular guest at every gathering.
Real-World Experience: What Building A Deck Teaches You
One of the biggest lessons from building a deck is that the project rewards patience more than speed. The most satisfying decks are not built by racing through the steps; they are built by measuring carefully, checking level often, and fixing small issues before they become permanent features. The first time you lay out a deck, the yard may look bigger than the plan. Then the framing starts, and suddenly every inch matters.
Planning the deck on paper feels easy, but the site always has opinions. Maybe the ground slopes more than expected. Maybe the back door threshold is lower than you remembered. Maybe a tree root is sitting exactly where a footing should go, like it made a reservation. These small surprises are normal. The trick is not to force the deck into a bad layout. Adjust the design, ask the building department questions, and solve problems before concrete and lumber make them harder to change.
Another experience many DIY builders share is that framing takes longer than expected. Deck boards get the applause because they are visible, but framing is where the real craftsmanship lives. A square frame makes board installation easier. Level beams make the deck feel solid. Proper blocking makes railings stronger. Correct hardware creates confidence every time someone walks across the surface. When the frame is right, the rest of the project feels smoother.
Material handling is also a reality check. Lumber is heavy, composite boards can be flexible, and long pieces rarely behave politely in a breeze. Having a helper is not just convenient; it can make the project safer and more accurate. Even simple tasks like setting beams, holding joists, snapping chalk lines, and aligning deck boards are easier with two people. A deck may be a DIY project, but it does not have to be a lonely heroic saga.
Fasteners teach another practical lesson. Cheap screws may save a few dollars at checkout, but the wrong fasteners can stain boards, corrode, snap, or fail inspection. The best builders treat hardware as part of the structure, not as an afterthought. They match fasteners to the material, use the right hanger nails or structural screws, and keep extra on hand because somehow the last five screws always disappear into another dimension.
Finishing details make a major difference. Straight board ends, consistent gaps, clean fascia, secure stair treads, and solid railings turn a basic platform into a deck that feels professionally built. Small visual flaws become more noticeable once furniture is placed and sunlight hits the surface. Taking an extra hour to trim, sand, align, and clean up can improve the final result dramatically.
The final lesson is that maintenance begins immediately. A new deck looks strong, but weather starts working on it from day one. Leaves collect moisture. Dirt hides in gaps. Sunlight fades wood. Screws loosen slightly as materials expand and contract. A quick seasonal inspection can prevent expensive repairs later. In that sense, building a deck is not just a weekend project; it is the start of a long relationship with an outdoor space that should serve your home for years.
Note: This article is for educational and planning purposes. Always verify structural details, footing requirements, railing rules, stair dimensions, ledger attachment, and inspection steps with your local building department or a qualified deck professional before construction.