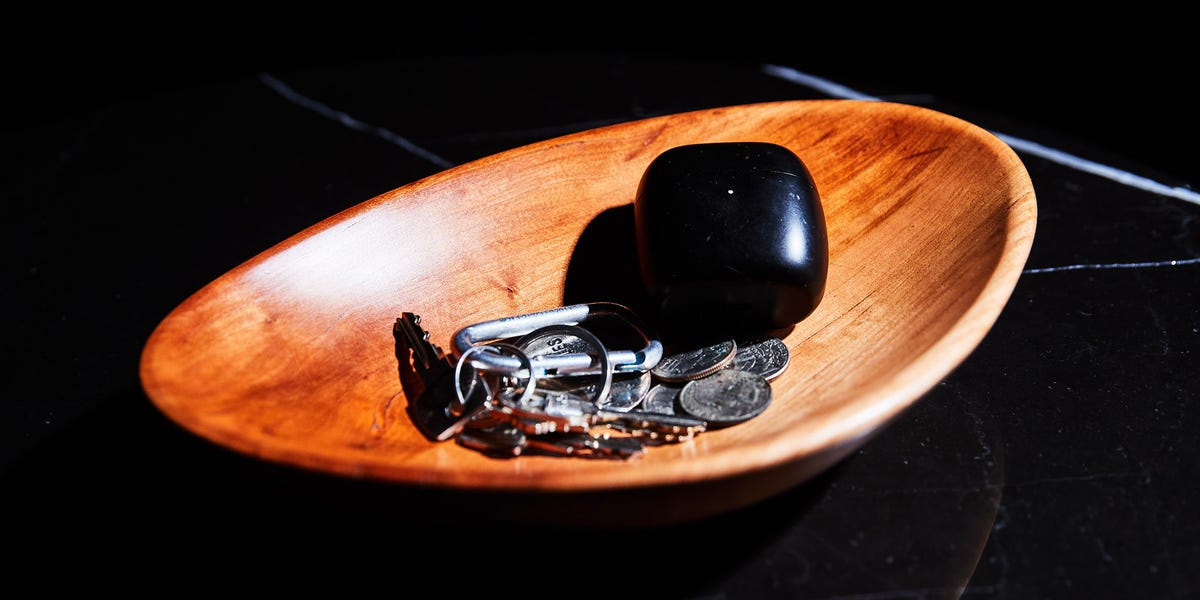
A DIY wooden bowl is one of those rare projects that feels both practical and a little magical. You start with a plain chunk of wood, and somehow end up with something that looks like it belongs on a designer kitchen island next to lemons nobody actually eats. Better yet, a handmade wooden bowl can be rustic, modern, sculptural, or wonderfully imperfect. That means you do not need a museum-grade workshop to make one look good. You just need a smart plan, realistic expectations, and enough patience to sand without muttering suspicious things at the wood.
Whether you want a fruit bowl for your table, a decorative centerpiece, or a handmade gift that feels far more expensive than it really is, this guide walks through the best ways to approach a DIY wooden bowl. It covers beginner-friendly methods, wood choices, finishing options, design ideas, and the real-life lessons people learn once sawdust enters the chat.
Why a DIY Wooden Bowl Is Such a Great Project
Wooden bowls sit in that sweet spot between art and usefulness. They are small enough to feel manageable, but impressive enough to make people ask, “Wait, you made that?” A good bowl also teaches core woodworking habits: planning curves, reading grain, refining a shape, sanding patiently, and choosing a finish that fits the project instead of just grabbing whatever can says “wood” the loudest.
Another reason this project works so well is flexibility. A wooden bowl can be made in more than one way. Some makers use a lathe for a classic round bowl. Others build segmented bowls from glued rings. Some even create bowl forms from layered pieces using a scroll saw. In other words, “DIY wooden bowl” does not mean there is only one road to the finish line. It means there are several roads, and at least one of them will match your tools, budget, and comfort level.
Choose the Right Type of Wooden Bowl Project
1. Lathe-Turned Bowl
This is the version most people picture first: a solid wood blank shaped into a smooth bowl. It gives the most classic look and can highlight beautiful grain patterns. It also requires training, protective gear, and a cautious approach, because bowl turning is not the moment to improvise like you are in an action movie. For beginners, the safest path is to learn from an experienced adult, take a class, or start with a rough-turned blank that needs only light shaping and finishing.
2. Segmented Bowl
A segmented bowl is built from many smaller pieces arranged into rings and then stacked. The result can be striking, especially if you mix contrasting woods. This method is popular because it lets you create patterns that a single block of wood cannot. It is also a good choice for makers who love precision and geometry almost as much as they love wood.
3. Scroll-Sawn or Layered Bowl
This approach uses angled rings cut from thinner stock and then glued into a bowl shape. It is clever, efficient, and surprisingly stylish. It also makes a great “I do not own a giant turning blank, and I am not about to wrestle a log in my garage” option. Layered bowls often have a sculptural look that feels handmade in the best way.
The Best Woods for a DIY Wooden Bowl
The wood you choose affects everything: appearance, ease of shaping, durability, and how the finished bowl feels in the hand. For a bowl that may contact food, most makers lean toward hardwoods with pleasant grain and reliable performance.
- Maple: A favorite for bowls because it is strong, smooth-grained, and clean-looking. It works beautifully in kitchens and fits almost any style.
- Cherry: Warm, elegant, and known for deepening in color over time. If maple is the crisp white shirt, cherry is the perfectly worn leather jacket.
- Walnut: Rich, dark, and dramatic. Great for decorative bowls and statement pieces.
- Birch: Light-colored and practical, with a subtle look that suits simple designs.
For beginners, a stable hardwood with a fine or medium grain is usually easier to manage than something extremely soft, knotty, or unpredictable. And while dramatic grain can be gorgeous, wild figure is not always the friendliest place to start if your shaping and sanding skills are still developing.
What You Need Before You Start
The exact supplies depend on your method, but most DIY wooden bowl projects involve some version of the following:
- A bowl blank, laminated blank, or ring components
- Sandpaper in several grits
- Clamps for glue-ups
- Wood glue
- A safe, appropriate finish
- Soft cloths or paper towels for finish application
- Basic measuring and layout tools
- Protective gear, especially eye and face protection
If you are using any powered cutting or turning setup, adult supervision, training, and proper protective equipment matter. That is not the boring fine print. That is the part that lets you keep all your fingers and enjoy your bowl afterward.
A Smarter Beginner Workflow
Because there are several ways to make a wooden bowl, the smartest beginner workflow is not “pick the most dramatic method.” It is “pick the method you can do well and safely.” Here is a practical approach:
- Start with a clear purpose. Decide whether your bowl will be decorative, used for fruit, or used for dry snacks. That choice affects finish and design.
- Keep the shape simple. A gentle curve is more forgiving than a bowl trying to look like modern sculpture on day one.
- Use dry, stable wood. Green wood can be beautiful, but it also moves, warps, and tests your patience.
- Refine the form before obsessing over finish. A perfect finish cannot save a clunky shape.
- Sand more than you think you need to. Then inspect in better light and sand a little more, because wood loves to hide rough spots like a tiny trickster.
Design Tips That Make a Wooden Bowl Look Better Fast
Pay Attention to the Rim
The rim is one of the first things people notice. A thick, heavy rim can make a bowl feel clumsy, while a rim that is too thin can feel fragile. Aim for balance. Even a simple bowl looks more refined when the rim feels intentional.
Watch the Curve
A pleasing bowl usually has a smooth visual flow from rim to base. Avoid random flat spots, awkward bulges, or a shape that looks undecided. If the bowl profile feels graceful, the project already looks more advanced.
Do Not Ignore the Base
The bottom should feel stable and proportionate. A bowl that rocks on the table is memorable, but not in the way you want. A small foot, a soft undercut, or a neatly flattened base can make the whole piece feel finished.
Use Contrast Carefully
Segmented or layered bowls can look stunning when contrasting woods are used thoughtfully. Maple and walnut are a classic pairing because they deliver drama without looking chaotic. Think “designed,” not “accidentally built from the scrap bin in a panic.”
Sanding: The Least Glamorous, Most Important Step
If shaping is where the bowl becomes a bowl, sanding is where it becomes beautiful. This is also the stage people rush, regret, and then pretend was part of the rustic aesthetic. Do not be those people.
Work through the grits progressively instead of jumping from rough sanding to wishful thinking. Many makers start with a coarser grit to remove tool marks or ridges, then move steadily finer until the surface feels even and comfortable to the touch. On layered bowls, sanding is also where you correct tiny glue-line misalignments and sharpen the overall look.
Check the surface with both your eyes and your hands. Light catches scratches that fingers miss, and fingers catch unevenness your eyes may politely ignore. If you are using a water-based finish, many woodworkers also raise the grain before the final pass so the finish does not surprise you later with a fuzzy texture.
Choosing the Best Finish for a Wooden Bowl
The finish depends on how the bowl will be used. Decorative bowls, fruit bowls, and bowls that may touch food are not all the same thing. That is why finish choice matters.
For Decorative Bowls
If the bowl is mainly for display, you have more freedom. Film finishes can give you richer sheen and stronger surface protection. They can make figured grain pop and add a polished look that feels more formal.
For Food-Contact Bowls
For bowls that will hold fruit, salad, bread, or dry snacks, many makers prefer finishes designed for food-contact surfaces or easy-to-refresh oil finishes. Mineral oil, walnut oil, butcher block oil, and salad bowl finishes are common choices. Some cured film finishes are also considered food-safe after full cure, but the right choice still depends on whether the bowl will be cut on, washed often, or simply used to serve.
In plain English: if the bowl will have light food contact and you want easy maintenance, a simple oil-based approach is often practical. If it is decorative, you can prioritize sheen and durability. If it is for active kitchen use, choose a finish appropriate for that purpose and follow the product directions like they were written by someone trying to save you from future regret.
Common DIY Wooden Bowl Mistakes
- Starting with a complicated design: Fancy shapes are fun until they become sanding purgatory.
- Using unstable or cracked wood: A beautiful blank with hidden trouble is still trouble.
- Ignoring grain direction: Wood has opinions, and it expresses them through tear-out and rough surfaces.
- Rushing glue-ups: Gaps in segmented or layered bowls will glow under finish like neon signs.
- Choosing the wrong finish: A gorgeous finish that is wrong for kitchen use is still the wrong finish.
- Underestimating sanding time: This is perhaps the most common woodworking tradition after buying clamps.
How to Make Your Wooden Bowl Look More Professional
A polished bowl usually comes from a few disciplined habits rather than one genius trick. Keep wall thickness visually consistent. Clean squeeze-out before it hardens. Round over edges that should feel soft in the hand. Remove dust thoroughly before finishing. Apply finish in thin, patient coats instead of trying to achieve instant perfection with one heroic slop-fest.
It also helps to pause during the process and simply look at the piece from different angles. A bowl often reveals its issues when you set it down at table height and view it like an actual object, not a project clamped in workshop chaos.
Caring for a Wooden Bowl After It Is Finished
A handmade wooden bowl will last much longer if it is treated like wood, not like stainless steel. Wash it gently by hand if needed, dry it promptly, and avoid soaking it. If the finish is an oil finish, refresh it when the wood starts to look dry. That little bit of routine care goes a long way toward preventing a bowl from looking tired, chalky, or sad.
And yes, this is the section where we all agree not to put a handmade wooden bowl in the dishwasher. That is not convenience. That is betrayal.
Real-World Experience: What DIY Wooden Bowl Projects Teach You
One of the most relatable experiences with a DIY wooden bowl is realizing that the project looks simple from across the room and deeply humbling from two feet away. At first, many people imagine a smooth curve, a glowing finish, and a cinematic shower of sawdust. Then the actual process begins, and the wood starts teaching lessons immediately. The first lesson is usually patience. A bowl is not a boxy project where small flaws can hide on the back side near the wall. A bowl is all curves, all visibility, all the time. Every uneven line, tiny flat spot, or missed scratch ends up front and center like it paid extra for the best seat in the theater.
Another common experience is discovering how much shape matters. New makers often think the finish will be the star, but the real star is proportion. A bowl can be made from beautiful cherry or walnut, sanded carefully, and still feel slightly off if the rim is too heavy or the base looks awkward. On the other hand, a simple bowl in humble wood can look fantastic if the profile feels balanced. That realization changes how people work. They stop chasing “fancy” and start chasing “graceful.” That is a major leap.
Then there is the sanding experience, which deserves its own dramatic soundtrack. Almost everyone underestimates it. What seems like a quick cleanup becomes a long, oddly meditative process of refining curves, checking scratches, wiping dust, and wondering how one tiny swirl mark survived three rounds of sanding like a villain in a movie franchise. But this is also where confidence grows. You begin to feel what smooth actually means. You start noticing how surfaces change under your fingertips. You learn that craftsmanship is often less about flashy skill and more about quiet persistence.
Making a wooden bowl also teaches respect for material. Wood is never just “brown stuff from the store.” Maple feels different from cherry. Walnut behaves differently from birch. Some pieces cooperate. Some pieces act like they woke up determined to argue. Grain can make a bowl glow, but it can also expose every weak choice in shaping or preparation. That experience builds better judgment. You stop asking only, “What looks pretty?” and start asking, “What suits this design?”
Perhaps the most rewarding experience is using the bowl after it is done. A handmade bowl changes how you see ordinary objects. Suddenly fruit on the table looks intentional. Bread looks rustic in a good way. Keys dumped into a catchall bowl by the door somehow seem more organized, even if they absolutely are not. The bowl becomes part of daily life, and that is where the project really succeeds. It is not just a woodworking exercise anymore. It becomes a useful object with a story.
And finally, every wooden bowl leaves you with at least one thought: “I could make the next one better.” That is not failure. That is the whole point. Bowl projects invite iteration. The second bowl is usually more confident than the first. The third often has better proportions. By the fourth, you stop fighting the process and start enjoying it. That is when a DIY wooden bowl turns from a one-time craft project into a genuine woodworking habit.
Conclusion
A DIY wooden bowl is more than a trendy craft project. It is a practical way to build woodworking skills, create something useful, and bring a little handmade warmth into your home. Whether you choose a turned bowl, a segmented design, or a layered approach, the real secret is not chasing perfection. It is choosing a method that fits your skill level, respecting the material, sanding like you mean it, and using a finish that matches how the bowl will live.
Make it simple, make it solid, and make it yours. If the finished bowl looks beautiful and holds fruit without drama, that is already a win. If it also makes guests ask where you bought it, that is just bonus glory.
Note: This article is cleaned for web publishing and contains no source-link artifacts or citation placeholders.