There are moments when a chocolate craving arrives politely, and there are moments when it kicks down the kitchen door wearing tiny sunglasses. Individual microwave chocolate tortes are built for the second kind. They deliver a warm, dark, fudgy dessert in a few minutes, without preheating an oven, washing a stack of bowls, or committing to an entire layer cake that will stare at you from the counter for three days.
These small tortes sit somewhere between a flourless chocolate cake, a brownie, and a particularly elegant chocolate mug cake. They are dense rather than fluffy, rich rather than bready, and portioned into ramekins so each person gets a private chocolate kingdom. The recipe uses very little flour, which keeps the texture compact and truffle-like, while butter, cocoa, sugar, and egg white create a glossy batter that cooks quickly.
Established microwave-dessert methods consistently favor microwave-safe vessels with room for expansion, short cooking intervals, and timing adjustments based on appliance wattage. Some modern recipes also use reduced power for gentler, more even cooking, while very small portions can cook successfully in brief high-power bursts.
Why This Microwave Chocolate Torte Recipe Works
A traditional torte is usually richer and denser than an everyday cake, often because it contains less flour or replaces some flour with nuts or chocolate. This quick version follows the same general philosophy: one tablespoon of flour supports two small tortes. That is enough structure to hold the dessert together, but not enough to turn it into a dry sponge.
The cocoa powder blends with melted butter, helping distribute the chocolate flavor throughout the batter. Sugar sweetens the cocoa and helps create a moist interior. Egg white supplies structure, while a tiny pinch of baking soda provides just enough lift to keep the tortes tender. The result rises dramatically in the microwave, settles slightly as it rests, and finishes with a soft center and delicate crust.
Cooking the tortes one at a time is also important. Microwaves distribute energy unevenly, and two ramekins may shield or compete with each other. One centered ramekin generally cooks more predictably. It may feel inefficient for approximately 45 seconds, but this is not a Thanksgiving turkey. Dessert will survive the delay.
Recipe at a Glance
- Yield: 2 individual chocolate tortes
- Prep time: 5 minutes
- Microwave time: About 35 to 55 seconds per torte
- Resting time: 1 to 2 minutes
- Best vessel: Two microwave-safe 6- to 8-ounce ramekins
- Texture: Dense, moist, fudgy, and lightly cakey at the edges
Ingredients
- 2 1/2 tablespoons unsalted butter, plus a little for greasing
- 2 tablespoons unsweetened cocoa powder
- 1/4 cup granulated sugar
- 2 tablespoons pasteurized liquid egg white, or 1 large egg white
- 1/4 teaspoon pure vanilla extract
- 1 tablespoon all-purpose flour
- 1/8 teaspoon baking soda
- 1/8 teaspoon fine salt
- 2 teaspoons mini semisweet chocolate chips, optional
- Whipped cream, berries, confectioners’ sugar, or shaved chocolate, for serving
Ingredient Notes That Make a Difference
Cocoa powder: Natural unsweetened cocoa gives the tortes a familiar brownie-like flavor and works well with baking soda. Dutch-process cocoa can taste darker and smoother, but because its acidity differs, the rise may change slightly. For the most repeatable result, use natural cocoa powder.
Butter: Butter adds richness and carries the cocoa flavor. Salted butter can work in a dessert emergency; simply omit the added salt. A neutral oil produces a softer texture after cooling, but it lacks butter’s flavor and makes the dessert feel more like an ordinary mug cake than a tiny torte.
Egg white: Pasteurized liquid egg white is convenient because two tablespoons are easy to measure and reduce concerns about an undercooked center. When using a shell egg, avoid tasting the raw batter and cook the torte until no liquid batter remains. Raw flour and raw egg products should be fully cooked before eating.
Chocolate chips: They are optional, but strategically excellent. Mini chips create small pockets of melted chocolate without dramatically changing the cooking time. For a lava-style center, press one square of semisweet chocolate into each ramekin instead of deliberately undercooking the batter.
How to Make Individual Microwave Chocolate Tortes
1. Prepare the Ramekins
Lightly grease two microwave-safe ramekins with butter. Choose containers that hold 6 to 8 ounces and have straight or gently sloped sides. The batter should fill each ramekin no more than halfway. That empty space is not wasted real estate; it is overflow insurance.
2. Melt the Butter
Place the butter in a small microwave-safe mixing bowl. Microwave for 15 seconds, stir, and continue in 5-second bursts only if needed. The butter should be melted but not furiously bubbling. Overheated butter may cause the cocoa to form dry clumps and could partially cook the egg white when it is added.
3. Build the Chocolate Base
Whisk the cocoa powder into the warm butter until smooth and shiny. Add the sugar and stir thoroughly. The mixture may look slightly grainy because granulated sugar does not dissolve completely at this stage; that is normal.
Add the egg white and vanilla, then whisk until the batter looks cohesive and glossy. Scrape around the bottom of the bowl so no stubborn cocoa pockets remain.
4. Add the Dry Ingredients
Sprinkle the flour, baking soda, and salt evenly over the batter. Stir just until no pale streaks remain. Scrape the bottom and sides of the bowl because a hidden pocket of flour has an uncanny ability to reveal itself in the first bite.
Fold in the mini chocolate chips, if using. Divide the batter evenly between the prepared ramekins. Tapping each ramekin gently on the counter helps level the batter and release large air pockets.
5. Microwave One Torte at a Time
Place one ramekin in the center of the microwave. For a 1,000- to 1,200-watt microwave, begin with 32 to 35 seconds on high. For a 700- to 900-watt microwave, begin with 42 to 45 seconds. Check the surface, then add time in 5-second bursts if necessary.
The torte is ready when the edges look set, the top has lost its wet shine, and the center springs back gently while remaining soft. Most tortes need no more than about 40 to 45 seconds in a powerful microwave or 50 to 55 seconds in a lower-wattage model.
Repeat the process with the second ramekin. Resist the temptation to microwave both at once until you know how your particular appliance behaves.
6. Let the Tortes Rest
Rest each torte for 1 to 2 minutes. The ramekin will be hot, and the dessert continues to set during this pause. Resting also allows the chocolate flavor to settle and prevents the first spoonful from doubling as an unscheduled tongue-removal procedure.
How to Tell When a Microwave Torte Is Done
Microwave cakes do not brown like oven-baked cakes, so color is a poor indicator. Watch the texture instead. The perimeter should appear firm, while the center should look moist but not raw. A toothpick inserted near the edge should emerge with a few damp crumbs.
If the toothpick passes directly through a chocolate chip or melted chocolate center, it will report “chocolate,” which is accurate but not especially helpful. Test a second area before adding more cooking time.
For batter made with a shell egg white, the conservative food-safety target for egg dishes is 160°F. Because such a small dessert can overcook quickly, use an instant-read thermometer only when needed and insert it in more than one spot. Microwave cooking may create hot and cool areas, so a brief rest is useful for temperature equalization.
Do not chase a bone-dry toothpick. By the time the center is completely dry, the edges may have crossed the border from “torte” into “chocolate eraser.” For a flowing center, insert solid chocolate before cooking rather than leaving raw batter uncooked.
Flavor Variations
Mocha Chocolate Torte
Add 1/8 teaspoon instant espresso powder with the cocoa. The coffee flavor will not dominate; it mainly deepens the chocolate. For an obvious mocha version, add 1/4 teaspoon and serve the torte with coffee-flavored whipped cream.
Chocolate Peanut Butter
Divide half the batter between the ramekins, add 1 teaspoon of peanut butter to the center of each, and cover it with the remaining batter. Use conventional creamy peanut butter rather than a very runny natural style, which may make the center oily.
Raspberry Chocolate
Place 1 teaspoon of thick raspberry preserves in the center of each torte. Tart berries sharpen the cocoa flavor and make the dessert seem more sophisticated, even though it was cooked by pressing a button while wearing slippers.
Mexican-Inspired Chocolate
Add a pinch of cinnamon and the tiniest pinch of cayenne. “Tiniest” matters. The goal is gentle warmth at the finish, not a dessert that files a noise complaint.
Salted Caramel Torte
Push one soft caramel into the middle of each ramekin before cooking. After the tortes rest, top them with a small pinch of flaky salt. Avoid placing caramel directly on the bottom, where it may stick aggressively to the ramekin.
Gluten-Free Option
Replace the tablespoon of all-purpose flour with a reliable cup-for-cup gluten-free baking blend. Because the quantity is small, the substitution is usually straightforward. Check that the cocoa, baking soda, chocolate, and toppings also meet the dietary needs of the person being served.
Serving Ideas for a Small but Fancy Dessert
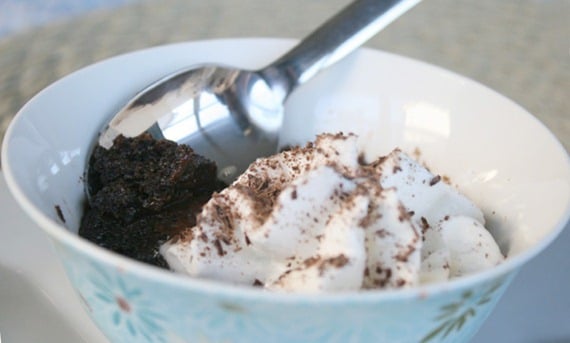
Serve the tortes warm in their ramekins for maximum ease. A spoonful of lightly sweetened whipped cream provides cool contrast, while vanilla ice cream melts into the top and forms an instant sauce. Fresh raspberries, strawberries, or sliced cherries add acidity and color.
A dusting of confectioners’ sugar is the fastest way to suggest that you had a plan all along. Sift it over the dessert immediately before serving because it will gradually dissolve into the warm surface.
For a dinner-party presentation, run a thin knife around the edge after the torte has rested for two minutes, invert it onto a small plate, and finish it with berries and shaved chocolate. Test this method with your ramekins before attempting a dramatic tableside reveal. Some tortes release like trained professionals; others cling to the dish as though they pay rent.
A pinch of flaky salt is especially good when the tortes include chocolate chips or caramel. Chopped toasted hazelnuts, pecans, or almonds add crunch, but sprinkle them on after cooking so they remain crisp.
Common Problems and Easy Fixes
The Torte Turned Rubbery
It cooked too long, the ramekin was too narrow, or the microwave was more powerful than expected. Reduce the next cooking time by 5 to 10 seconds. A wider ramekin cooks more evenly than a tall, narrow mug because the batter forms a shallower layer.
The Center Is Raw
Return the ramekin to the microwave for 5 seconds, then rest it for 30 seconds and check again. Large jumps in time are risky. A microwave dessert can move from underdone to overdone while you are still deciding whether five seconds sounds insignificant.
The Batter Overflowed
The vessel was too small or filled too high. Use a 6- to 8-ounce ramekin and keep the batter below the halfway mark. Placing the ramekin on a microwave-safe plate will not prevent overflow, but it will preserve your dignity and your microwave floor.
The Cocoa Formed Lumps
Whisk the cocoa into warm melted butter before adding the other ingredients. If the cocoa is especially clumpy, sift it first. Lumps are harder to remove after the egg white enters the bowl.
The Torte Sank After Cooking
A small amount of settling is normal. Microwave cakes inflate rapidly as steam expands, then relax when the heat stops. A sunken top is not a failure; it is a naturally occurring bowl for whipped cream.
The Torte Stuck to the Ramekin
Use a thin, even coating of butter before adding the batter. If you plan to invert the tortes, dust the greased ramekins lightly with cocoa powder. Cocoa provides additional protection without leaving the white patches that flour can create on a dark chocolate dessert.
Make-Ahead, Storage, and Reheating
These tortes are best eaten shortly after cooking, when the edges are tender and the center is soft. For entertaining, mix the dry ingredients and wet ingredients separately a few hours ahead, refrigerate the egg mixture, and combine them shortly before microwaving. Do not leave raw batter sitting at room temperature.
Leftover cooked tortes can be covered and refrigerated for up to two days, although the texture becomes firmer. Reheat one at 50% power in 10-second bursts until just warm. Add whipped cream or a spoonful of chocolate sauce to restore moisture.
Freezing is possible, but for a dessert that takes minutes from start to finish, it is a little like freezing toast.
The Real-Life Experience of Making Individual Microwave Chocolate Tortes
The first notable experience is how little the batter looks like before cooking. Divided between two ramekins, it may seem almost comically modest, as though dessert has been affected by budget cuts. Then the microwave starts, the batter rises, and suddenly both ramekins look capable of staging a small chocolate rebellion. Watching through the door is encouraged, especially during the final 15 seconds.
The second lesson is that every microwave has a personality. One model may produce a perfectly tender torte in 36 seconds; another may need 48. Even appliances with the same listed wattage can heat differently because of turntable design, cavity size, and power cycling. The useful habit is to write the successful time on the recipe after the first batch. That tiny note turns future attempts from guesswork into a nearly automatic dessert ritual.
Ramekin shape changes the experience more than many cooks expect. In a wide, shallow dish, the torte cooks quickly and develops a larger soft top. In a narrow cup, the center stays wetter while the upper edges may become firm. The most reliable vessel is not necessarily the prettiest one; it is the one that gives the batter enough surface area and still leaves room to rise. Fortunately, whipped cream has never rejected a ramekin for aesthetic reasons.
Another common discovery is that the resting minute matters. Straight from the microwave, the torte may seem too loose and dangerously hot. After 60 seconds, the crumb becomes more coherent, the chocolate chips remain molten, and the flavor tastes fuller. That pause is also the perfect time to retrieve ice cream, rinse the mixing bowl, or pretend the dessert required advanced pastry training.
Serving two individual tortes feels more special than splitting one mug cake. Each person gets tender edges, a soft middle, and full authority over toppings. This matters in households where “just one bite” has historically meant “approximately half.” For date night, the separate ramekins make an ordinary weeknight feel deliberate. For a solo evening, the second torte can be covered for tomorrowor eaten immediately in the name of quality control.
The recipe is also surprisingly useful for guests. The ingredients are inexpensive, the equipment is basic, and the batter can be assembled while coffee is brewing. Rather than serving a large dessert after a heavy meal, these small portions deliver chocolate without asking anyone to negotiate a wedge of cake.
Add raspberries and confectioners’ sugar, and the result looks restaurant-inspired. Add a scoop of ice cream, and nobody will ask whether the microwave was involved. Guests generally care far more about the warm chocolate center than the appliance responsible for it.
There is also freedom in how informal the dessert can be. On a quiet evening, it can be eaten directly from the ramekin while standing at the kitchen counter. For a celebration, it can be inverted onto a plate, decorated with berries, and presented as a miniature plated dessert. The basic recipe does not insist on formality. It simply adapts to the amount of effort available.
Finally, the cleanup is genuinely small. One bowl, one whisk or fork, two ramekins, and two spoons are usually all that stand between the cook and a clean kitchen. That low level of commitment is part of the pleasure.
Individual microwave chocolate tortes are not trying to replace a carefully baked celebration cake. They serve a different purpose: immediate comfort, controlled portions, and warm chocolate on a schedule that respects commercial breaks.
Conclusion
Individual microwave chocolate tortes prove that a fast dessert does not have to taste like a compromise. With cocoa, butter, sugar, egg white, and a spoonful of flour, you can create two rich, fudgy servings in roughly the time it takes to locate the whipped cream.
The keys are simple: use roomy microwave-safe ramekins, cook one portion at a time, start with less time than you think you need, and let each torte rest before serving.
Once the base recipe is familiar, it becomes a template for mocha, peanut butter, raspberry, salted caramel, or gluten-free variations. Keep the toppings playful, the cooking intervals short, and the second ramekin under close supervision. Chocolate has a way of disappearing when nobody is looking.
Note: Microwave wattages and vessel shapes vary. Use the lower end of the timing range for the first attempt, add time only in 5-second bursts, and make sure flour-and-egg batter is fully cooked before eating.