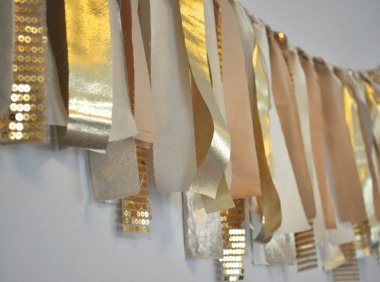
By Day 12 of holiday planning, the cookies are disappearing, the gift wrap has developed its own weather system, and someone has already suggested leaving the inflatable reindeer up until spring. This is exactly when a Christmas photo booth deserves a place on the nice list.
A well-designed holiday photo booth gives guests an activity, fills awkward pauses, encourages different generations to mingle, and produces pictures more memorable than another stiff lineup beside the coat rack. Better yet, you do not need a professional studio, expensive rental equipment, or a sleigh full of cash. A camera-friendly backdrop, flattering light, a few playful props, and one clear visual theme can transform an unused wall into the busiest corner of your Christmas party.
The goal is not perfection. The goal is to create a space so welcoming that toddlers, grandparents, coworkers, teenagers, and the cousin who claims to “hate pictures” eventually wander into the frame.
Plan the Christmas Photo Booth Before Buying Tinsel
Begin by deciding who will use the booth and what kind of photos you want. A children’s party needs durable props, open floor space, and decorations that cannot shatter. An office celebration may call for a cleaner, more polished background. A family gathering can feel warmer and more personal with heirloom ornaments, framed holiday photos, favorite blankets, or a chair that has survived twenty Christmas mornings.
Choose one theme and repeat its colors, shapes, and textures. Classic red and green, snowy white and silver, gingerbread brown, candy-cane stripes, vintage plaid, elegant greenery, or a North Pole mailroom can all work beautifully. Combining every Christmas idea in one corner may look festive, but it may also appear as though a holiday store sneezed.
Choose a Practical Location
Use a wall that is visible without becoming a traffic bottleneck. Guests should be able to enter, pose, and leave without blocking the kitchen, gift table, hallway, or bathroom door. Leave several feet between the camera and the backdrop, plus enough width for group pictures.
Before decorating, place the phone or camera where it will remain and check the frame. Mark the edges of the visible area with removable tape. This prevents you from spending an hour decorating sections that never appear in a single photograph.
Decorate for the Camera Frame
A concentrated visual area usually photographs better than decorations scattered across an entire room. A roughly six-foot-square backdrop can accommodate couples, children, and small groups. Wrapping paper attached to a sturdy wall or cardboard panel is a popular shortcut, while fabric, curtains, greenery, tinsel, and layered paper decorations offer reusable alternatives.
12 Christmas Photo Booth Ideas for Day 12
1. The Giant Wrapped-Present Wall
Cover a wall or several large cardboard panels with coordinated wrapping paper. Add oversized ribbon strips and a giant bow so guests appear to be standing inside a Christmas present. Matte paper works better than highly reflective foil, which can bounce harsh light toward the camera.
Place a few empty gift boxes near the bottom corners to create depth. Keep the center clear so guests do not have to perform an obstacle course while wearing reindeer antlers.
2. A Snowy White Christmas Corner
Hang a white curtain, sheet, or photography backdrop and decorate it with paper snowflakes, white garland, silver ornaments, and cool-white string lights. Add a bench covered with a chunky knit blanket for seated family portraits.
Cotton batting can imitate snow along the floor, but tape it securely. Nothing ruins a winter wonderland faster than Uncle Mike sliding through it like an unlicensed figure skater.
3. Santa’s North Pole Mailroom
Create a red-and-white background with cardboard packages, oversized envelopes, a canvas mailbag, and a “North Pole Special Delivery” sign. Guests can hold letters labeled “Nice,” “Naughty,” “Still Negotiating,” or “Ask Santa’s Lawyer.”
A small writing desk or mailbox gives children something to interact with, helping you capture natural expressions instead of requesting that they stand perfectly still during peak cookie season.
4. The Upside-Down Chimney Scene
Build a lightweight faux chimney from a large cardboard box, foam board, or printed brick paper. Add faux snow, Santa boots, a toy sack, and a dark fabric background. Guests can pose as though they are climbing into or tumbling out of the chimney.
Keep the structure decorative rather than load-bearing. Nobody should actually climb into a cardboard fireplace, regardless of how strongly the eggnog encourages them.
5. Candy Cane Lane
Use red-and-white balloons, paper peppermint swirls, striped pool noodles, and oversized candy cutouts. A curved balloon garland adds height without covering every inch of the wall.
Continue the same palette in the props with red glasses, peppermint signs, striped hats, and candy-cane frames. Repeating a small number of colors makes inexpensive decorations look deliberate and professionally coordinated.
6. Cozy Christmas Pajama Booth
Place a loveseat, bench, or two sturdy chairs in front of a Christmas tree, plaid curtain, or warm wooden backdrop. Add blankets, stockings, slippers, storybooks, and empty cocoa mugs.
This setup is ideal for family parties and pajama gatherings because guests become part of the decor. Coordinate outfits around shared colors instead of requiring identical pajamas. Holiday photography guidance commonly recommends using a unified palette so groups look connected without resembling a seasonal marching band.
7. Vintage Christmas Card Studio
Re-create the mood of an old-fashioned holiday postcard with plaid fabric, a wooden sled, bottlebrush trees, vintage-style ornaments, wrapped packages, and a hand-lettered “Season’s Greetings” sign.
Encourage guests to try exaggeratedly formal poses, perfectly straight seated rows, dramatic smiles, or thoughtful gazes toward an imaginary snowfall. Apply a warm, faded, or black-and-white filter afterward for instant heirloom charm.
8. Ugly Sweater Runway
Turn the booth into a miniature fashion show. Hang tinsel curtains, add a short floor runner, and make award signs such as “Most Likely to Blind Rudolph,” “Best Use of Pom-Poms,” and “Champion of Questionable Taste.”
A ring light or soft front light will reveal every bell, bow, blinking bulb, and stuffed snowman. Holiday party guides often combine whimsical wrapping paper, tinsel, Santa hats, antlers, and easily accessible lighting for energetic photo and video stations.
9. Winter Woodland Booth
Combine evergreen garland, pinecones, bare branches, kraft-paper stars, wooden crates, and animal-ear headbands. Use warm white lights to create the feeling of a cozy cabin in the woods.
Faux greenery is reusable and less messy, while fresh branches add fragrance and natural texture. A dark green or brown background helps pale ornaments, wooden details, and warm lights stand out.
10. Ornament Wall With a Face Frame
Cut a giant ornament shape from foam board and create an opening in the center. Guests can place their faces inside the frame or pretend to be decorations hanging from an enormous Christmas tree.
Another option is to suspend colorful, shatter-resistant ornaments at different heights against a plain background. Add an instant-photo garland nearby so guests can clip up their pictures, allowing the booth to become a growing party decoration.
11. Christmas Movie Moment
Build a scene inspired by the visual mood of a favorite holiday movie without copying protected logos or character artwork. Try a cozy train-platform scene, a glamorous old-Hollywood living room, a chaotic family breakfast, or a snowy small-town storefront.
Place pose prompts in a bowl: “Defend the last cookie,” “React to unexpected sleigh bells,” “Pretend the tree just fell over,” or “Smile like your present definitely includes batteries.” Prompts create more interesting expressions than repeatedly shouting, “Okay, now do something funny.”
12. The Twelve Days of Christmas Booth
For the Day 12 finale, create a visual collage inspired by the classic song. Use paper birds, gold rings, milk-pail cutouts, dancing silhouettes, drums, crowns, or numbered signs.
You do not need to illustrate every verse literally. Choose three or four recognizable elements and arrange them as bold graphic shapes. Give guests number cards from one through twelve and photograph a sequence during the party. The completed gallery becomes a visual countdown and a ready-made social media carousel.
Christmas Photo Booth Lighting That Flatters Everyone
Place the main light in front of guests and slightly above eye level. A ring light is convenient, but a shaded lamp, LED panel, softbox, or bright window can work when the light is soft and even.
Avoid depending entirely on overhead ceiling lights. They tend to create shadows beneath the eyes and nose, producing the unmistakable mood of a department-store fitting room. Diffused light is commonly used for portraits because it softens the transition between highlights and shadows.
Keep decorative string lights primarily in the background. They add sparkle and may create attractive blurred circles when there is distance between the guests and the lights. Take several test photos because bright bulbs can look perfect to your eyes while the camera records dark faces.
Direct built-in flash may overpower the warm glow of holiday lights. Camera manufacturers generally recommend preserving ambient light or using a softer, adjusted light source when possible.
Mount the phone or camera on a tripod and mark the ideal standing position with a small piece of removable tape. Clean the lens, charge the device, clear storage space, and enable a short timer. For a self-service booth, post three instructions: stand on the mark, tap the timer, and take several pictures. Simple instructions prevent the station from requiring its own technical-support department.
Christmas Photo Booth Props Guests Will Actually Use
Too many props create clutter. Offer a curated collection in an open basket, crate, or wall organizer so guests can see everything quickly.
- Santa hats, elf caps, reindeer antlers, and oversized glasses
- Speech bubbles with large, short phrases
- Empty wrapped boxes, wreaths, bells, and candy-cane props
- A large open frame or faux holiday-card border
- Signs such as “Cookie Inspector” and “Backup Reindeer”
- A few neutral props for guests who prefer subtle pictures
Make signs from thick cardstock or foam board and attach the handles securely. Use lettering large enough to read on a phone screen. Avoid long jokes; by the time someone finishes reading the sign, the camera timer may have captured three photographs of their confused face.
Frames, hats, letters, signs, and recognizable objects remain popular because they give people something to do with their hands and make posing feel less formal.
Make the Booth Safe, Easy, and Shareable
Complete a Five-Minute Test Shoot
Take sample pictures with one person, a couple, and a small group. Check whether the background fills the frame, signs are readable, faces are bright, and cords or storage boxes remain hidden.
Groups generally appear more connected when guests stand close together in a staggered formation. If people are standing in multiple rows, the camera also needs enough depth of field to keep everyone acceptably sharp.
Prepare for Children and Pets
Anchor backdrop stands, secure electrical cords, use shatter-resistant ornaments, and remove small pieces that could become choking hazards. Keep candles, hot lamps, unstable furniture, and fragile decorations out of reach.
For pets, avoid noisy bells and restrictive costumes. A simple bandana beside the prop basket usually works better than trying to persuade a cat to wear a full Santa beard.
Create a Simple Sharing System
Display a party hashtag or a QR code leading to a private shared album. An instant camera can provide take-home souvenirs, while a phone or digital camera can preserve higher-resolution images for printing later.
Keep charging cables or a power bank nearby. Party-planning recommendations frequently suggest using a stable phone station, creating a shared album, and ensuring that devices remain charged throughout the event.
Ask permission before posting photographs publicly, especially pictures of children. A private album allows guests to choose which images they download, share, or place on holiday cards.
Budget-Friendly Christmas Photo Booth Checklist
- Fabric, wrapping paper, curtains, or cardboard backdrop panels
- Removable hooks, painter’s tape, clamps, or a backdrop stand
- One soft front light and optional decorative string lights
- A tripod, phone holder, timer, or remote shutter
- Foam board, cardstock, wooden sticks, and adhesive for props
- A basket or crate for organizing accessories
- Floor tape, secured extension cords, and charging cables
- A short instruction sign and shared-album QR code
Reuse household items before shopping. Blankets can become backdrops, empty boxes can become presents, garland can frame the scene, and old Christmas-card outtakes can become decorations. The most successful booth is not necessarily the most expensive. It is the one with a coherent palette, flattering light, and enough personality to make guests stop walking and start posing.
Experience-Based Field Notes: What Hosts Commonly Learn
The first lesson from a typical Christmas photo booth setup is that guests rarely use it exactly as imagined. A host may carefully arrange two chairs for elegant portraits, only to discover that everyone prefers standing beside the giant cardboard candy cane. That is not failure. It is useful feedback delivered by people wearing blinking necklaces. A booth succeeds when guests feel free to play, so the design should support improvisation rather than demand one perfect pose.
Another common experience is that the photo booth starts slowly. During the first half hour, people glance at it while pretending to be deeply interested in the cheese board. The easiest solution is to recruit two outgoing guests for the first photographs. Once others see laughter, movement, and finished pictures, the booth usually gains momentum. A host can also announce a relaxed challenge such as the best family pose, funniest sweater, or most convincing reindeer impression.
Lighting problems often become obvious only after every decoration is complete. The scene looks warm and magical in person, but the test picture shows bright string lights floating behind three shadowy faces. Moving one lamp in front of the guests usually improves the image more than adding another hundred decorative bulbs. A white poster board positioned opposite the lamp can also bounce light toward faces. The practical lesson is simple: decorate with your eyes, but approve the finished booth through the camera.
Props behave differently during an actual party. Tiny signs disappear in group photographs, glitter spreads across the floor, and elastic beard props become tangled before dessert. Larger, lighter objects usually perform better. An oversized frame can include several people, a wreath provides an obvious pose, and a reusable speech bubble can hold changing messages. Removing damaged or abandoned props midway through the event keeps the area inviting instead of making it resemble Santa’s workshop after an insurance dispute.
Families with young children commonly discover that a seated setup works better than a strict standing mark. A bench, rug, or group of sturdy wrapped boxes creates different levels and gives restless children somewhere to settle. Letting a child hold a prop or open an empty present often produces more natural expressions than asking for a formal smile.
For pet photographs, prepare the human group first and bring the animal into the scene last. Take several frames quickly and release the furry employee before negotiations collapse. Treats placed close to the camera may help direct attention, although cats reserve the right to ignore the entire production.
The most memorable moment often arrives near the end of the party, when planned poses disappear. Grandparents borrow the silly glasses, quiet guests invent their own signs, and cousins spontaneously re-create childhood pictures. These imperfect photographs frequently become the favorites because they preserve relationships rather than decorations.
After the celebration, the sharing process matters almost as much as the setup. A private album organized the following morning keeps the excitement alive. Sending hundreds of near-duplicate images does not. Remove obvious blinks, keep a generous mix of candid and posed shots, and include at least one group photograph in which nearly everyone is looking in approximately the same direction.
Printing a few favorites, turning them into ornaments, or displaying them in next year’s booth transforms a one-night activity into a continuing holiday tradition. The booth may begin as a decorated corner, but its real value is social: it gives people permission to gather, be ridiculous, and create evidence that they genuinely enjoyed being together.
Conclusion: Give the Party a Place to Smile
A successful Christmas photo booth needs four essentials: a focused theme, a camera-friendly backdrop, soft light on people’s faces, and props that encourage participation. Start with materials you already own, test the frame before guests arrive, and design the space for real people rather than a flawless catalog photograph.
Day 12 is the perfect time to complete the holiday countdown with an activity that is interactive, funny, and genuinely memorable. Long after the tinsel has been packed away, the photographs will still contain the most important part of the celebration: everyone who showed up.
Note: This original, publication-ready article synthesizes established holiday entertaining, DIY event-planning, portrait-photography, and photo-booth setup practices.


