A brand-new canvas can be a little too perfect. Its white surface practically announces, “Hello, I was purchased yesterday, and I still have the receipt.” That clean appearance works for modern art, but it can feel out of place when you want the charm of an antique portrait, a weathered landscape, a vintage botanical print, or an old-world sign.
Fortunately, you do not need to store your canvas in a dusty attic for 80 years. With layered paint, tinted glaze, strategic distressing, subtle stains, crackle effects, and a low-sheen finish, you can create convincing age in an afternoon. The secret is not simply making the canvas dirty. Realistic aging comes from building several restrained effects that suggest fading, handling, oxidation, accumulated grime, and normal wear.
This guide explains how to make a canvas look old without making it look as though it lost a wrestling match with a coffee pot.
What Makes a Canvas Look Antique?
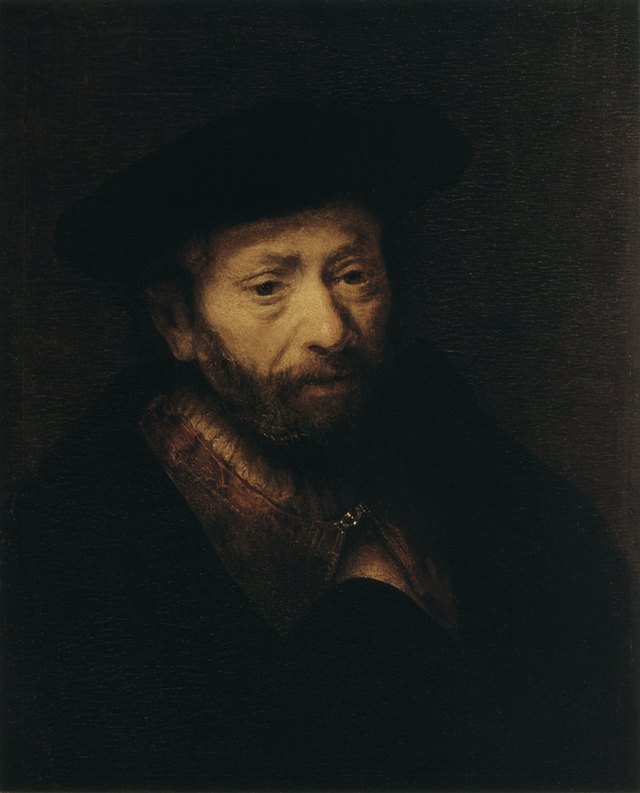
Before opening the paint, study genuinely old artwork. Antique paintings and prints rarely age evenly. Their surfaces may show warmer colors, softened contrast, darkened edges, fine cracks, worn corners, uneven discoloration, and marks concentrated in recessed or frequently handled areas.
The most convincing antique canvas effects usually combine four visual elements:
- Warm discoloration: Cream, ocher, amber, raw umber, and muted brown imitate the warmth associated with aged paper and varnish.
- Uneven wear: Edges and raised texture generally receive more abrasion than protected areas.
- Layered transparency: Thin glazes change the color without completely hiding the artwork underneath.
- Reduced shine: Matte, satin, or wax-like finishes often look more believable than a thick, plastic-looking gloss.
An antiquing glaze is essentially a translucent coating placed over a dry base layer. It can be brushed on and partially wiped away, allowing darker color to remain in texture and low areas. Commercial decorative glazes are specifically designed to create buildable aged or distressed effects.
Materials and Supplies
You do not need every item on this list. Select materials according to the amount of aging you want and whether you are working with a blank canvas, a reproduction, or your own fully dried painting.
- Stretched canvas or canvas panel
- Acrylic paint in cream, yellow ocher, raw umber, burnt umber, gray, and black
- Acrylic glazing medium
- Matte medium or decoupage medium
- Soft synthetic brushes
- Stiff bristle brush or inexpensive chip brush
- Lint-free cotton rags
- Natural sea sponge or cosmetic sponge
- Fine-grit sandpaper, approximately 220 to 400 grit
- Crackle medium or acrylic crackle paste, if desired
- Palette knife
- Spray bottle filled with clean water
- Matte or satin acrylic varnish
- Disposable gloves
- Scrap canvas for testing
Choose Water-Based Materials When Possible
For a decorative DIY project, water-based acrylic products are generally easier to control, dry relatively quickly, and clean up without strong solvents. Use products that are intended for art or craft applications, follow their labels, and work in a ventilated area.
Do not perform artificial-aging treatments on a valuable painting, family heirloom, signed artwork, or genuine antique. Museum conservation guidance warns that tears, flaking paint, water damage, and unstable surfaces can worsen without professional treatment. Artificial distressing is appropriate for new decorative artnot for “improving” Grandpa’s mysterious landscape from 1927.
How to Make a Canvas Look Old Step by Step
1. Decide How Old the Canvas Should Appear
“Old” can describe several very different styles. A lightly aged farmhouse sign may need only a cream glaze and softly worn edges. An old-master-style portrait may call for amber warmth, shadowed corners, fine crackling, and a satin finish. A distressed industrial canvas might use gray washes, scuffs, speckles, and rough texture.
Choose a general period or mood before beginning:
- Soft vintage: Ivory, faded beige, dusty blue, pale sage, and gentle edge wear
- Old-world European: Amber, raw umber, muted red, olive, and deeper corner shadows
- Rustic farmhouse: Chalky white, gray-brown glaze, exposed underlayers, and matte texture
- Weathered industrial: Charcoal, rust brown, gray, black, scratches, and irregular stains
A clear target prevents you from applying every aging trick at once. A canvas with yellow stains, giant cracks, black corners, fake mildew, and aggressive scratches does not look ancient. It looks like it escaped from a haunted restaurant.
2. Prepare the Surface
Make sure the canvas is clean, dry, and free of loose dust. If you are aging a newly painted piece, allow every layer to dry thoroughly before applying glaze or distressing it. Test your planned finish on a scrap piece or an inconspicuous edge.
For a blank canvas, apply a warm base coat rather than beginning with bright white. Mix titanium white with a small amount of yellow ocher and raw umber to create an ivory or parchment color. Apply it loosely with a broad brush, allowing faint brush marks and slight color variations to remain.
Do not overblend. Subtle irregularities are helpful because perfectly uniform color tends to look machine-made.
3. Add Texture Before Aging
Texture gives glaze somewhere to collect. You can brush on acrylic gesso unevenly, press a coarse brush into wet medium, drag a palette knife across selected areas, or stipple matte medium over the surface.
Keep the texture shallow on flexible stretched canvas. Thick, brittle, or heavily cracked layers can become vulnerable when the fabric flexes. Some crackle pastes are better supported by a rigid panel, and technical guidance cautions that soft or fragile textured grounds may not provide stable support for certain painting systems.
For a safer decorative effect on stretched canvas, use thin texture layers and avoid bending or pressing the finished surface from behind.
4. Build a Transparent Antiquing Glaze
Mix a small amount of transparent brown, ocher, or gray acrylic paint into acrylic glazing medium. Start weak. You can always add another glaze, while removing a glaze that resembles chocolate frosting is considerably less entertaining.
Liquitex recommends approximately one part transparent soft-body acrylic color to ten parts glazing medium as a starting point for a highly transparent glaze. The ideal mixture can vary by pigment, product, and desired effect, so make a test swatch first.
A useful basic palette includes:
- Yellow ocher: Adds warm, parchment-like discoloration
- Raw umber: Creates natural-looking dirt and muted shadows
- Burnt umber: Produces a richer, redder antique tone
- Payne’s gray or charcoal: Suggests cooler grime and smoke
5. Apply and Remove the Glaze
Work on one manageable section at a time. Brush a thin layer of glaze across the surface, then soften or remove it with a clean lint-free rag. Use circular motions for cloudy discoloration, vertical strokes for rain-like streaks, or gentle dabbing for mottled age.
Leave more glaze in corners, along edges, around raised texture, and in any deliberate cracks. Wipe the central areas more thoroughly. This uneven distribution creates depth and prevents the finish from looking like a single transparent brown filter.
Professional glaze instructions commonly recommend working in limited areas and wiping the coating until the desired degree of aging remains.
Allow the first glaze to dry before judging it. Acrylic color can shift slightly as it dries, and several light applications usually look more natural than one dark coat.
6. Darken the Edges and Corners
Old canvases often appear darker near their edges because of framing, handling, dust, previous coatings, and uneven exposure. You can imitate this appearance by applying a slightly darker glaze around the perimeter.
Load a dry brush or sponge with a small amount of raw umber glaze. Remove most of it on a paper towel, then work inward from the edges. Keep the shape irregular. Avoid creating a perfectly symmetrical brown border, which can make the artwork look like it has been toasted.
For a softly framed effect, feather the darker color toward the center. For a heavily distressed piece, add a few deeper patches to corners and isolated sections of the sides.
7. Create Fading and Color Variation
Age does not only make artwork darker. It can also reduce contrast and make colors appear quieter. Mix a translucent veil of warm gray, beige, or muted cream and brush it lightly across selected areas.
You can also dry-brush a small amount of the original background color over raised portions. This makes the surface appear rubbed and faded without covering the image.
Another option is to sponge on extremely diluted color in irregular clouds. Rotate the sponge frequently so you do not stamp the same pattern repeatedly. Nature is wonderfully inconsistent; your sponge should learn from nature.
8. Add a Controlled Crackle Effect
Craquelurethe network of fine cracks visible in some aged paintingscan immediately suggest age. However, restraint matters. Large, evenly spaced cracks across every square inch often look decorative rather than authentic.
Apply crackle medium according to the manufacturer’s directions. Depending on the product, it may go between contrasting coats of paint or over a finished color. Application thickness often influences the pattern: thinner coats generally create smaller cracks, while heavier coats may produce larger ones.
Once the crackle is completely dry, rub a thin brown or gray glaze over it and wipe the surface. Pigment left in the lines makes the crack pattern more visible.
Do not force-dry crackle paste unless the product directions specifically permit it. Rapid drying may interfere with the intended pattern or weaken the finish.
9. Distress the Surface Selectively
When all painted layers are dry, gently sand a few raised areas and edges with fine-grit sandpaper. Use light pressure and stop frequently to inspect your progress.
Focus on places where wear seems plausible:
- Outer edges
- Corners
- Raised brush marks
- Areas near simulated folds or seams
- Small sections where an undercolor can show through
Do not sand deeply enough to weaken the canvas fibers. On stretched canvas, support the area carefully from behind with a smooth, rigid surface, and avoid pressing against the stretcher-bar edges.
10. Add Flecks, Streaks, and Small Imperfections
A few tiny marks can help unite the finish. Thin raw umber paint heavily, load a stiff brush, and flick a restrained amount of color onto the canvas. Practice on scrap material before aiming at the artwork.
You can also make faint streaks by dragging a nearly dry brush vertically across the surface or blotting diluted glaze with crumpled paper. Keep these effects subtle. The viewer should notice the overall sense of history, not immediately identify Tuesday afternoon’s enthusiastic splatter session.
11. Age the Canvas Sides
Bright white sides can betray an otherwise convincing vintage canvas. Carry a thin glaze around the wrapped edges and darken the corners slightly. If the artwork will be framed, you can still age the visible side areas so the canvas does not look unfinished when viewed from an angle.
For a rustic piece, lightly dry-brush brown-gray color across the staples or back edges, but avoid saturating the raw fabric.
12. Seal the Finished Canvas
When the aging layers have cured, protect them with a compatible matte or satin acrylic varnish. A low-sheen finish usually supports an antique look better than a thick, high-gloss coating.
Apply multiple light coats rather than one heavy coat, and follow the varnish manufacturer’s drying and ventilation directions. Some decorative systems also use clear wax or a low-gloss sealer to protect distressed finishes.
Remember that varnish can deepen color and alter sheen. Always test it over a sample containing the same paint, glaze, and crackle layers.
Alternative Methods for Aging Canvas
Decoupage Vintage Paper onto Canvas
Old maps, public-domain illustrations, sheet-music reproductions, botanical images, and photocopied letters can be attached to canvas with decoupage medium. Print or copy the design rather than cutting up a valuable historical document.
Apply an even layer of medium, position the paper, and smooth it gently. Once dry, glaze the image with diluted ocher or umber and distress the outer edges. Decoupage traditionally involves layering paper onto a surface and sealing it with an adhesive medium.
Create an Aged Canvas Sign
Paint the background in a dark undercolor, add a lighter topcoat, and apply lettering after the paint dries. Sand selected edges and parts of the letters so the lower color appears. Finish with a thin brown glaze.
This technique works especially well for vintage advertisements, farmhouse signs, nautical decor, and old general-store-inspired artwork.
Use Chalky Paint for a Powdery Finish
Chalk-style paint creates an ultra-matte surface that can be lightly distressed and treated with dark antiquing wax. It is most commonly associated with furniture, but compatible craft formulas can also be used on decorative canvas. Test first because an overly thick chalky layer may hide the canvas weave.
Common Mistakes to Avoid
Using Too Much Brown
Brown is useful, but an all-over brown wash can make colors muddy. Use transparent layers and retain some cleaner areas so the final result has contrast.
Aging Every Area Equally
Uniform aging looks printed. Vary the glaze, leave quiet areas, and concentrate wear around edges, texture, corners, and selected focal points.
Combining Too Many Effects
Crackle, sanding, splatter, staining, dark edges, peeling paint, and dramatic scratches do not all need to attend the same party. Select two or three primary effects and use the others sparingly.
Skipping the Test Piece
Paint colors, mediums, printers, sealers, and varnishes may interact differently. A small sample can reveal whether the glaze is too orange, the crackle is too large, or the varnish makes everything surprisingly shiny.
Using Food and Household Stains
Coffee and tea are popular craft stains, but they can behave unpredictably, introduce organic residue, leave rings, and provide less control than artist acrylic glazes. A mixed acrylic glaze offers repeatable color and can be sealed with a compatible finish.
Trying to Age Authentic Artwork
Keep these methods away from valuable or historically important paintings. Environmental fluctuations, high humidity, water, excessive light, and improper handling can contribute to canvas slackening, cracking, mold, fading, and other damage. Genuine conservation problems belong with a trained conservator.
Experience-Based Lessons from Aging Canvas Projects
The most important lesson in making a canvas look old is that the first layer rarely looks impressive. A pale brown glaze may initially seem too weak, especially while it is wet. The temptation is to pour in more umber and continue painting until the canvas resembles a well-seasoned cutting board. After drying, however, even a light glaze can noticeably warm the entire composition. Adding a second thin layer is much safer than trying to rescue one heavy application.
Another practical lesson is that rags remove glaze differently from sponges. A folded cotton rag creates broad, soft transitions and works well for fading large areas. A natural sponge produces mottled marks that resemble irregular staining, but it can quickly create an obvious repeated pattern. Turning the sponge after every dab makes a surprising difference. Cosmetic sponges create smoother, more controlled shading around edges and are useful when the canvas is small.
Glaze also behaves differently over smooth and textured paint. On a smooth acrylic surface, it remains relatively even and may need to be manipulated for several minutes before it looks natural. On rough gesso, modeling medium, or visible brushwork, pigment immediately settles into the low spots. That makes texture helpful, but it also means a dark glaze can become difficult to remove. Testing the mixture over an identical textured sample prevents unpleasant archaeological discoveries.
Crackle effects tend to look better when they are not perfectly consistent. Makers often achieve a more convincing result by applying crackle medium only in selected areas, such as near corners or across a few broad passages. When every inch has the same crack pattern, the surface may resemble decorative gift wrap. Applying slightly varied thicknesses produces a less predictable pattern, although the product instructions should always take priority.
Sanding creates the fastest visible transformation, but it is also the easiest step to overdo. The best approach is to sand for a few seconds, step back, and inspect the whole piece from several feet away. Close inspection encourages excessive detail because every untouched spot seems suspiciously new. From normal viewing distance, a surprisingly small amount of wear is often enough.
Edge treatment is another detail that separates a convincing project from a craft experiment. The center of the artwork may look beautifully faded, but clean white wrapped sides can instantly reveal the canvas’s youth. Carrying the glaze around the perimeter, shading the corners, and lightly distressing the outer edge creates continuity. It also makes an unframed canvas appear more finished.
It is equally useful to preserve a few crisp areas. Antique-looking art still needs a focal point. If the entire surface becomes hazy, dark, and low-contrast, the image loses energy. Wiping more glaze from a face, flower, building, title, or central object guides the viewer’s eye and makes the surrounding age effects appear deeper.
Finally, patience between layers improves almost every result. Wet acrylic glaze can lift, mix with, or soften another wet layer. Allowing each application to dry lets you evaluate its true value and color. It also provides a natural stopping point, which is helpful because artificial aging has a peculiar habit of becoming more entertaining immediately before it becomes excessive.
Conclusion
Learning how to make a canvas look old is primarily an exercise in controlled imperfection. Begin with a warm foundation, introduce shallow texture, apply transparent glazes, darken selected edges, and add only as much distressing or crackle as the design requires. Several restrained layers create more convincing age than one dramatic coat of brown paint.
The finished canvas should suggest that it has a history without looking abused. Keep wear uneven, preserve a visible focal point, test every finish, and stop while the effect still feels subtle. In antique-style decorating, the difference between “old-world treasure” and “found behind a leaking refrigerator” is usually one unnecessary glaze.
Note: These methods are intended for newly created decorative canvases and reproductions. Do not sand, stain, crackle, glaze, clean, or revarnish an authentic antique, valuable painting, or unstable artwork without advice from a qualified art conservator.