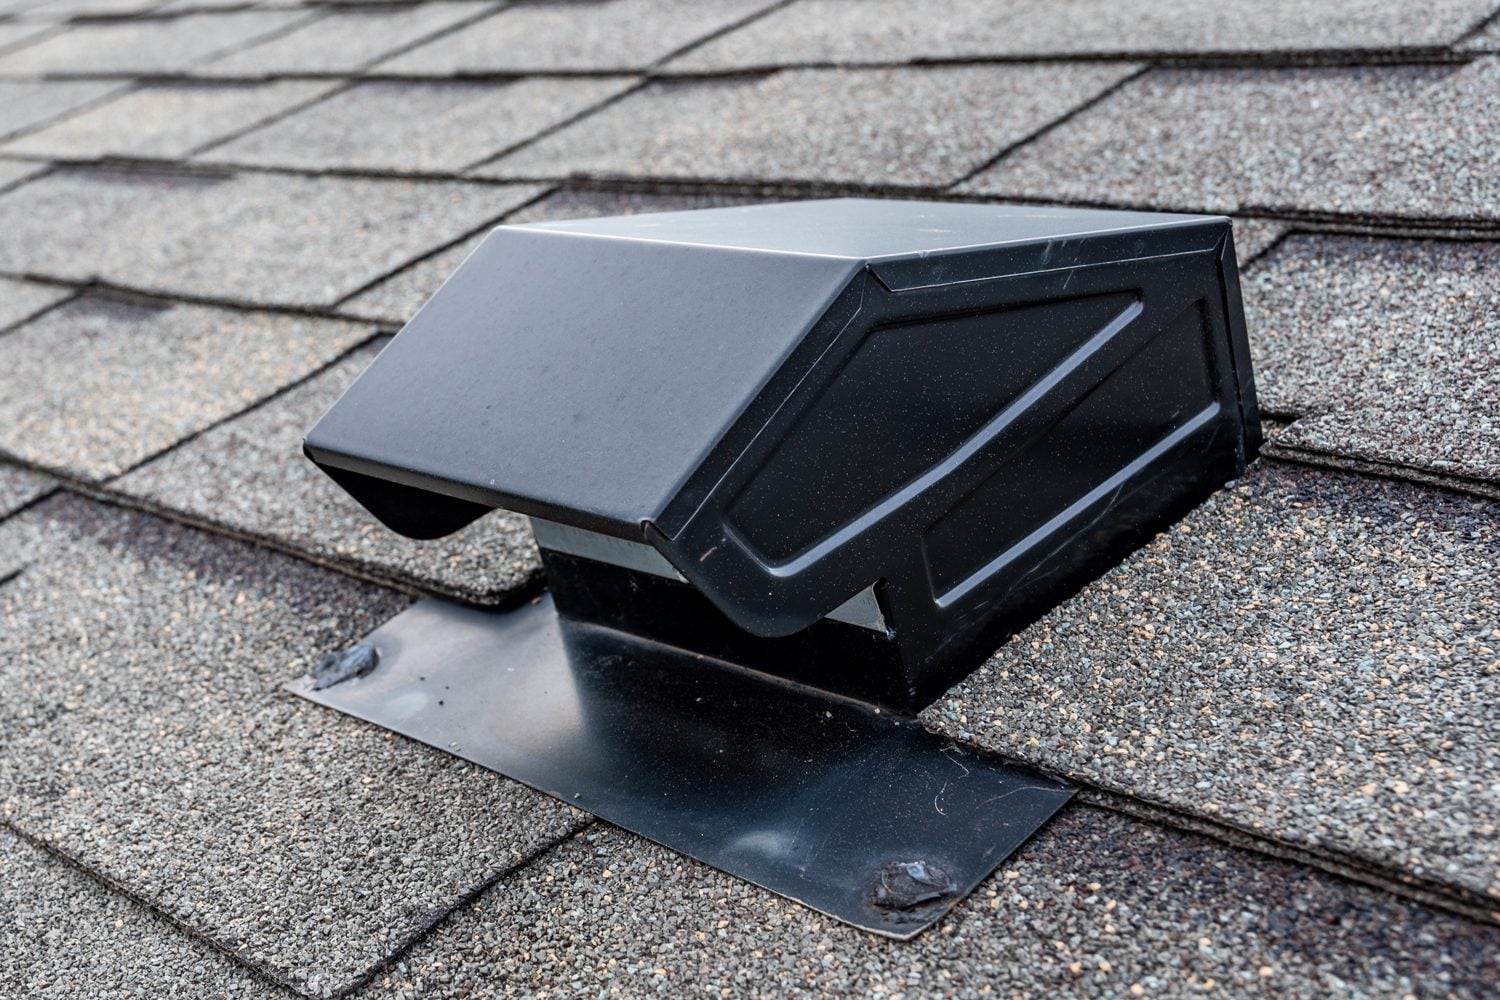
A clothes dryer does more than tumble socks until one mysteriously disappears. It also pushes a large volume of warm, humid, lint-filled air out of your home. That exhaust must travel through a properly designed duct and terminate outdoors. In some houses, the shortest practical exit is through an exterior wall. In others, especially homes with centrally located laundry rooms, the duct travels upward and exits through a roof dryer vent.
A roof termination is not automatically unsafe or incorrect. When properly designed, installed, flashed, and maintained, it can vent a dryer effectively. The trouble begins when someone treats it like an ordinary bathroom exhaust vent, adds a screen that catches lint, creates an excessively long duct run, or seals the roof opening with a heroic blob of caulk and positive thinking.
This guide explains how roof dryer vents work, when they make sense, what building-code principles generally apply, and how to recognize installation or maintenance problems before your dryer starts behaving like a small, overheated laundromat.
What Is a Roof Dryer Vent?
A roof dryer vent is the exterior termination point for a clothes dryer exhaust system that passes vertically through the building and roof. The complete system normally includes:
- A short transition duct behind the dryer
- A rigid or approved metal exhaust duct
- Elbows or fittings needed to change direction
- Supports and sealed duct joints
- A roof-mounted termination cap
- A backdraft damper that opens during operation
- Flashing that prevents rain from entering the roof assembly
The roof cap is only the visible final piece. Dryer performance depends on the entire path from the appliance to the outdoor opening. A shiny new cap cannot rescue a crushed hose, a lint-packed elbow, or 60 feet of ductwork wandering around the attic like it is sightseeing.
The vent must discharge completely outdoors. Exhausting into an attic, soffit cavity, crawlspace, garage, or other enclosed area can introduce moisture and lint into the building. Over time, that may contribute to mold, damaged insulation, stained framing, poor indoor air quality, and an increased fire risk.
Are Roof Dryer Vents Allowed?
Roof terminations are generally permitted when the installation follows the locally adopted building code and the dryer manufacturer’s instructions. However, codes vary by state, county, and city, and many jurisdictions have adopted different editions or local amendments.
Common U.S. residential-code principles include the following:
- The dryer exhaust must terminate outside the building.
- The permanent duct is generally required to be smooth-interior metal.
- A typical residential dryer duct has a nominal diameter of 4 inches.
- The termination must include a functioning backdraft damper.
- A mesh screen should not cover the dryer exhaust outlet.
- The duct should remain independent and should not connect to an attic vent, bathroom fan duct, chimney, or general ventilation system.
- Fasteners that extend into the duct interior and catch lint should be avoided.
- The allowable duct length depends on the dryer instructions, code provisions, fittings, and termination design.
Current model-code language commonly provides a prescriptive maximum duct length of 35 feet, with reductions for elbows and fittings. Manufacturer instructions may permit a different distance, so the appliance manual is not optional bedtime reading. It is part of the installation standard.
For example, a 25-foot straight run with two 90-degree elbows may have an equivalent length near 35 feet when each elbow is counted as additional resistance. Other elbow designs have different equivalent lengths. The safest approach is to calculate the route using the applicable code table and the exact dryer manual rather than assuming every metal tube behaves identically.
When Does Venting a Dryer Through the Roof Make Sense?
A roof dryer vent may be practical when the laundry area is located near the center of the home and no short, direct wall route is available. It is also common in multistory houses, townhomes, apartments, slab-on-grade construction, and remodeled floor plans where exterior walls are far from the dryer.
However, a sidewall termination is often preferable when it creates a shorter, straighter, and more accessible route. Wall vents are usually easier to inspect and clean from ground level. They also avoid an additional roof penetration.
The decision should not be based only on which route is easiest to draw on a floor plan. A professional should consider:
- Total developed and equivalent duct length
- Number and type of elbows
- Accessibility for future cleaning
- Roof pitch and roofing material
- Snow, wind, rain, and freezing conditions
- Location of windows, doors, soffit vents, and air intakes
- The dryer’s maximum permitted vent length
- Whether the route passes through conditioned or unconditioned space
The Biggest Problems Associated With Roof Dryer Vents
Lint Accumulation and Fire Risk
Lint is light, fluffy, and surprisingly determined to settle wherever airflow becomes weak. It commonly accumulates at elbows, rough joints, crushed transition ducts, and termination caps that do not open fully.
The U.S. Fire Administration reports that failure to clean is a leading factor in residential clothes dryer fires. Cleaning the lint filter after every load helps, but the lint screen does not capture every fiber. Some lint passes into the exhaust system and gradually coats the duct.
A vertical roof run can be more difficult to inspect than a short wall vent. When the dryer stops, loosened debris may settle near fittings or the lower portions of the duct. This does not mean every vertical vent will clog, but it makes correct sizing, strong airflow, and scheduled cleaning especially important.
Reduced Airflow and Longer Drying Times
A dryer removes moisture by moving heated air through clothing and discharging that humid air outdoors. When the exhaust path is restricted, moisture remains in the drum longer. The dryer runs additional cycles, clothes feel damp, and energy consumption increases.
Every sharp bend adds resistance. A roof cap with a narrow opening adds more. A damper stuck halfway closed adds still more. Eventually, the dryer is trying to breathe through the mechanical equivalent of a cocktail straw.
Restricted airflow can also raise temperatures inside the dryer and exhaust duct. Modern appliances may display an airflow warning code, but older models often communicate through less sophisticated signals, such as taking two hours to dry six towels.
Roof Leaks
Every roof penetration is a potential water-entry point. A proper roof dryer vent includes a flashing base integrated with the shingles, underlayment, metal panels, tile, or roof membrane according to the roofing system’s requirements.
Caulk alone is not a durable flashing system. Sealant can crack, shrink, separate, or deteriorate after years of ultraviolet exposure and temperature changes. Correctly layered flashing uses gravity to direct water over and around the penetration rather than asking a bead of sealant to defend the house forever.
Signs of a leaking roof vent may include ceiling stains, damp insulation, rusty fasteners, dark roof sheathing, mold in the attic, or damaged shingles around the cap. Because water can travel along framing before becoming visible, the stain inside the house may not appear directly below the vent.
Condensation in Cold Spaces
Dryer exhaust is warm and humid. When a long metal duct passes through a cold attic, the duct surface can cool the exhaust enough for moisture to condense inside. Depending on the configuration, water may collect near a low point, drip back toward the appliance, or combine with lint to form sticky deposits.
A qualified installer may recommend an insulated duct assembly or another approved condensation-control strategy in certain climates. Materials must be compatible with dryer exhaust temperatures and local requirements. Homeowners should not improvise by wrapping the duct in whatever insulation was left behind by the previous owner.
Weather, Animals, and Damper Problems
A roof cap must shed rain while providing a large, unrestricted outlet. Its damper should open fully under dryer airflow and close when the dryer stops. A poorly designed cap may admit wind-driven rain, rattle loudly, freeze, or become blocked by debris.
Some multipurpose roof vents include removable bird or pest screens for bathroom exhaust applications. A screen should not remain installed when the unit serves a clothes dryer. Fine mesh can quickly collect lint and restrict airflow. The backdraft damper and cap design should discourage pests without placing a lint-catching grille across the outlet.
What a Good Roof Dryer Vent System Looks Like
A Short and Direct Route
The best duct route is normally the shortest one that meets code, manufacturer instructions, and roofing requirements. Long horizontal detours in the attic should be eliminated when possible. Gentle bends are better than sharp turns, and 45-degree elbows usually create less resistance than 90-degree elbows.
Before installation, the route should be measured from the dryer connection to the termination. All bends must be included when calculating equivalent length. In new construction, the equivalent duct length may need to be identified on a label near the dryer connection so a future homeowner or appliance installer knows what the machine is facing.
Smooth Metal Ductwork
Permanent concealed ductwork should have a smooth interior that encourages airflow and minimizes lint collection. Plastic ducts and flimsy vinyl hoses are inappropriate for dryer exhaust. Accordion-style foil products have ridges that can trap lint and may be crushed behind the appliance.
The short connection between the dryer and permanent duct should be a listed transition duct allowed by the appliance manufacturer and local code. It should remain visible and accessible rather than disappearing into a wall or ceiling.
Excess transition duct should be removed so it cannot sag or kink. The dryer must not be pushed backward until the duct resembles a crushed aluminum sandwich.
Properly Sealed and Supported Joints
Duct sections should remain aligned and securely supported. Joints should be assembled and sealed using methods approved for dryer exhaust. Ordinary cloth-backed duct tape can dry out and fail, despite having the most misleading product name in the hardware store.
Screws or fasteners that protrude into the airstream can snag lint. Approved clamps and listed metal sealing products are generally better choices, subject to the applicable installation instructions.
A Dryer-Specific Roof Cap
The roof termination should be designed and approved for appliance or clothes dryer exhaust. It needs a full-size airflow passage, weather-resistant construction, an efficient backdraft damper, and a flashing base appropriate for the roof.
Do not assume that every small roof vent sold beside bathroom fans is suitable. A cap intended for low-airflow bathroom ventilation may have a restrictive outlet or permanent screen. Product documentation should clearly support dryer use.
Correct Roof Flashing
The flashing must be integrated into the roof covering in a water-shedding pattern. On an asphalt-shingle roof, the upper portion is normally placed beneath upslope shingles while the lower portion remains over the shingles below. Other roof systems require different curbs, boots, flanges, membranes, or manufacturer-specific details.
Roof work is not an ideal do-it-yourself project for anyone who becomes nervous while cleaning the second shelf of a bookcase. A roofing professional can help protect both the house and the person holding the ladder.
Can You Use a Dryer Booster Fan?
A generic inline booster fan should not be casually added to a dryer duct. Modern codes distinguish between prohibited ordinary booster fans and listed dryer exhaust duct power ventilators designed and tested for this specific use.
A listed dryer exhaust duct power ventilator may be permitted in some long-run installations when it complies with the relevant safety standard and is installed according to its instructions. It may require an airflow sensor, pressure switch, access for cleaning, and specific placement.
A power ventilator should not be used to excuse a badly designed route. The first choices should be shortening the duct, reducing elbows, improving the termination, or selecting a dryer approved for the required vent length.
How Often Should a Roof Dryer Vent Be Cleaned?
The lint screen should be cleaned before or after every load. The transition duct, permanent exhaust duct, and outdoor termination should be inspected regularly and professionally cleaned when needed. Annual cleaning is a common baseline, but the correct frequency depends on usage, duct length, household size, pets, fabric types, and dryer performance.
A large family doing laundry every day may need service more often than a one-person household running two loads per week. Long roof runs with several elbows also deserve closer attention.
Routine maintenance should include:
- Cleaning the lint filter after every load
- Checking behind the dryer for a crushed or loose connection
- Watching for unusually long drying cycles
- Confirming that the roof damper opens during operation when it can be observed safely
- Inspecting accessible duct sections for separation or corrosion
- Removing lint from the complete duct using appropriate equipment
- Checking the roof cap and flashing for storm or age-related damage
Accessing a steep or wet roof is dangerous. A vent-cleaning or roofing professional can inspect the termination without turning laundry maintenance into an emergency-room anecdote.
Warning Signs That Your Dryer Vent Needs Attention
Call a qualified technician when you notice one or more of these symptoms:
- Clothes require multiple cycles to dry
- The dryer cabinet or laundry room becomes unusually hot
- Clothing has a musty or overheated smell
- The appliance displays a vent or airflow warning
- Lint accumulates behind or around the dryer
- The transition duct repeatedly disconnects
- The outdoor damper barely moves while the dryer runs
- A burning odor appears during operation
- Water or damp lint is found inside the duct
- Ceiling stains or attic moisture appear near the roof penetration
Stop using the dryer if you smell burning, see smoke, hear unusual mechanical noises, or discover severe overheating. Cleaning the lint filter and pressing the start button again is not an appropriate scientific experiment.
Roof Dryer Vent Versus Wall Dryer Vent
| Consideration | Roof Termination | Wall Termination |
|---|---|---|
| Best application | Centrally located laundry areas with no practical exterior wall route | Laundry areas near an exterior wall |
| Duct length | Often longer and more vertical | Often shorter and more direct |
| Cleaning access | May require roof access or specialized equipment | Usually easier to reach from ground level |
| Weather concerns | Rain, snow, wind, freezing, and roof exposure | Rain, snow accumulation, landscaping, and exterior obstacles |
| Building-envelope concern | Creates a roof penetration that must be flashed correctly | Creates a wall penetration that must be sealed correctly |
| Overall preference | Acceptable when properly engineered and maintained | Often preferred when it provides the shorter route |
Real-World Experiences and Lessons From Roof Dryer Vent Problems
The most useful lessons often come from recurring problems seen in homes rather than dramatic equipment failures. Roof dryer vent troubles tend to develop slowly. The dryer still runs, the drum still turns, and the control panel still plays its cheerful little song. The homeowner simply begins accepting 90-minute drying cycles as a normal part of adulthood.
Experience One: The Dryer That Was Blamed for a Duct Problem
A common situation begins when an older dryer takes longer to finish a load. The owner replaces the heating element, moisture sensor, or entire appliance. The new dryer performs well for a few weeks, then drying times begin increasing again.
The real problem may be a long vertical duct with several elbows and a partially blocked roof cap. A newer appliance can temporarily mask the restriction because its seals, blower, and controls are in better condition. As lint continues accumulating, airflow drops and the original symptoms return.
The lesson is simple: test the exhaust system before assuming the appliance is defective. A technician can check airflow or back pressure and compare the result with the dryer’s specifications. Replacing a dryer without evaluating the duct is like buying stronger lungs while keeping the same blocked airway.
Experience Two: The Helpful Screen That Became a Lint Blanket
Another frequent problem appears after a homeowner or pest-control worker notices birds near a rooftop vent. A fine screen is installed beneath the cap. It keeps animals out, but it also catches lint.
At first, the openings look large enough. After several months, a thin layer of fibers forms across the mesh. Moisture makes the lint cling together, and additional debris builds on top. The damper may still move slightly, giving the impression that everything is working, while actual airflow has fallen dramatically.
The solution is not to ignore pest concerns. It is to use a dryer-rated termination designed to resist animal entry without placing a restrictive mesh screen over the exhaust passage. Multipurpose caps should be configured correctly for dryer use.
Experience Three: The Roof Leak That Looked Like Condensation
Water near a dryer duct is sometimes blamed on condensation, but the source may be failed flashing. A common shortcut is cutting a hole through shingles, placing the vent over it, and sealing the perimeter with exposed caulk. The installation may survive several seasons before sunlight, movement, and temperature changes crack the seal.
Rainwater can then travel along the outside of the duct into the attic. Because the duct carries humid air, the moisture is easily misdiagnosed as internal condensation. A careful inspection must examine both the inside of the duct and the roof flashing.
Correcting the problem may require removing surrounding roofing materials and reinstalling the vent with properly layered flashing. Adding another tube of sealant over the old one may delay the leak, but it rarely corrects the underlying water-management problem.
Experience Four: The Crushed Connection Behind the Dryer
Not every roof-vent problem is on the roof. During cleaning, painting, or flooring work, a dryer may be pushed too close to the wall. The transition duct becomes flattened, sharply bent, or disconnected.
Because the permanent duct rises vertically, the homeowner assumes lint near the roof cap must be responsible. In reality, the largest restriction is two inches behind the appliance.
This is why troubleshooting should follow the complete airflow path. Start at the dryer, inspect the transition, evaluate concealed duct length and fittings, and finish at the roof termination. The system is only as efficient as its most restrictive section.
The Practical Lesson
Successful roof dryer vent systems share a few unglamorous qualities: they are short enough, smooth inside, firmly connected, correctly flashed, free of screens, accessible for cleaning, and matched to the dryer manufacturer’s limits. None of these details is exciting enough for a home-renovation television reveal, but together they protect the appliance, roof, energy bill, and household.
Final Thoughts
A roof dryer vent can be a safe and effective solution when a wall termination is impractical. The installation must be treated as a complete exhaust and roofing system rather than a pipe pointed vaguely upward.
Choose a dryer-rated roof cap with a backdraft damper and unrestricted outlet. Use smooth metal ductwork, minimize elbows, calculate equivalent length, follow the appliance manual, and make sure the roof flashing is installed for the specific roofing material. Most importantly, keep the lint filter and entire exhaust path clean.
When drying times suddenly increase, do not immediately blame the dryer. The appliance may simply be asking for air. Check the transition duct, permanent vent, roof cap, and flashing before a minor airflow problem becomes an expensive repairor a dangerous fire hazard.