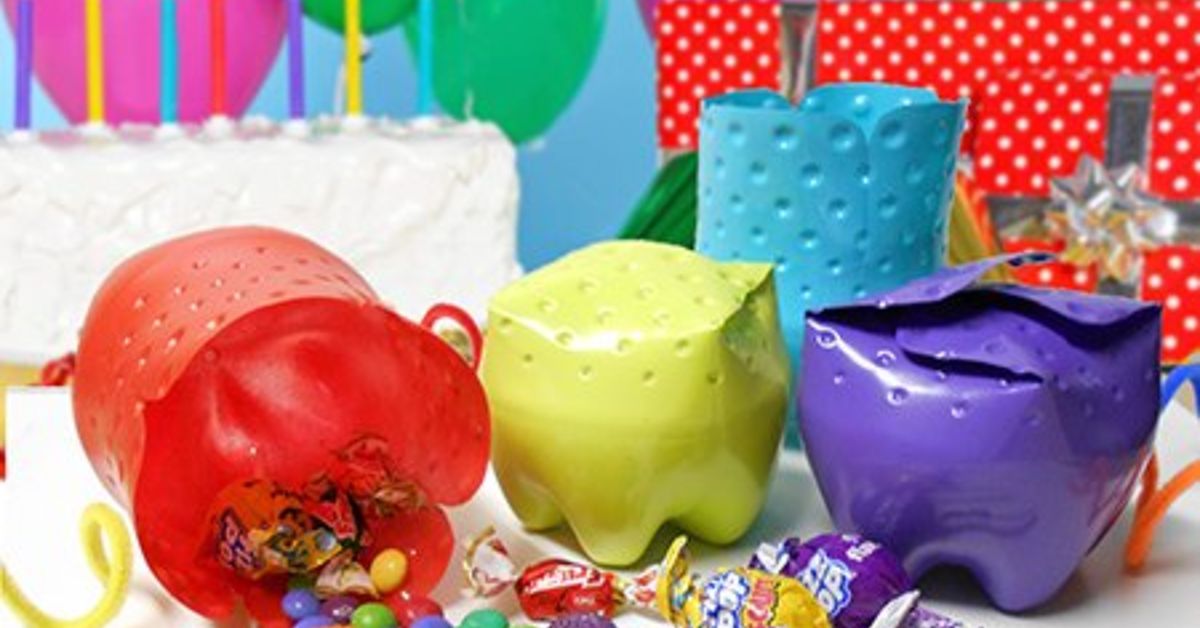
Party favors have a sneaky habit of becoming expensive little bundles of plastic wrapped inside more plastic. Fortunately, yesterday’s water or soda bottle can become tomorrow’s cheerful treat container with a few careful cuts, removable decorations, and a small amount of imagination.
Recycled plastic bottle party favour containers are inexpensive, customizable, and surprisingly polished when assembled neatly. They work for birthdays, baby showers, classroom celebrations, holiday parties, weddings, and any event where guests deserve a small thank-you giftbut not another forgettable bag of trinkets.
This project also introduces children and adults to practical upcycling. PET, commonly identified by the number 1 resin code, is widely used for beverage bottles and can be processed into new packaging, fibers, carpeting, and other products. However, local collection rules differ, so bottles that are not used for crafting should be handled according to the recycling program in your community.
Why Make Party Favor Containers From Plastic Bottles?
They cost very little
If you are preparing favors for 10, 20, or even 50 guests, commercial boxes can quickly consume the party budget. Reusing bottles reduces the amount of new packaging you need to purchase. Your main expenses may be ribbon, paper, adhesive, and whatever delightful treasures go inside.
Every container can match the party theme
A clear bottle base is essentially a blank canvas. Add orange paper and a green ribbon for a pumpkin party favor. Use blue tissue paper and fish stickers for an ocean celebration. Metallic stars suit a space-themed birthday, while kraft-paper labels and twine create a rustic wedding look.
The project turns packaging into something useful
Upcycling differs slightly from ordinary recycling because it gives an existing object a new purpose before the material enters a processing facility. Craft organizations and family activity publishers regularly use clean bottles for organizers, planters, decorations, games, and other projects.
One craft will not personally defeat the world’s plastic-waste problem while wearing a tiny superhero cape. Still, it can reduce demand for new favor packaging, encourage reuse, and start useful conversations about consumption.
Choose the Right Bottles
For the easiest project, collect clear beverage bottles with smooth sides and similar diameters. Water, sparkling-water, and soda bottles are usually easier to decorate than heavily textured containers.
- Use only beverage bottles: Never repurpose containers that held cleaners, automotive liquids, pesticides, cosmetics, or unknown substances.
- Inspect the plastic: Reject bottles with cracks, deep scratches, discoloration, stubborn odors, or sticky residue.
- Match the sizes: Two bottles of the same brand usually create the neatest two-piece container.
- Choose clear plastic: Guests can see colorful candy, crayons, seeds, or small gifts inside.
- Collect extras: A few bottles will inevitably be cut crookedly. Consider those the official snacks for the recycling bin.
Empty, clean, and dry containers are also easier to craft with and less likely to contaminate other recyclable materials. Recycling guidance from the EPA and The Recycling Partnership emphasizes checking local rules and preparing accepted containers properly.
Materials and Tools
- Two clean plastic beverage bottles for each container
- Permanent marker
- Flexible measuring tape or paper strip
- Sharp scissors
- Craft knife for the first opening, used by an adult
- Fine-grit sanding sponge or emery board
- Removable paper tape, washi tape, or fabric ribbon
- Cardstock, stickers, stamps, or printed labels
- Hole punch, optional
- Twine or narrow ribbon
- Wrapped treats or a food-safe inner bag
A low-temperature glue gun can be used by an experienced adult, but it is not essential. Removable paper bands, ribbon, and carefully placed double-sided tape make the container easier to disassemble later.
How to Make a Two-Piece Bottle Favor Container
Step 1: Wash and dry the bottles
Remove the caps and rinse the bottles immediately after use. Wash them with dish soap and water, rinse thoroughly, and allow them to dry completely. Remove the original labels and as much adhesive as possible.
If a bottle smells sour, feels oily, or refuses to become clean, recycle or discard it according to local instructions instead of turning it into party packaging. Cleaning guidance for reused plastic containers generally recommends washing away residue and drying the item thoroughly before storage or reuse.
Step 2: Mark two even cutting lines
Measure approximately 3 to 4 inches upward from the bottom of each bottle. Wrap a strip of paper around the bottle and align its edges to create a straight guide. Trace along the top of the paper with a marker.
The first bottle will become the base. The second will become the lid. Mark the lid section slightly shorter if you want the two halves to look balanced when assembled.
Step 3: Make the first opening
Place the empty bottle on a stable work surface. An adult should carefully create a starter opening above the marked line with a craft knife. Insert the scissors into the opening and cut around the bottle.
Children can decorate the finished pieces, but they should remain at a safe distance during cutting. PBS craft instructions similarly reserve bottle cutting and puncturing for careful adult handling.
Step 4: Trim and smooth the edges
Slowly trim away uneven peaks until each rim is level. Use a fine sanding sponge or emery board to soften rough spots. Next, cover the rim with folded washi tape, cloth tape, or a narrow paper edging strip.
Do not use an open flame to melt the plastic. Besides creating an irregular edge, heating plastic can produce fumes and increase the risk of burns. A mechanically trimmed and covered rim is the safer approach for a family craft project.
Step 5: Test the fit
Gently press the lid section over the base. Thin PET plastic flexes slightly, allowing one section to overlap the other. If both pieces have exactly the same diameter, make two tiny vertical snipsabout one-quarter inch longon opposite sides of the lid. This gives it enough flexibility to slide over the base.
The lid should stay in position without crushing the lower section. Practice with an empty container before adding decorations.
Step 6: Add a closure
For a simple closure, wrap a paper band around the seam and secure it with a sticker. Guests can slide or tear the band to open the container.
For a ribbon closure, punch one hole near the top of the base and a matching hole in the lid. Thread ribbon through both holes and tie a bow. Keep the holes far enough from the cut edges to prevent tearing.
Step 7: Decorate the container
Decorate after cutting so patterns remain correctly positioned. Removable embellishments are preferable when you hope to recycle the bottle sections later. The Association of Plastic Recyclers notes that labels, inks, attachments, and adhesives can affect plastic sorting and processing, which is another good reason to avoid burying the container under permanent glue, foil, and glitter.
Step 8: Fill and finish
Add the favor items, fit the lid, and attach a name tag or thank-you message. When using edible favors, choose individually wrapped treats or place loose food inside a new food-safe bag before putting it in the bottle container.
The FDA evaluates food-contact materials and recycled-plastic processes according to their intended conditions of use. Because a household craft has not gone through that evaluation, an inner wrapper provides a sensible barrier between the reused craft surface and edible contents.
Creative Decoration Ideas
Woodland animals
Wrap the lower half with brown, gray, or orange paper. Add cardstock ears, a paper nose, and drawn facial features. Fill the container with animal crackers, seed packets, or forest-themed stickers.
Mini treasure chests
Use brown kraft paper, black paper straps, and a gold-colored cardstock buckle. Fill each chest with wrapped chocolate coins, costume jewelry, or a miniature pirate map.
Rainbow capsules
Layer wrapped candies by color or add curled strips of colored paper around a central gift. Keep the outside mostly clear so the rainbow becomes the decoration.
Space pods
Add a silver paper band, printed control panel, and each guest’s name as a “mission specialist.” Good fillers include glow stars, astronaut stickers, pencils, or a small planet-themed activity card.
Garden favors
Fill a sealed paper packet with flower or herb seeds and include planting instructions. Decorate the container with pressed-leaf illustrations, green ribbon, and a label reading, “Thanks for helping our friendship grow.” Yes, it is delightfully corny. Parties are legally permitted to be corny.
Holiday characters
Use removable paper pieces to make snowmen, reindeer, pumpkins, bats, or spring chicks. Seasonal bottle crafts are frequently used as approachable family activities because the shapes can be changed dramatically with simple paper details.
What to Put Inside
The best fillers are useful, consumable, or connected to the party activity. Better Homes & Gardens and HGTV favor ideas frequently emphasize themed treats, crafts, photos, plantable items, and take-home activities rather than random objects.
- Individually wrapped candy or cookies
- Temporary tattoos and sticker sheets
- Sidewalk chalk
- Crayons and a rolled coloring page
- Flower, vegetable, or herb seed packets
- Hair ties or fabric bracelets
- A small puzzle or scavenger-hunt card
- Bath salts sealed in a new inner pouch
- Tea bags or cocoa packets for adult guests
- A printed photograph from the party
Avoid loose magnets, marbles, beads, hard candy, button batteries, or tiny toys when favors may reach children under three. The U.S. Consumer Product Safety Commission warns that small objects can present choking, aspiration, and ingestion hazards to young children.
How to Make 20 or More Containers Efficiently
- Collect one bottle style. Uniform bottles reduce measuring and fitting problems.
- Create a cutting template. Use one cardstock strip to mark every bottle at the same height.
- Work in stages. Wash everything first, mark everything second, and cut everything third.
- Prepare decorations assembly-line style. Cut all labels, ears, stars, or paper bands together.
- Test one finished sample. Confirm the fit, capacity, appearance, and opening method before producing the full batch.
- Fill containers last. This keeps treats clean and prevents containers from spilling while decorations are attached.
Keep one completed sample on the table as a visual guide. Otherwise, container number 18 may mysteriously become twice the height of container number 3. Craft projects enjoy testing human confidence.
Common Mistakes to Avoid
Buying new bottled drinks just for the craft
The environmental advantage becomes considerably weaker when bottles are purchased solely to make containers. Collect them gradually, ask friends to save clean bottles, or obtain bottles left from an event where the beverages were already being served.
Using too much permanent decoration
Heavy paint, laminated coverings, glitter glue, foam, and mixed-material attachments may make the finished object difficult to recycle. Use removable sleeves and ribbons whenever possible.
Leaving sharp edges exposed
Every container should pass a careful fingertip inspection by an adult. Trim, smooth, and cover the rim. If an edge still feels sharp, do not give the container to a guest.
Putting unwrapped food against the craft surface
Use wrapped products or a food-safe inner pouch. This is especially important when the bottle has been cut, handled, decorated, and stored during assembly.
Forgetting the container’s next life
Add a small label suggesting reuse as a paper-clip holder, travel sewing kit, seed organizer, or crayon container. When the item is worn out, guests should remove decorations and follow their local recycling guidance. PET bottle acceptance is widespread, but community requirements still vary.
Hands-On Experience: What Usually Happens During a Real Batch
The first lesson from making recycled plastic bottle party favor containers is that bottle selection matters more than fancy decoration. A mixed collection looks charming in a recycling bin but creates chaos on a craft table. Different brands have different curves, wall thicknesses, ridges, and base diameters. When two matching bottles are used, the lid usually fits after only minor trimming. When unrelated bottles are paired, the project can become an unexpected engineering internship.
A small test batch of three containers is therefore more useful than immediately cutting 30 bottles. The first sample establishes the cutting height. The second reveals whether the lid needs flexibility slits. The third confirms that the method can be repeated consistently. Once those three look alike, larger production becomes dramatically faster.
Label removal is often the slowest stage. Paper labels may lift after soaking, while plastic film labels can usually be cut and peeled away. Adhesive residue does not always disappear politely. A little dish soap and patient rubbing may work better than adding stronger chemicals to an object intended for a children’s party. When residue remains, a removable decorative paper band can cover it.
Cutting also improves with experience. Beginners commonly squeeze the bottle too hard, producing a dented or wavy line. Holding the bottle gently and rotating it into the scissors creates a smoother rim. It also helps to cut slightly above the marked line first and perform a second, more precise trimming pass.
The most successful decorations are usually the simplest. A clear container with one neat paper sleeve, a ribbon, and a personalized tag often looks more professional than a bottle covered with six materials competing for attention. Clear walls also make the contents part of the design. Bright crayons, wrapped candies, or folded paper stars provide color without requiring permanent paint.
Another practical discovery is that guests open favors in unpredictable ways. Some untie the ribbon carefully. Others approach the package as though it contains emergency supplies during a dinosaur attack. Closures should therefore be obvious and easy to operate. A paper belly band or single ribbon bow works better than several pieces of tape hidden around the seam.
Transportation deserves attention as well. Finished containers roll around inside large boxes, and delicate cardstock ears can bend. A shallow cardboard tray with dividers keeps the favors upright. Filling and closing the containers at the party location may be easier when traveling a long distance.
Finally, the project works best when reuse is treated as part of the fun rather than a lecture disguised as a birthday activity. A small sign can explain that the favors began as beverage bottles and can later hold craft supplies or desk items. Guests understand the idea immediately because they can see the transformation. The lesson is tangible: an ordinary package does not have to become waste the moment its original contents are gone.
Conclusion
Recycled plastic bottle party favour containers combine creativity, affordability, and practical reuse in one cheerful project. Matching beverage bottles create the best-fitting containers, while smooth covered edges, adult-controlled cutting, wrapped treats, and age-appropriate fillers help make the finished favors safer.
The strongest designs are not necessarily the most complicated. A transparent container, removable paper band, simple ribbon, and thoughtful gift can look polished without preventing later reuse or recycling. Prepare one sample, organize the work in stages, and invite children to help with safe decorating tasks. You will end up with personalized party favors that cost little, reduce new packaging, and give an ordinary bottle a much more interesting second act.