Turning on a water heater sounds like a one-switch jobuntil you meet circuit breakers, gas valves, pilot lights, hidden thermostats, and a mysterious dial marked “A,” “B,” and “C.” Fortunately, the process is manageable when you identify the heater type, follow the correct sequence, and resist the urge to twist every knob like you are cracking a safe.
This DIY guide explains how to start an electric, gas, heat-pump, or tankless water heater and how to adjust its temperature safely. The exact controls vary by model, so treat the instructions printed on the appliance and in its owner’s manual as the final authority.
What Temperature Should a Water Heater Be Set At?
For many households, 120°F is a practical starting point. It is hot enough for normal bathing, cleaning, and handwashing while reducing energy use and the risk of serious scalding compared with higher settings. The U.S. Department of Energy and Consumer Product Safety Commission commonly recommend approximately 120°F for residential use.
Temperature and scald-prevention guidance:
However, there is a safety trade-off. The Centers for Disease Control and Prevention notes that storing water at 130°F to 140°F can help control waterborne germs such as Legionella, but hotter water also creates a much greater burn risk. Homes with immunocompromised residents, complex plumbing systems, recirculation loops, or a history of water-quality problems may need professional guidance. A plumber can install a thermostatic mixing valve so the tank stores hotter water while faucets deliver water at a safer temperature.
CDC home water-temperature guidance:
A Useful Residential Temperature Guide
| Setting | Typical Use | Important Consideration |
|---|---|---|
| Below 120°F | Vacation mode or special circumstances | May feel inadequate and may encourage microbial growth if maintained too low |
| 120°F | Good starting point for most homes | Balances comfort, energy use, and scald protection |
| 125°F–130°F | Higher demand or long plumbing runs | Scalding occurs more quickly; test carefully |
| 130°F–140°F | Special health, sanitation, or appliance needs | Use mixing valves and obtain professional advice |
| Above 140°F | Rarely appropriate for ordinary residential use | Severe burn danger; do not select casually |
Never judge the temperature by briefly touching the water. Use a reliable cooking or plumbing thermometer instead. Your fingers are not calibrated laboratory equipment, no matter how confident they feel.
Before You Turn On the Water Heater
Whether the heater uses gas or electricity, complete a basic inspection before restoring power or fuel. Starting a damaged, empty, or leaking heater can turn a five-minute task into an expensive service call.
Gather a Few Basic Items
- The water heater’s model-specific owner’s manual
- A flashlight
- A flat-head and Phillips screwdriver
- A digital multimeter or noncontact voltage tester for electrical work
- A cooking or plumbing thermometer
- Work gloves and safety glasses
Complete This Startup Checklist
- Inspect the floor and drain pan. Do not start the appliance if water is leaking from the tank, drain valve, fittings, or temperature-and-pressure relief system.
- Confirm that the drain valve is closed. This valve is normally near the bottom of a storage-tank heater.
- Check the water connections. Look for loose fittings, active drips, corrosion, or damaged piping.
- Inspect wiring and access covers. Electrical junction boxes and thermostat panels must be closed before the power is restored.
- Check gas equipment for damage. Do not operate a unit with soot, scorch marks, a disconnected vent, corrosion around the burner, or signs of flooding.
- Make sure the tank is full. This is critical for electric storage heaters because powering dry heating elements can destroy them.
To fill a storage tank, open its cold-water supply valve. Then open a nearby hot-water faucet. Let the faucet run until the flow is steady and free of sputtering air. Some manufacturers recommend allowing it to run for several additional minutes to confirm that the tank is completely full.
Storage-tank filling and startup guidance:
Stop Immediately If You Smell Gas
Do not light the pilot, operate a switch, use a flame, unplug equipment, or attempt to find the leak yourself. Leave the building, move to a safe location, and contact the gas utility or emergency services. If a pilot has gone out but there is no continuing gas odor, follow the appliance label exactly and allow the manufacturer’s required waiting period before relighting it.
Gas-emergency and pilot-light guidance:
How to Turn On an Electric Water Heater
An electric tank water heater usually starts automatically when power is restored. The trick is making sure it contains water first. Energizing an empty tank can “dry-fire” the upper heating element, which is a dramatic way of converting a working part into an expensive paperweight.
Step 1: Keep the Breaker Off
Locate the double-pole breaker labeled “water heater” in the main electrical panel. It should remain in the OFF position while you inspect and fill the appliance.
Step 2: Close the Drain Valve
Verify that the drain valve near the bottom of the tank is fully closed. Check that any hose used during draining has been removed unless the manufacturer directs otherwise.
Step 3: Open the Cold-Water Supply
Turn the cold-water shutoff valve fully open. A lever-style valve is generally open when its handle is parallel to the pipe.
Step 4: Purge Air Through a Hot Faucet
Open a hot-water faucet at a sink or bathtub. At first, you may hear air and see irregular spurts. Wait until the flow becomes smooth, then continue running it briefly to ensure the tank is full.
Step 5: Inspect for Leaks
Check the drain valve, inlet, outlet, relief-valve piping, and surrounding floor. If water is escaping from the tank body, leave the power off and call a plumber.
Step 6: Restore Electrical Power
Make sure all access covers are secured. Flip the double-pole breaker to ON. A standard electric heater should begin heating automatically. Heat-pump or hybrid models may run a short diagnostic cycle before the compressor or heating elements activate.
Step 7: Allow the Tank to Recover
A full electric storage heater may require an hour or more to produce a useful supply of hot water. Tank size, element wattage, incoming water temperature, and selected operating mode all affect recovery time.
Electric and hybrid startup procedures:
How to Turn On a Gas Water Heater
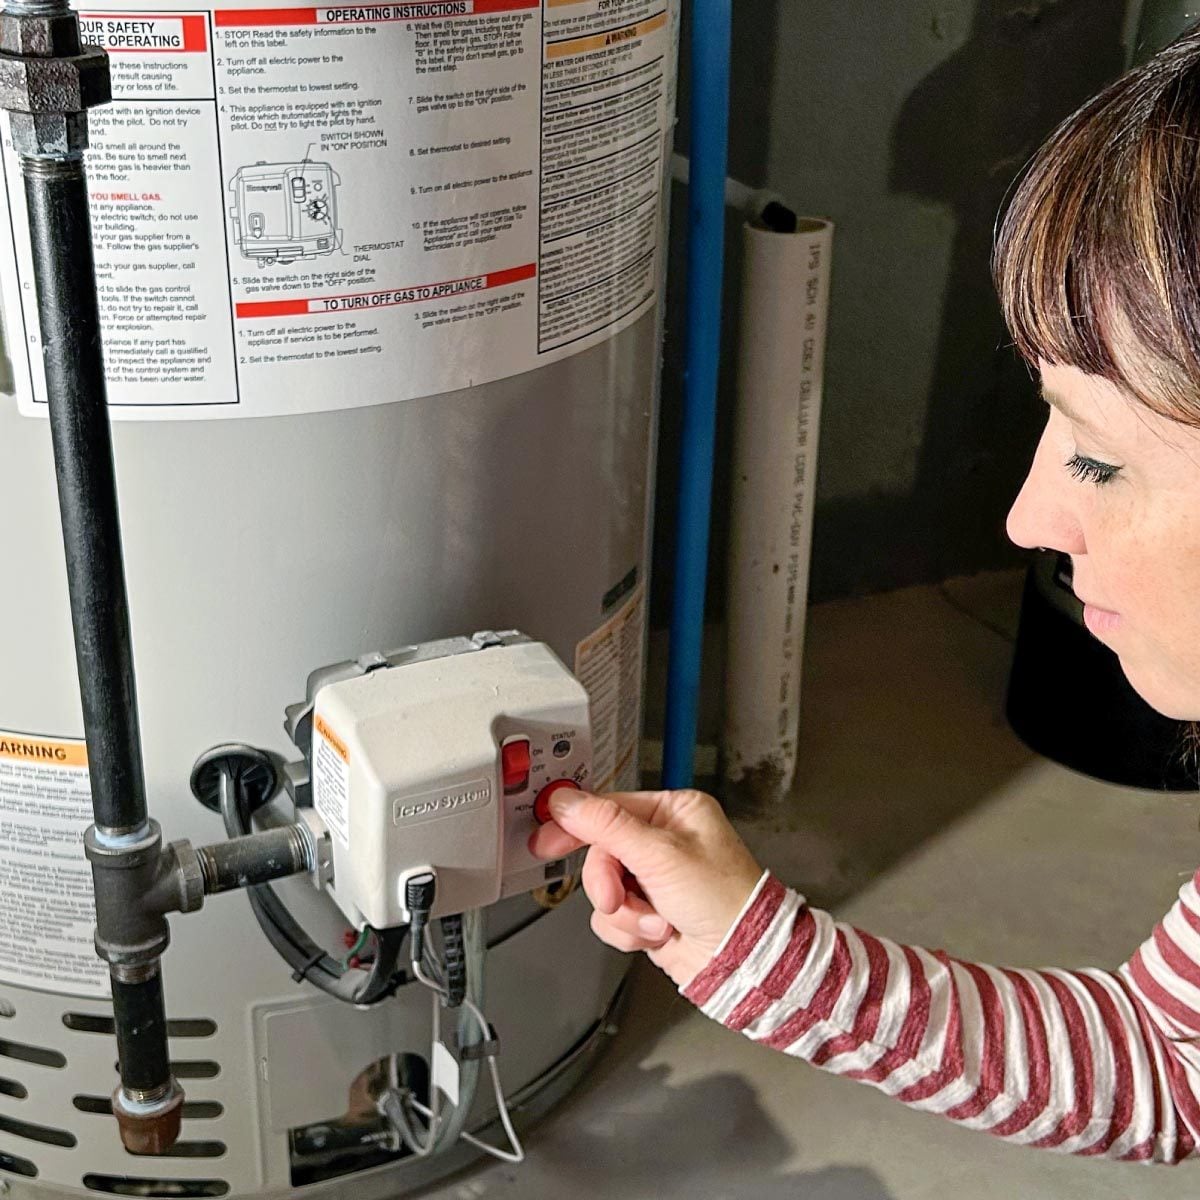
Gas water heaters may have a standing pilot, electronic ignition, or a digital controller. Read the lighting instructions attached to the heater before touching the controls. Knob positions and ignition sequences are not universal.
Starting a Gas Heater With a Standing Pilot
- Confirm that the tank is full and that a hot-water faucet has been used to purge trapped air.
- Check that the venting system is connected and undamaged.
- Turn the gas control knob to OFF, following the printed appliance instructions.
- Wait at least the time stated on the labelcommonly five minutesfor unburned gas to disperse.
- Stop if you smell gas at any point.
- Open the manual gas shutoff valve if it was previously closed. The handle is normally parallel to the pipe when open.
- Turn the control to PILOT.
- Press and hold the pilot control as instructed.
- Operate the built-in spark igniter until the pilot status light flashes or the pilot flame is visible through the sight glass.
- Continue holding the control for the specified period, then release it.
- Confirm that the pilot remains lit.
- Turn the control from PILOT to ON and select the recommended temperature setting.
Do not improvise with a match, lighter, paper torch, or barbecue igniter. Older appliances that require manual lighting should be handled strictly according to their labels. When the instructions are missing or unreadable, call the gas utility or a qualified technician.
Starting a Gas Heater With Electronic Ignition
Electronic models usually do not have a continuously burning pilot. Once the tank is full, the gas valve is open, electrical power is available, and the controller is enabled, the heater performs its own ignition sequence. Select the desired temperature on the display and watch for error codes.
If ignition repeatedly fails, do not keep cycling the heater indefinitely. A blocked vent, failed igniter, gas-supply issue, dirty flame sensor, or control fault may require professional service.
Gas startup procedures and safe relighting:
How to Turn On a Tankless Water Heater
Most modern tankless heaters activate only when a hot-water fixture creates sufficient flow. After confirming that the water, gas, and electrical supplies are available, press the power button on the controller and select the output temperature.
- Open the cold-water inlet and hot-water outlet service valves.
- Open the gas valve on a gas-fired model.
- Connect electrical power or turn on the dedicated breaker.
- Press the controller’s power button.
- Set the output temperature, typically beginning around 120°F.
- Open a hot-water faucet and confirm that the burner or heating indicator activates.
- Check the controller for an error code if the outlet remains cold.
Some tankless heaters lock residential temperature settings at or near 120°F unless a special high-temperature procedure is followed. Do not bypass that protection merely because the shower feels cooler than expected. First check for excessive flow, a clogged inlet filter, a crossover between hot and cold plumbing, or an undersized appliance.
Tankless control and temperature guidance:
How to Adjust an Electric Water Heater’s Temperature
Traditional electric tank heaters often have two thermostats hidden behind upper and lower access panels. Both should normally be set to the same temperature unless the manufacturer specifically instructs otherwise.
Step-by-Step Thermostat Adjustment
- Turn off the circuit breaker. Never adjust a conventional electric thermostat while the heater is energized.
- Verify that power is off. A qualified DIYer should test the circuit with an appropriate voltage tester. When in doubt, hire an electrician.
- Remove the access panels. Use a screwdriver to remove the upper and lower metal covers.
- Move the insulation carefully. Do not damage wires or remove protective plastic shields unless the manual requires it.
- Locate the thermostat dials. They may show specific temperatures or marks such as Low, Medium, and High.
- Make a small adjustment. Use a flat-head screwdriver and move each thermostat toward the same desired setting.
- Replace everything. Reinstall insulation, protective covers, and metal access panels before restoring power.
- Turn the breaker on. Allow the heater to complete a full heating cycle before testing the water.
Do not assume the dial is perfectly calibrated. The thermostat senses temperature inside the tank, while the water reaching your faucet may be cooler because of pipe distance, mixing, standby losses, and recent hot-water use.
Electric thermostat adjustment procedures:
How to Adjust a Gas Water Heater’s Temperature
Most conventional gas heaters have a temperature dial on the gas control valve near the bottom of the tank. Newer models may use buttons and a digital display.
- Find the temperature dial or control panel.
- Read the label beside the control to learn what each mark represents.
- Move the setting only one step at a time.
- Wait for the tank to complete one or more heating cycles.
- Measure the temperature at a faucet.
- Repeat with another small adjustment if necessary.
Lettered settings are not standardized across every brand. On one model, “A” may be near 130°F; on another, it may represent a different temperature. The owner’s manualnot internet folkloreshould decode the dial.
Digital controls are simpler: press the up or down button until the desired setting appears. Some controllers require holding two buttons, unlocking a child-safety feature, or turning off water flow before selecting temperatures above 120°F.
Gas and digital temperature-control guidance:
How to Measure the Actual Hot-Water Temperature
After changing the setting, wait until the heater has completed a full recovery cycle. Avoid testing immediately after several showers, a dishwasher cycle, or a load of hot laundry.
- Choose the faucet closest to the water heater.
- Make sure no one else is using hot water.
- Open the hot side fully.
- Let the water run until its temperature stabilizes.
- Place a thermometer in the flowing water or in a clean cup filled from the stream.
- Record the highest stable reading.
- Repeat at a distant bathroom or shower to identify temperature loss through the piping.
Make thermostat changes in small incrementsoften about 5°F at a time. Large jumps can create an unexpected scald hazard, especially for children, older adults, and people with reduced sensation or slower reaction times.
Temperature verification and scald-risk guidance:
Common Water Heater Startup Problems
The Electric Heater Does Nothing
Check whether the dedicated double-pole breaker has tripped. Reset it once by moving it fully to OFF and then ON. If it trips again, leave it off. A grounded element, damaged wire, water leak, faulty thermostat, or overloaded circuit may be responsible.
The Gas Pilot Will Not Stay Lit
The thermocouple, flame sensor, gas valve, pilot assembly, or combustion-air supply may be faulty. Verify that you followed the exact lighting sequence. If the pilot repeatedly goes out, arrange professional service rather than holding the control down with tape, string, or creative optimism.
The Burner Starts but Shuts Down
Modern heaters monitor flame quality, venting, overheating, and other safety conditions. Record any flashing status-light pattern or digital error code and consult the troubleshooting chart for your model.
The Water Is Warm but Not Hot
Confirm the thermostat setting and wait for a complete recovery cycle. On an electric heater, one failed element can produce a small amount of warm water while greatly reducing capacity. A plumbing crossover caused by a defective mixing valve can also dilute the hot supply.
The Water Is Much Hotter Than the Setting
Turn the temperature down and retest. Extremely hot water may indicate a thermostat or control failure. Shut off the heater and call a professional if the temperature continues rising or the temperature-and-pressure relief valve discharges.
The Heater Makes Popping or Rumbling Sounds
Sediment can collect at the bottom of a storage tank and create noisy hot spots. Flushing may help when performed according to the manufacturer’s maintenance instructions. Heavy sediment, a leaking tank, or recurring noise deserves professional evaluation.
The Tank or Fittings Are Leaking
Turn off the energy source and close the cold-water supply if it can be done safely. A loose threaded fitting or drain valve may be repairable, but leakage through the tank body usually means the heater must be replaced.
Common troubleshooting and maintenance guidance:
When This DIY Project Should Become a Professional Job
Stop and contact a licensed plumber, electrician, HVAC technician, gas utility, or emergency service when you encounter:
- A persistent natural-gas or propane odor
- A heater that has been submerged or flooded
- Soot, scorching, melted wiring, or damaged insulation
- A disconnected, corroded, or backdrafting vent
- Water leaking through the steel tank
- A relief valve that repeatedly opens or drips heavily
- A breaker that trips more than once
- Exposed energized wiring
- A pilot or burner that will not remain lit
- A cracked heat exchanger or combustion-chamber damage
- Temperature that rises far above the selected setting
- Any situation in which the appliance instructions are missing or unclear
Homeowners can safely handle many basic control adjustments, but gas combustion, high-voltage wiring, venting, and pressure-control repairs are not good places for improvisation.
Final Thoughts
To turn on a water heater safely, remember the order: inspect the unit, close the drain, fill the tank, purge the air, check for leaks, and only then restore gas or electricity. For most households, 120°F is a sensible starting temperature, followed by careful thermometer testing at the faucet.
Make small adjustments and allow time for the heater to respond. Most temperature problems are not solved faster by turning the dial to its maximum setting. That approach mainly produces hotter pipes, higher energy use, and showers that feel like an interrogation technique.
DIY Experience Notes: Lessons That Make the Job Easier
One of the most useful lessons from working around water heaters is that the obvious control is not always the real problem. When someone reports “the heater will not turn on,” the appliance may simply have an empty tank, a closed supply valve, a tripped breaker, an unlit pilot, or a controller left in vacation mode. A calm inspection usually beats aggressive knob-turning.
The first habit worth developing is taking photographs before changing anything. Photograph the rating plate, control positions, piping, electrical disconnect, gas valve, and access-panel arrangement. These pictures provide a reference if you forget where a dial started or need to explain the system to a technician later. They also help when searching for the correct owner’s manual because the model number is often printed in microscopic lettering designed to test both patience and eyesight.
Another practical lesson is to verify that an electric tank is full with more than a two-second faucet test. A tank can contain trapped air, especially after draining or plumbing repairs. Open a hot faucet and wait for a steady stream without coughing, spitting, or surging. Only after the flow remains stable should power be restored. Replacing a dry-fired element is not difficult for an experienced technician, but avoiding the failure is considerably more satisfying.
Temperature adjustment also rewards patience. Turning a thermostat and testing five minutes later tells you very little on a storage heater. The tank contains many gallons of water, and the new setting must work through a complete heating cycle. Make one small adjustment, wait, and test under consistent conditions. Otherwise, you may keep turning the control upward because the old tank temperature has not changed yet. Several hours later, the result arrives all at onceand it may be much hotter than intended.
Measure temperature at more than one fixture. A sink close to the heater may deliver 120°F water while a distant bathroom receives only 112°F because heat is lost through a long pipe run. Conversely, a shower valve may limit outlet temperature even though the tank is hotter. This distinction matters. Increasing the heater setting to fix one cool shower could make every unprotected faucet dangerously hot. Sometimes the correct repair is adjusting or replacing the shower’s pressure-balancing or thermostatic cartridge.
Gas heaters teach a different lesson: never ignore the condition of the vent and burner area. A pilot that repeatedly goes out is not merely an inconvenience. It may indicate a dirty pilot assembly, failing sensor, inadequate combustion air, downdraft, or another condition that should be diagnosed. Relighting it again and again without investigating the cause is like repeatedly resetting a smoke alarm without checking for smoke.
It is also wise to listen to the heater after startup. A gentle burner sound, minor expansion noises, and water movement can be normal. Loud rumbling, sharp popping, electrical buzzing, repeated ignition attempts, or unusual vibration should not be dismissed. Record the sound and note when it occurs. This information can save diagnostic time if professional service becomes necessary.
Finally, label the breaker and nearby shutoff valves once you know what they control. Include the normal temperature setting and the date it was measured. During a leak or electrical problem, clear labels eliminate guesswork. Good DIY work is not only about completing today’s task; it is about making the next inspection safer, faster, and far less confusing.
Note: This article provides general educational guidance. Always follow the operating instructions attached to your specific water heater, local building codes, and the manufacturer’s owner’s manual. Do not attempt gas, electrical, venting, or pressure-system repairs beyond your training.