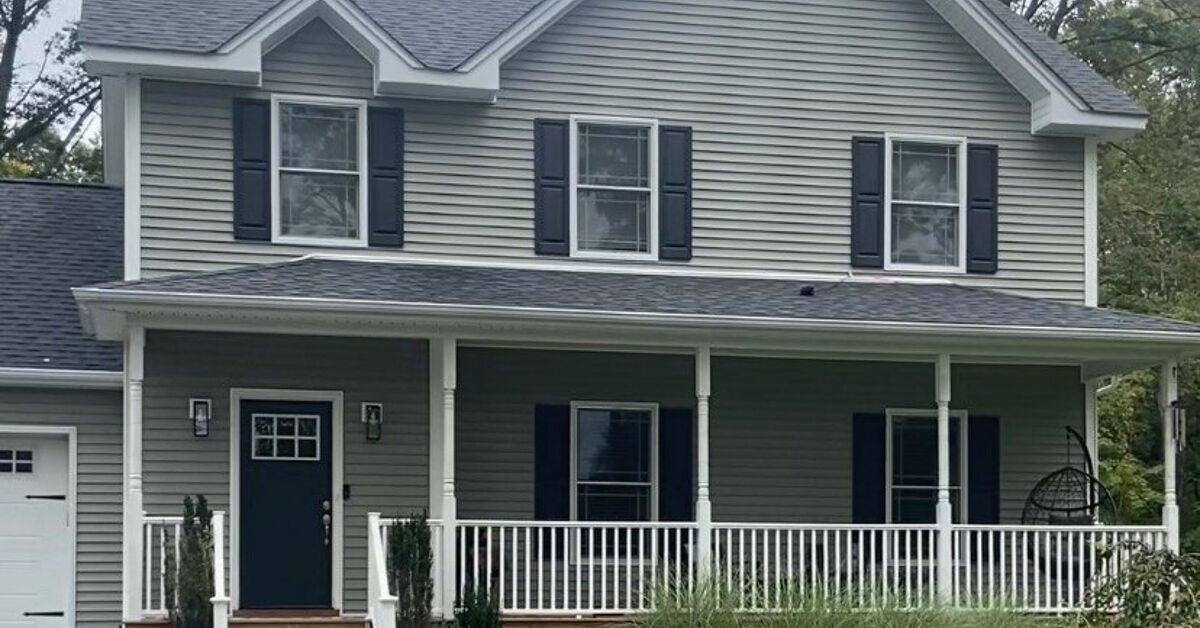
Landscape lighting has a remarkable talent: it can turn an ordinary yard into a polished outdoor retreat, make a dark walkway safer, and convince your neighbors that you have your life unusually well organized. Fortunately, you do not need an electrical engineering degree, a trenching machine, or a contractor’s truck full of mysterious equipment to get started.
The easiest approach is usually a low-voltage LED landscape lighting system. A transformer converts standard household power to approximately 12 volts, allowing compatible fixtures to illuminate paths, trees, planting beds, steps, patios, and architectural details. Many kits plug into a protected outdoor outlet and include coordinated components, making them far more approachable for homeowners than permanent line-voltage installations.
This guide explains how to plan, select, install, test, and maintain DIY landscape lighting without turning your lawn into an archaeological excavation site.
Why Low-Voltage Lighting Is the Easiest DIY Option
Outdoor lighting generally falls into three categories: solar, low voltage, and line voltage. Each has a place, but low-voltage lighting offers an especially useful balance of reliability, flexibility, appearance, and installation simplicity.
Solar landscape lights
Solar fixtures require no cable or transformer. Place them in a sunny location, push the stakes into the soil, and wait for sunset. They work well for decorative accents, temporary layouts, remote garden areas, and locations where running cable would be inconvenient.
The tradeoff is variable performance. Shade, cloudy weather, dirty solar panels, battery age, and short winter days can reduce runtime or brightness. Solar lights are wonderfully easy, but they sometimes behave like employees who are enthusiastic on sunny Mondays and difficult to locate by Friday.
Low-voltage landscape lights
Low-voltage systems normally use a transformer, outdoor-rated cable, waterproof connections, and compatible fixtures. They provide more consistent illumination than typical solar products while remaining manageable for careful DIY installation. Cable routes can also be modified later as plants mature or the landscape changes.
Line-voltage outdoor lights
Line-voltage systems operate on household voltage and may be appropriate for large floodlights, permanent structures, security applications, or extensive properties. However, they involve stricter wiring methods, deeper burial requirements, electrical boxes, permits, and code considerations. Unless you are qualified and local rules allow the work, this portion of an outdoor lighting project belongs to a licensed electrician.
Start With a Nighttime Lighting Plan
Do not begin by buying twelve matching path lights and arranging them like runway markers. Good landscape lighting is less about the number of fixtures and more about where light is needed, what it should reveal, and what should remain in shadow.
Walk through the yard after dark
Carry a flashlight and identify the areas that need attention. Look for steps, changes in grade, uneven pavers, gates, seating areas, doorways, garden features, and dark turns along walkways. Take photographs from the street, front door, patio, and primary windows.
Create a simple property sketch showing:
- The outdoor electrical outlet and proposed transformer location
- Walkways, stairs, patios, decks, gates, and driveways
- Trees, shrubs, walls, fences, fountains, and garden structures
- Proposed fixture positions and cable routes
- Approximate distances between the transformer and each lighting zone
Divide the project into lighting zones
Organizing fixtures by purpose makes the system easier to design and troubleshoot. A straightforward residential plan might include a front walkway zone, an entry zone, a specimen-tree zone, and a backyard entertaining zone.
Separate cable runs can reduce voltage-drop problems and prevent one long chain of fixtures from becoming noticeably dimmer at the far end. A documented map will also save considerable confusion when you are troubleshooting a connection two years later.
Use Layers Instead of Lighting Everything
A professionally designed yard rarely depends on one fixture type. It uses layers of subtle illumination, much like a well-designed room.
Safety and task lighting
Safety lighting helps people navigate steps, paths, entrances, cooking areas, gates, and changes in elevation. These fixtures should reveal hazards without shining directly into anyone’s eyes.
Accent lighting
Accent fixtures highlight trees, stone walls, sculptures, textured siding, fountains, or architectural columns. The goal is to create depth and visual interest rather than blast the entire property with brightness.
Ambient lighting
Ambient light establishes a comfortable glow around patios, porches, pergolas, and seating areas. Downlights, lanterns, subtle wall lights, and carefully placed string lights can make outdoor rooms feel welcoming without resembling a convenience-store parking lot.
Layered lighting that combines ambient, task, and accent sources generally produces a more balanced result than repeating one fixture throughout the yard.
Choose the Right Landscape Lighting Fixtures
Path lights
Path lights spread illumination downward and outward. Use them near walkways, garden-bed edges, short steps, and transitions between outdoor spaces. Staggering fixtures usually looks more natural than placing identical lights directly opposite one another.
Avoid overcrowding. The objective is to create overlapping pools of gentle light, not a glowing fence made from miniature lamp posts.
Spotlights and uplights
Spotlights create a focused beam and are commonly used to illuminate trees, columns, masonry, and prominent plants from below. Experiment with the distance between the fixture and the subject. Moving a spotlight only a few feet can change a harsh beam into a graceful wash of light.
Floodlights
Floodlights cast a wider beam. They can illuminate broad walls, large canopies, play areas, and security-sensitive spaces. Select modest output whenever possible because excessively bright floodlights cause glare, flatten the landscape, and may spill onto neighboring property.
Well lights
Well lights sit partly or completely below grade. They are useful where a visible stake-mounted fixture would interfere with mowing or distract from the design. Confirm that the product is listed for its intended outdoor and ground-contact conditions.
Deck, step, and hardscape lights
Compact fixtures can be installed beneath stair treads, along retaining walls, under benches, or within deck posts. These lights are especially effective when the light source remains hidden and only the illuminated surface is visible.
Downlights
A fixture mounted in a tree, pergola, or elevated structure can cast light downward to resemble moonlight. This technique creates attractive shadows through branches, but elevated electrical work requires secure mounting, outdoor-rated components, and careful cable management. Never attach wiring in a way that restricts tree growth or damages the trunk.
Select Brightness and Color Temperature
With LEDs, wattage describes energy consumption, while lumens describe light output. This distinction matters because an efficient LED fixture can produce useful illumination with relatively little power.
For most residential landscapes, restrained brightness looks better than maximum output. Small accent and path fixtures may need only modest lumen levels, while broad security areas require substantially more. Adjustable fixtures are helpful because they allow you to reduce output after seeing the completed system at night.
Warm white light in the neighborhood of 2700K to 3000K usually complements wood, brick, stone, plants, and traditional residential architecture. Cooler light can suit contemporary materials or specific task areas, but bright blue-white illumination often feels harsh in a garden.
Responsible outdoor lighting should be useful, targeted, low-level, controlled, and warm-colored. Shield fixtures, aim beams carefully, and use only enough light to accomplish the purpose. These practices reduce glare, wasted electricity, light trespass, and unnecessary disruption of nighttime wildlife.
Calculate Transformer Capacity
The transformer is the power center of a low-voltage landscape lighting system. To estimate the required capacity, add the wattage of every fixture connected to it.
For example, suppose your design includes:
- Six path lights rated at 4 watts each: 24 watts
- Four spotlights rated at 6 watts each: 24 watts
- Two step lights rated at 3 watts each: 6 watts
The total connected load is 54 watts. Select a transformer that can support the load while staying within the manufacturer’s recommended operating range. Leaving reasonable spare capacity makes it easier to add fixtures later and avoids operating the transformer at its absolute limit.
Do not assume that a bigger transformer automatically solves every problem. Cable length, wire gauge, connection quality, fixture distribution, and voltage drop still affect performance. Follow the load chart and installation instructions supplied by the transformer manufacturer.
Plan Cable Runs and Control Voltage Drop
Voltage drop occurs when electrical voltage decreases along a cable run. In practical terms, fixtures far from the transformer may appear dimmer or operate inconsistently if the cable is too small, the run is excessively long, the connections are poor, or too many fixtures share the same route.
You can reduce problems by:
- Using the wire gauge recommended for the total load and run length
- Dividing a large installation into multiple shorter runs
- Using hub-style layouts instead of one extremely long daisy chain
- Keeping connections clean, waterproof, and accessible
- Using the appropriate transformer voltage tap when provided
- Testing voltage at distant fixtures when troubleshooting uneven output
A digital voltmeter can help identify weak connections and excessive loss. Connection points are common trouble spots, so inspect them before assuming the transformer has developed an elaborate personal grudge against your garden.
Tools and Materials for an Easy Installation
- Low-voltage LED fixtures
- Compatible outdoor transformer with timer or photocell
- Direct-burial low-voltage landscape cable
- Outdoor-rated waterproof connectors
- Wire cutters and wire strippers
- Flat shovel or trenching spade
- Tape measure and marking flags
- Screwdrivers and mounting hardware
- Outdoor-rated GFCI-protected receptacle
- Optional digital voltmeter
Use components specifically listed for outdoor exposure. Wet-location requirements, ingress protection ratings, cable markings, and manufacturer instructions help determine whether a product is appropriate for rain, soil, irrigation, and other environmental conditions.
How to Install DIY Landscape Lighting
Step 1: Confirm electrical and digging safety
Inspect the proposed transformer outlet. It should be suitable for outdoor use, protected from weather as required, and GFCI-protected. Do not use an indoor extension cord as permanent outdoor wiring. Damaged cords, overloaded connections, and standing water are serious hazards.
Contact 811 or the appropriate local utility-location service before digging, even when the planned trench appears shallow. Public utility markings may not identify private irrigation pipes, invisible-fence wires, septic components, or existing landscape cables, so review property records and inspect the area carefully as well.
Step 2: Assemble and test above ground
Place fixtures in their proposed positions and lay the cable on the surface. Make temporary connections according to the product instructions, connect the transformer, and test the entire layout after dark.
This trial run is one of the most valuable steps in the project. It lets you adjust fixture spacing, beam angles, brightness, and cable routes before digging. A daytime plan may look perfect on paper yet reveal an illuminated gutter, a blinding reflection, or a shrub receiving the visual importance of a national monument.
Step 3: Mount the transformer
Install the transformer in a ventilated, accessible location that meets the manufacturer’s required clearances and mounting height. Keep it near the protected outdoor receptacle without placing it where irrigation water, roof runoff, mulch, or vegetation will trap moisture or block airflow.
Step 4: Route the cable
Run landscape cable along planting-bed edges and other protected areas whenever practical. Avoid sharp bends, mower paths, future fence-post locations, and places where edging tools are frequently used.
Leave a little extra cable near fixtures and connection hubs. The extra length makes repositioning and future repairs easier, particularly when plants expand and yesterday’s charming dwarf shrub becomes tomorrow’s leafy apartment building.
Step 5: Make waterproof connections
Follow the connector manufacturer’s instructions precisely. Some fixtures use pierce-point connectors, while others require stripped conductors and waterproof wire connectors. A connection should be electrically secure, moisture-resistant, and protected from physical damage.
Do not bury a questionable connection and hope optimism will seal it. Moisture intrusion and corrosion are common causes of landscape lighting failure.
Step 6: Install and aim the fixtures
Drive stakes into firm soil without striking the fixture body or cable. In hard soil, create a pilot hole rather than forcing the stake. Position path lights vertically and aim spotlights so viewers cannot see directly into the LED source from normal walking or seating positions.
Step 7: Bury the cable
Once the nighttime test looks right, bury the cable to the depth required by the product instructions and applicable local rules. Place it carefully in the trench without stretching, crushing, or sharply bending it. Compact the soil and replace mulch or sod.
Step 8: Program the controls
A photocell can activate the lights at dusk, while a timer can turn them off later in the evening. Smart controls may provide scheduling, dimming, or zone management. Avoid running decorative lights all night when nobody needs them. Timers and motion controls reduce energy use and limit unnecessary nighttime illumination.
Easy Landscape Lighting Design Ideas
Create a welcoming front walk
Stagger low-output path lights along alternating sides of the walkway. Add a soft spotlight to a small ornamental tree and make sure steps or elevation changes are clearly visible.
Highlight a mature tree
Use two restrained uplights from different angles instead of one powerful beam. This reveals the trunk and canopy while preserving natural-looking shadows.
Graze a textured wall
Position a narrow-beam fixture close to brick, stone, or textured siding. Light traveling nearly parallel to the surface emphasizes relief and creates dramatic shadow patterns.
Silhouette a plant
Place the fixture behind a sculptural shrub or ornamental grass and aim it toward a wall. The dark plant outline becomes the focal point while the reflected light remains soft.
Add moonlighting above a patio
Mount shielded downlights in a suitable elevated location and aim them through branches or structural elements. The resulting shadows can feel far more natural than a bright overhead floodlight.
Common DIY Landscape Lighting Mistakes
Using too many fixtures
Darkness is part of the design. Leave unlit areas between focal points so the landscape retains depth and mystery.
Choosing fixtures that are too bright
More lumens do not automatically create better visibility. Excessive brightness produces glare, reduces visual comfort, and makes neighboring areas appear darker by comparison.
Ignoring mature plant size
Fixtures placed beside young shrubs may disappear inside the foliage within a season. Allow room for growth and expect to reposition lights periodically.
Aiming lights into windows
View the completed system from indoor bedrooms, living spaces, neighboring property lines, and the street. Re-aim or shield any fixture that creates glare or unwanted light trespass.
Buying incompatible components
Transformers, LED fixtures, dimmers, photocells, connectors, and smart controls are not universally compatible. Confirm voltage, wattage, control requirements, and environmental ratings before purchasing.
Skipping the nighttime test
Fixture locations should remain temporary until you see the system operating after dark. This single habit prevents unnecessary digging and dramatically improves the final result.
Maintaining Your Outdoor Lighting System
Low-voltage LED systems require relatively little maintenance, but they are not completely maintenance-free. Inspect the installation several times per year and after severe weather.
- Clean dirt, mineral deposits, and fallen leaves from lenses
- Trim plants that block fixtures or trap moisture
- Straighten stakes shifted by frost, animals, or landscaping work
- Check exposed cable for mower or edging damage
- Inspect connections when a fixture flickers or appears dim
- Adjust timers as sunset times change
- Test the GFCI according to its manufacturer’s instructions
- Re-aim lights as trees and shrubs grow
Practical Experiences and Lessons From DIY Lighting Projects
The most successful DIY landscape lighting projects usually begin smaller than the homeowner originally imagined. A person may sketch twenty fixtures, purchase eight, install six, and then discover that six carefully positioned lights create a better result than the original glowing master plan. Starting with one path, one tree, and one architectural feature allows you to learn how light behaves on your property before expanding the system.
One common lesson is that fixtures appear much brighter in a truly dark yard than they do under showroom lighting. A compact spotlight that seems modest inside a store can dominate a front garden at night. Adjustable lumen output is valuable, but fixture position matters just as much. Moving a spotlight farther from a tree, changing its angle, or partially shielding the source can improve the effect without replacing the lamp.
Another recurring experience involves path-light spacing. First-time installers often place fixtures too close together because they worry about dark gaps. Once illuminated, the path resembles an airport runway. Removing every second fixture or staggering the lights creates softer, overlapping pools of illumination and a more relaxed appearance. The walkway remains navigable, but the fixtures stop shouting for attention.
Cable planning also rewards patience. Running one cable past every fixture may appear simplest, yet a long route can complicate troubleshooting and produce uneven performance. Dividing the property into logical zones makes future changes easier. When one backyard fixture fails, you can investigate that branch instead of disturbing the entire front landscape.
Waterproof connections deserve more attention than their size suggests. A connector can work perfectly during the first nighttime test and fail months later after irrigation, rain, freeze-thaw cycles, or shifting soil allow moisture to reach the conductors. Using listed outdoor connectors and making each splice carefully is less exciting than aiming a spotlight at a Japanese maple, but it has a much greater effect on long-term reliability.
Homeowners also discover that landscapes refuse to remain still. Plants spread, tree canopies thicken, mulch depth changes, and roots redirect stakes. A spotlight that beautifully illuminated a trunk in spring may be buried behind hostas by midsummer. Leaving extra cable near each fixture makes seasonal repositioning possible without cutting and splicing the wire repeatedly.
The most visually successful projects usually hide the light source. People should notice the illuminated steps, textured stone, branches, and flowers before they notice the fixture. Glare commonly occurs when a spotlight is aimed correctly at the subject but remains visible from a chair, doorway, or neighboring window. Walking around the property and checking every major viewing angle solves problems that cannot be seen while kneeling beside the fixture.
Finally, automation improves both convenience and design discipline. A dusk sensor ensures the system activates when needed, while a timer prevents it from operating until sunrise simply because everyone forgot about it. Turning decorative zones off late at night saves energy, preserves darkness, and reduces disturbance to wildlife. The best landscape lighting does not conquer the night. It edits the darkness just enough to make the yard safer, more useful, and more beautiful.
Conclusion
DIY landscape lighting becomes much easier when you approach it as a design project first and an installation project second. Begin with a nighttime walkthrough, divide the yard into functional zones, choose low-voltage LED fixtures, calculate the total load, and test everything above ground before digging.
Use warm, restrained illumination instead of maximum brightness. Aim each beam carefully, protect every connection from moisture, document the cable routes, and leave enough flexibility for future plant growth. A thoughtfully installed system should make paths safer and reveal the best parts of the landscape while allowing plenty of natural darkness to remain.
Note: This guide focuses on typical plug-in low-voltage landscape lighting. Hire a licensed electrician when an outdoor GFCI receptacle must be added, permanent line-voltage wiring is involved, local regulations require professional installation, or you are uncertain about electrical safety.